Embark on a journey curated by seasoned explorers William and Hui Cha Stanek, who have spent decades immersing themselves in the diverse landscapes of North America. These itineraries are more than just travel plans - they are thoughtfully crafted adventures designed to help you connect with the natural world, discover hidden gems, and create lasting memories.
National Parks Index | US Itineraries Index | American Roadtrips Index

Bring home a Bugville Critters book and watch as your child's love for reading and learning grows with every page. Hand-painted illustrations bring the heartwarming stories to life. Ask your librarian to add Bugville Critters to the library's digital collection today!
Discover William Stanek's Exclusive Art Collection
Explore and purchase the stunning art featured on this site. Own a piece of William Stanek's unique and captivating artwork today!
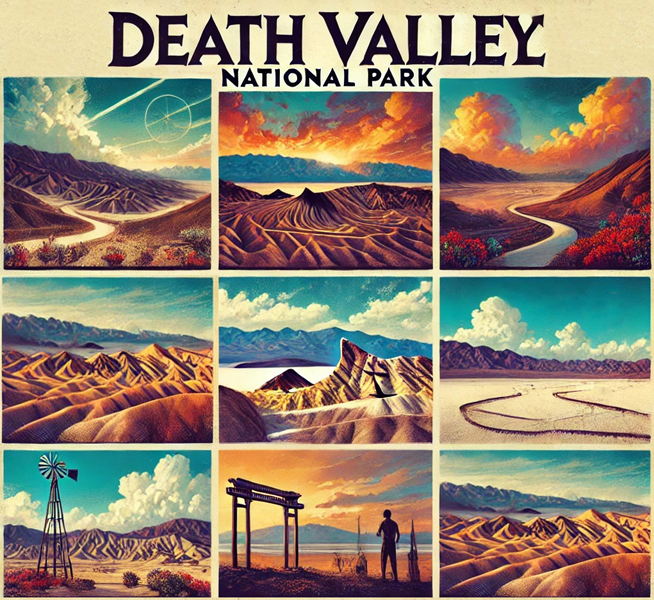
(June 7, 2025) Exploring Death Valley and Joshua Tree
Introduction: A 3-Day Journey Through California's Desert Wonders
The deserts of California are places of stark contrasts and haunting beauty, where the landscape seems both timeless and ever-changing. For us, William and Hui Cha, exploring the vast expanses of Death Valley and the surreal landscapes of Joshua Tree was an opportunity to immerse ourselves in the raw, untamed wilderness that these two iconic parks offer.
For Hui Cha, the journey into these deserts was both a challenge and a revelation. The harsh conditions and extreme environments pushed us to adapt and think creatively about how to capture the essence of these landscapes. For me, William, it was about finding beauty in the details – the subtle play of light and shadow on the dunes of Death Valley, and the otherworldly shapes of the Joshua trees silhouetted against the night sky.
This dual adventure was about more than just photography; it was about experiencing the profound silence of the desert, the sense of solitude that comes from being surrounded by such vast, open spaces, and the deep connection to nature that these places inspire. In this guide, we'll take you through our detailed itineraries, share specific tips and techniques for photographing these unique environments, and offer alternative activities for those seeking a less challenging experience. Whether you have just one day or a full three days to explore, this guide will help you make the most of your journey through California's stunning desert landscapes.
Day 1: Experiencing the Extremes of Death Valley National Park
Morning: Sunrise at Zabriskie Point
6:00 AM - Sunrise at Zabriskie Point
Overview: Start your day in Death Valley National Park with a sunrise at Zabriskie Point, one of the park's most famous and accessible viewpoints. From here, you can watch the first light of day illuminate the badlands, creating a breathtaking scene of golden hues and deep shadows.
Tips from William: "Arrive at least 30 minutes before sunrise to set up your shot. Use a wide-angle lens to capture the full scope of the badlands, and a tripod to ensure sharpness in the low light. The soft, golden light of dawn will bring out the intricate textures and layers of the landscape, so focus on capturing the contrast between the sunlit ridges and the shadowed valleys."
Insights from Hui Cha: "The mornings in Death Valley can be surprisingly cool, so dress in layers and bring a thermos of hot tea or coffee. The quiet solitude of the early morning, combined with the stunning views, creates a moment of peace and reflection that is truly special. Take a moment to soak in the vastness of the landscape before the sun rises higher and the day's heat begins to build."
How to Access Zabriskie Point:
- Location: Zabriskie Point is located along Highway 190, just east of Furnace Creek.
- Travel Directions: From Furnace Creek, head east on Highway 190 for about 5 miles until you reach the parking area for Zabriskie Point. The drive takes about 10 minutes.
- Trail Details: The viewpoint is easily accessible from the parking area, with a short, paved trail leading to the overlook.
Alternative Activity: Mesquite Flat Sand Dunes
- For a different sunrise experience, consider visiting the Mesquite Flat Sand Dunes. Located about 30 minutes west of Zabriskie Point, the dunes offer stunning opportunities for photography, especially as the first light casts long shadows across the sand.
Photographic Techniques:
- Golden Hour Lighting: The soft, golden light of sunrise will enhance the warm tones of the badlands. Use this light to highlight the ridges and valleys, creating a sense of depth in your images.
- Wide-Angle Shots: Use a wide-angle lens to capture the full scope of the landscape, including the layers of hills receding into the distance.
- Textural Details: Focus on the intricate textures of the rock formations and the patterns created by erosion. These details can add a sense of scale and complexity to your images.
Exploring the Area:
- After photographing the sunrise at Zabriskie Point, consider exploring nearby areas like the Twenty Mule Team Canyon or the Golden Canyon Trail, both of which offer additional opportunities for morning photography and exploration.
Midday: Exploring the Badwater Basin
11:00 AM - Badwater Basin
Overview: Badwater Basin is the lowest point in North America, lying 282 feet below sea level. This vast salt flat stretches out in all directions, creating a surreal and otherworldly landscape. The midday sun can be intense, but it's also the perfect time to capture the stark contrasts and abstract patterns of the salt formations.
Tips from William: "The midday light can be harsh, but it's perfect for capturing the sharp contrasts of the salt flats. Use a polarizing filter to reduce glare and enhance the textures of the salt crystals. A wide-angle lens will allow you to capture the vastness of the basin, while a telephoto lens can help isolate interesting patterns and details in the salt formations."
Insights from Hui Cha: "Badwater Basin is an incredibly unique and mesmerizing place. The endless expanse of salt flats, combined with the intense heat and the absolute silence, creates an almost alien landscape. Be sure to wear a hat, sunglasses, and plenty of sunscreen, and bring plenty of water. The heat can be overwhelming, so take your time and don't overexert yourself."
How to Access Badwater Basin:
- Location: Badwater Basin is located along Badwater Road, about 17 miles south of Furnace Creek.
- Travel Directions: From Furnace Creek, head south on Badwater Road for about 30 minutes until you reach the parking area for Badwater Basin.
- Trail Details: The salt flats are accessible via a short, flat walk from the parking area. There is no defined trail, so you can explore freely, but be mindful of your surroundings and avoid venturing too far from the parking area in the extreme heat.
Alternative Activity: Devil's Golf Course
- For a different perspective on the salt flats, consider visiting Devil's Golf Course, located just north of Badwater Basin. The jagged salt formations here create a truly unique landscape that is both beautiful and eerie.
Photographic Techniques:
- Abstract Patterns: Focus on the intricate patterns and textures of the salt flats, using a telephoto lens to isolate interesting details. The stark white of the salt against the deep blue sky can create striking images.
- Wide-Angle Views: Use a wide-angle lens to capture the vastness of the basin, including the distant mountains that frame the scene. The contrast between the flat salt surface and the rugged peaks adds depth and drama to your photos.
- High Contrast: The intense sunlight can create high-contrast images, so experiment with different exposures to find the best balance between light and shadow.
Exploring the Area:
- After exploring Badwater Basin, consider taking a scenic drive along Artists Drive, where you can admire the colorful rock formations of Artists Palette. The drive is especially beautiful in the late afternoon when the colors are most vibrant.
Afternoon: Hiking Golden Canyon and Red Cathedral
2:00 PM - Golden Canyon and Red Cathedral Hike
Overview: The Golden Canyon Trail is one of Death Valley's most popular hikes, offering a moderately challenging trek through a narrow, colorful canyon to the towering Red Cathedral rock formation. The canyon's walls are rich in shades of gold, red, and orange, making it a photographer's dream.
Tips from William: "The afternoon light brings out the rich colors of the canyon walls, creating a warm and vibrant palette. Use a mid-range zoom lens (24-70mm) to capture both the wide views of the canyon and the close-up details of the rock formations. A polarizing filter can help reduce glare and enhance the colors of the rocks. The Red Cathedral is particularly stunning in the late afternoon light, so plan your hike to reach the end of the trail around this time."
Insights from Hui Cha: "This hike is moderately challenging, with some steep sections, so be prepared with sturdy shoes, plenty of water, and a good hat. The canyon is beautiful, but it can also be hot and exposed, so take your time and rest in the shade when needed. The reward of reaching the Red Cathedral is well worth the effort, as the views are simply breathtaking."
How to Access the Golden Canyon Trail:
- Location: The trailhead for Golden Canyon is located along Badwater Road, about 10 miles south of Furnace Creek.
- Travel Directions: From Furnace Creek, head south on Badwater Road for about 15 minutes until you reach the parking area for Golden Canyon.
- Trail Details: The Golden Canyon Trail is a 3-mile round-trip hike with a moderate difficulty level. The trail follows a narrow canyon and includes some steep, rocky sections as you approach the Red Cathedral.
Alternative Activity: Harmony Borax Works
- For a less strenuous option, consider visiting the Harmony Borax Works, located just north of Furnace Creek. This historic site offers an easy walk through the remnants of an old borax mining operation, with interpretive signs that provide insight into the park's history.
Photographic Techniques:
- Canyon Walls: Use a wide-angle lens to capture the towering walls of the canyon, including the rich colors and textures of the rocks. The light in the canyon can vary greatly, so experiment with different exposures to capture the best results.
- Red Cathedral: The Red Cathedral is a stunning rock formation that is best photographed in the late afternoon light. Use a telephoto lens to zoom in on the details of the rock face, or a wide-angle lens to capture the full scope of the formation against the canyon walls.
- Color Contrast: The warm colors of the rocks against the deep blue sky create a beautiful contrast that can add drama and intensity to your images.
Exploring the Area:
- After your hike, consider visiting the nearby Furnace Creek Visitor Center, where you can learn more about the park's geology, wildlife, and history. The visitor center also offers exhibits and displays that provide additional context and information about the area.
Evening: Sunset at Dante's View
6:30 PM - Sunset at Dante's View
Overview: End your day in Death Valley National Park with a sunset at Dante's View, one of the park's most breathtaking overlooks. From here, you can enjoy panoramic views of the entire valley, stretching from the salt flats of Badwater Basin to the towering peaks of the Panamint Range. The elevation of Dante's View, at over 5,000 feet, offers a cooler respite from the heat of the valley floor and a perfect vantage point for sunset photography.
Tips from William: "Arrive about an hour before sunset to set up your shot. Use a wide-angle lens to capture the expansive view, and a graduated neutral density filter to balance the exposure between the bright sky and the darker foreground. The best shots often come just after the sun has dipped below the horizon when the sky is filled with soft, pastel colors."
Insights from Hui Cha: "Dante's View is a peaceful and serene spot to watch the sunset. The views are simply stunning, and the cooler temperatures at this elevation make it a comfortable place to relax and reflect on your day in Death Valley. Bring a light jacket, as it can get chilly in the evening, and enjoy the quiet as the sun dips below the horizon."
How to Access Dante's View:
- Location: Dante's View is located along Dante's View Road, about 25 miles southeast of Furnace Creek.
- Travel Directions: From Furnace Creek, head east on Highway 190 for about 12 miles, then turn right onto Dante's View Road and follow it for 13 miles to the viewpoint. The drive takes about 45 minutes.
- Trail Details: The viewpoint is easily accessible from the parking area, with only a short walk required to reach the overlook.
Alternative Activity: Zabriskie Point for Sunset
- If you prefer to avoid the drive, consider returning to Zabriskie Point for sunset. The view is equally stunning at this time of day, with the added benefit of fewer crowds.
Photographic Techniques:
- Panoramic Views: The sweeping vistas at Dante's View are perfect for panoramic photography. Take multiple shots from left to right and stitch them together in post-processing to create a wide, sweeping view of the landscape.
- Silhouettes: As the sun sets behind the Panamint Range, use the mountains as silhouettes against the colorful sky. A graduated neutral density filter can help balance the exposure between the bright sky and the darker foreground.
- Color Contrast: The warm colors of the sunset against the cool blues of the distant mountains create a striking contrast that can add drama and intensity to your images.
Exploring the Area:
- After sunset, consider staying a bit longer for some stargazing. The night sky at Dante's View is incredibly clear, making it an excellent place for night photography. The view of the Milky Way rising above the valley is particularly stunning, and you can capture it in all its glory.
Day 2: Discovering the Unique Beauty of Joshua Tree National Park
Morning: Sunrise at Cholla Cactus Garden
6:00 AM - Sunrise at Cholla Cactus Garden
Overview: Begin your day in Joshua Tree National Park with a sunrise at the Cholla Cactus Garden, one of the park's most iconic and photogenic locations. The garden is home to thousands of cholla cacti, which glow like golden spines in the first light of day. The effect is magical, transforming the landscape into a sea of light and shadow.
Tips from William: "Arrive at least 30 minutes before sunrise to set up your shot. Use a wide-angle lens to capture the full scope of the cactus garden, and a tripod to ensure sharpness in the low light. The best shots often come just as the sun begins to rise, casting long shadows and creating a beautiful contrast between the golden cacti and the dark ground."
Insights from Hui Cha: "The Cholla Cactus Garden is a truly unique and enchanting place, especially at sunrise. The cacti seem to glow in the soft light, creating an otherworldly atmosphere. Be careful when walking among the cacti, as their spines are extremely sharp. Wear sturdy shoes and watch your step."
How to Access Cholla Cactus Garden:
- Location: The Cholla Cactus Garden is located along Pinto Basin Road, about 12 miles south of the park's north entrance.
- Travel Directions: From the town of Twentynine Palms, enter Joshua Tree National Park through the north entrance and follow Pinto Basin Road south for about 12 miles until you reach the parking area for the garden. The drive takes about 30 minutes.
- Trail Details: The cactus garden is easily accessible from the parking area, with a short, flat trail that winds through the cacti.
Alternative Activity: Hidden Valley Nature Trail
- For a different sunrise experience, consider visiting the Hidden Valley Nature Trail. This 1-mile loop trail offers stunning views of the park's unique rock formations and is a great place to start your day.
Photographic Techniques:
- Golden Hour Lighting: The soft, golden light of sunrise will enhance the warm tones of the cacti and the surrounding desert. Use this light to highlight the intricate details of the cacti and create a sense of depth in your images.
- Wide-Angle Shots: Use a wide-angle lens to capture the full scope of the cactus garden, including the layers of cacti receding into the distance.
- Textural Details: Focus on the intricate textures of the cactus spines and the patterns created by the shadows. These details can add a sense of scale and complexity to your images.
Exploring the Area:
- After photographing the sunrise at the Cholla Cactus Garden, consider exploring nearby areas like the Ocotillo Patch or the White Tank Campground, both of which offer additional opportunities for morning photography and exploration.
Midday: Exploring the Hidden Valley
11:00 AM - Hidden Valley Exploration
Overview: Hidden Valley is one of Joshua Tree National Park's most popular and accessible areas, known for its unique rock formations and dense concentrations of Joshua trees. The area is also rich in history, as it was once used by cattle rustlers who took advantage of the natural enclosure to hide stolen cattle. The Hidden Valley Nature Trail offers an easy hike through this fascinating landscape, with plenty of opportunities for photography and exploration.
Tips from William: "The midday light can be harsh, but it's perfect for capturing the contrast between the bright sky and the dark shadows of the rocks. Use a polarizing filter to deepen the blue of the sky and reduce glare on the rocks. A wide-angle lens will allow you to capture the full scope of the valley, while a telephoto lens can help isolate interesting details in the rock formations and the Joshua trees."
Insights from Hui Cha: "Hidden Valley is a beautiful and peaceful place to explore, with its stunning rock formations and iconic Joshua trees. The trail is easy and offers lovely views throughout, making it a great place for a midday walk. Be sure to bring plenty of water and wear sunscreen, as the sun can be intense in the middle of the day."
How to Access Hidden Valley:
- Location: Hidden Valley is located along Park Boulevard, about 14 miles west of the town of Joshua Tree.
- Travel Directions: From the town of Joshua Tree, enter the park through the west entrance and follow Park Boulevard east for about 14 miles until you reach the parking area for Hidden Valley. The drive takes about 30 minutes.
- Trail Details: The Hidden Valley Nature Trail is a 1-mile loop with a flat, easy path that winds through the valley.
Alternative Activity: Barker Dam Trail
- For a different hiking experience, consider the Barker Dam Trail. This 1.3-mile loop trail offers beautiful views of a historic dam, unique rock formations, and a small reservoir that attracts a variety of wildlife.
Photographic Techniques:
- Rock Formations: Use a wide-angle lens to capture the sweeping views of the rock formations, including some foreground elements such as Joshua trees or boulders to add depth to your composition.
- Joshua Trees: Focus on the iconic Joshua trees, using a telephoto lens to isolate interesting shapes and patterns. The contrast between the trees and the bright sky can create striking images.
- Texture and Contrast: The harsh midday light can create strong contrasts between light and shadow. Experiment with different exposures to find the best balance for your images.
Exploring the Area:
- After exploring Hidden Valley, consider visiting the nearby Keys View, where you can enjoy panoramic views of the Coachella Valley and the San Andreas Fault. The viewpoint is especially beautiful in the late afternoon when the light is softer.
Afternoon: Discovering Skull Rock
2:00 PM - Skull Rock Exploration
Overview: Skull Rock is one of Joshua Tree's most famous and photogenic landmarks, known for its eerie resemblance to a human skull. The rock formation is located right along Park Boulevard, making it easy to access and explore. The area is also surrounded by other interesting rock formations and boulder piles, making it a great spot for afternoon photography.
Tips from William: "The afternoon light can be harsh, but it's perfect for capturing the textures and details of Skull Rock. Use a polarizing filter to reduce glare and enhance the colors of the rock. A mid-range zoom lens (24-70mm) will allow you to capture both wide views of the formation and close-up details of the 'eye sockets' and other features."
Insights from Hui Cha: "Skull Rock is a fun and interesting place to explore, especially for photographers. The rock's unique shape and the surrounding boulders create a landscape that is both surreal and beautiful. Be sure to explore the area around Skull Rock, as there are plenty of other interesting formations to discover."
How to Access Skull Rock:
- Location: Skull Rock is located along Park Boulevard, about 7 miles east of the Hidden Valley area.
- Travel Directions: From Hidden Valley, follow Park Boulevard east for about 7 miles until you reach the parking area for Skull Rock. The drive takes about 15 minutes.
- Trail Details: Skull Rock is easily accessible from the parking area, with a short, unmarked trail leading to the formation. The area is surrounded by other boulder piles and rock formations that are fun to explore.
Alternative Activity: Arch Rock
- For a different rock formation experience, consider visiting Arch Rock, located near the White Tank Campground. This natural arch is especially beautiful in the late afternoon light, and the surrounding boulders offer plenty of opportunities for exploration.
Photographic Techniques:
- Skull Rock: Use a mid-range zoom lens to capture both the wide views of Skull Rock and the close-up details of its 'eye sockets' and other features. The rock's shape and texture create interesting shadows and highlights, so experiment with different angles and compositions.
- Boulder Piles: The surrounding boulders offer plenty of opportunities for abstract and textural photography. Focus on the patterns and textures of the rocks, using a telephoto lens to isolate interesting details.
- Late Afternoon Light: The warm, golden light of late afternoon is perfect for highlighting the rich colors and textures of the rocks. Use this light to create dramatic and dynamic images.
Exploring the Area:
- After exploring Skull Rock, consider taking a short drive to nearby Jumbo Rocks Campground, where you can enjoy additional opportunities for photography and exploration. The area is known for its massive boulder formations and is especially beautiful in the soft light of late afternoon.
Evening: Stargazing at Hidden Valley Campground
8:00 PM - Stargazing at Hidden Valley Campground
Overview: End your day in Joshua Tree National Park with a night of stargazing at Hidden Valley Campground. The park's remote location, away from city lights, makes it one of the best places in Southern California to view the night sky. The clear, dark skies offer a stunning view of the stars, with the Milky Way stretching across the horizon and countless constellations twinkling overhead.
Tips from William: "Use a wide-angle lens with a large aperture (f/2.8 or wider) to capture the night sky. A tripod is essential for long exposures – start with a 20-30 second exposure at ISO 3200 and adjust as needed. If you want to capture star trails, set your camera for an exposure of several minutes, or take multiple shorter exposures and stack them in post-processing."
Insights from Hui Cha: "There's something incredibly peaceful about sitting under the stars in the quiet of the desert. The vastness of the sky, combined with the silence of the night, creates a sense of wonder and connection with the universe. Bring a blanket or camping chair, and just take a moment to appreciate the beauty of the night sky."
How to Access the Stargazing Spots:
- Location: Hidden Valley Campground is located along Park Boulevard, about 14 miles west of the town of Joshua Tree.
- Travel Directions: From Skull Rock, follow Park Boulevard west for about 7 miles until you reach the campground. The drive takes about 15 minutes.
- Viewing Points: The open areas around the campground and the nearby boulder piles offer wide-open skies and minimal light pollution, making them ideal for stargazing.
Alternative Activity: Stargazing at Joshua Tree National Park's South Entrance
- For a different stargazing experience, consider visiting the area near the park's south entrance, where the skies are even darker, and the views of the Milky Way are especially stunning.
Photographic Techniques:
- Milky Way Photography: Plan your session around the new moon to avoid light pollution. Use a wide-angle lens and set your ISO high (3200 or above) to capture the details of the Milky Way.
- Star Trails: To capture star trails, use a remote shutter release to minimize camera shake. Set your camera to bulb mode for exposures longer than 30 seconds. Alternatively, take multiple short exposures and stack them in post-processing to create the effect.
- Foreground Elements: Include some of the Joshua trees or boulders in the foreground to add depth and interest to your night sky images.
Exploring the Area:
- After your stargazing session, take a quiet drive back to your accommodations. The night sky will continue to accompany you on your journey, providing a serene and reflective end to your adventure.
Day 3: Connecting the Parks and Capturing the Final Moments
Morning: Revisiting Zabriskie Point for Sunrise
6:00 AM - Zabriskie Point
Overview: Return to Death Valley National Park for a second sunrise at Zabriskie Point, this time with the benefit of familiarity. With your previous experience, you can experiment with different compositions and techniques that you may have missed on your first visit.
Tips from William: "This time, focus on capturing the subtle changes in the light as the sun rises. Use a wide-angle lens to capture the entire scene, and a telephoto lens to zoom in on the details of the badlands and the distant mountains. The morning light can create beautiful, long shadows that add depth and interest to your images."
Insights from Hui Cha: "Returning to a location can offer a deeper connection to it. Take this opportunity to explore different angles and perspectives, and to notice the subtle changes in the light and atmosphere that make each visit unique."
How to Access Zabriskie Point:
- Location: Same as Day 1 – Zabriskie Point is located along Highway 190, just east of Furnace Creek.
- Travel Directions: Follow the same route as before to reach Zabriskie Point.
- Trail Details: The viewpoint remains the same – easily accessible with only a short walk required to reach the overlook.
Photographic Techniques:
- Morning Light: The soft, golden light just after sunrise is ideal for capturing the warm tones of the badlands and the cool blues of the distant mountains. Adjust your white balance to enhance these colors.
- Detail Shots: Focus on the intricate details of the rock formations, the ridges, and the layers of sediment. These close-ups can add variety to your images and tell a deeper story about the site.
- Wide-Angle Landscapes: The sweeping views of the badlands provide a beautiful backdrop for your sunrise shots. Use a wide-angle lens to capture the full scope of the landscape.
Exploring the Area:
- After photographing Zabriskie Point, consider exploring the nearby Artists Palette, where you can capture the vibrant colors of the rocks in the soft morning light.
Midday: Revisiting the Hidden Valley for a Midday Hike
11:00 AM - Hidden Valley Hike
Overview: Return to Joshua Tree National Park's Hidden Valley for a midday hike, this time with the benefit of familiarity. With your previous experience, you can experiment with different compositions and techniques that you may have missed on your first visit.
Tips from William: "This time, focus on capturing the subtle changes in the light as the sun moves higher in the sky. Use a wide-angle lens to capture the entire scene, and a telephoto lens to zoom in on the details of the Joshua trees and the surrounding rock formations."
Insights from Hui Cha: "Returning to a location can offer a deeper connection to it. Take this opportunity to explore different angles and perspectives, and to notice the subtle changes in the light and atmosphere that make each visit unique."
How to Access Hidden Valley:
- Location: Same as Day 2 – Hidden Valley is located along Park Boulevard, about 14 miles west of the town of Joshua Tree.
- Travel Directions: Follow the same route as before to reach the Hidden Valley parking area.
- Trail Details: The trail remains the same – easily accessible with only a short walk required to reach the valley.
Photographic Techniques:
- Midday Light: The harsh midday light can create strong contrasts between light and shadow. Use this contrast to create dynamic and dramatic images of the Joshua trees and the rock formations.
- Detail Shots: Focus on the intricate details of the Joshua trees, the boulders, and the surrounding vegetation. These close-ups can add variety to your images and tell a deeper story about the site.
- Wide-Angle Landscapes: The sweeping views of the valley provide a beautiful backdrop for your midday hike. Use a wide-angle lens to capture the full scope of the landscape.
Exploring the Area:
- After your hike, consider visiting the nearby Barker Dam, where you can capture the reflection of the surrounding rocks and Joshua trees in the water.
Afternoon: Revisiting Skull Rock for an Afternoon Exploration
2:00 PM - Skull Rock Exploration
Overview: Return to Skull Rock in Joshua Tree National Park for an afternoon exploration, this time with the benefit of familiarity. With your previous experience, you can experiment with different compositions and techniques that you may have missed on your first visit.
Tips from William: "This time, focus on capturing the subtle changes in the light as the sun moves lower in the sky. Use a mid-range zoom lens to capture the entire scene, and a telephoto lens to zoom in on the details of the rock formations and the surrounding boulders."
Insights from Hui Cha: "Returning to a location can offer a deeper connection to it. Take this opportunity to explore different angles and perspectives, and to notice the subtle changes in the light and atmosphere that make each visit unique."
How to Access Skull Rock:
- Location: Same as Day 2 – Skull Rock is located along Park Boulevard, about 7 miles east of the Hidden Valley area.
- Travel Directions: Follow the same route as before to reach the Skull Rock parking area.
- Trail Details: The trail remains the same – easily accessible with only a short walk required to reach the formation.
Photographic Techniques:
- Afternoon Light: The warm afternoon light can enhance the rich colors and textures of Skull Rock and the surrounding boulders. Use this light to create dynamic and dramatic images of the rock formations.
- Detail Shots: Focus on the intricate details of the boulders, the surrounding vegetation, and the textures of the rock formations. These close-ups can add variety to your images and tell a deeper story about the site.
- Wide-Angle Landscapes: The sweeping views of the surrounding boulders and rock formations provide a beautiful backdrop for your afternoon exploration. Use a wide-angle lens to capture the full scope of the landscape.
Exploring the Area:
- After exploring Skull Rock, consider visiting the nearby Arch Rock, where you can capture the beautiful natural arch in the soft light of the late afternoon.
Evening: Revisiting Hidden Valley Campground for Stargazing
8:00 PM - Hidden Valley Campground Stargazing
Overview: Return to Hidden Valley Campground in Joshua Tree National Park for a night of stargazing, this time with the benefit of familiarity. With your previous experience, you can experiment with different compositions and techniques that you may have missed on your first visit.
Tips from William: "This time, focus on capturing the subtle changes in the light as the night progresses. Use a wide-angle lens to capture the entire scene, and a telephoto lens to zoom in on the details of the stars and constellations."
Insights from Hui Cha: "Returning to a location can offer a deeper connection to it. Take this opportunity to explore different angles and perspectives, and to notice the subtle changes in the light and atmosphere that make each visit unique."
How to Access Hidden Valley Campground:
- Location: Same as Day 2 – Hidden Valley Campground is located along Park Boulevard, about 14 miles west of the town of Joshua Tree.
- Travel Directions: Follow the same route as before to reach the Hidden Valley Campground parking area.
- Viewing Points: The open areas around the campground and the nearby boulder piles offer wide-open skies and minimal light pollution, making them ideal for stargazing.
Photographic Techniques:
- Night Sky Photography: The clear, dark skies of Joshua Tree National Park are perfect for capturing the stars and the Milky Way. Use a wide-angle lens with a large aperture (f/2.8 or wider) to capture as much of the night sky as possible. A tripod is essential for keeping your camera steady during long exposures.
- Star Trails: For a unique and stunning effect, try capturing star trails. Use a remote shutter release to minimize camera shake and set your camera to bulb mode for exposures longer than 30 seconds. Alternatively, take multiple short exposures and stack them in post-processing to create the effect.
- Foreground Interest: Include some of the boulders or Joshua trees in the foreground to add depth and interest to your night sky images.
Exploring the Area:
- After your stargazing session, take a quiet drive back to your accommodations. The night sky will continue to accompany you on your journey, providing a serene and reflective end to your adventure.
Conclusion: A Journey Through California's Desert Wonders
As we packed up our gear and began the drive back through the vast deserts of California, the night sky filled with stars, I felt a deep sense of peace and fulfillment. Our journey through Death Valley and Joshua Tree had been more than just a photographic adventure; it had been a journey through some of the most unique and awe-inspiring landscapes that the state has to offer.
These parks are places where the natural world is at its most extreme, where the beauty of the land is matched only by the sense of solitude and wonder that comes from being surrounded by such vast, untamed wilderness. From the otherworldly landscapes of Death Valley to the surreal rock formations of Joshua Tree, these deserts offer a chance to connect with nature in a way that is both profound and humbling.
For us, this trip was a reminder of the importance of taking the time to explore and appreciate the natural world. It was a chance to capture the beauty of these places, to experience the peace that comes from being in such awe-inspiring surroundings, and to reconnect with each other and with ourselves.
As you embark on your own adventure through Death Valley and Joshua Tree, we hope that our insights and experiences will help you make the most of your journey. Take your time, respect the land, and let the beauty of these parks inspire you. And when you look back on your photographs, may they remind you not just of the places you visited, but of the moments you lived.
Happy travels, and may your journey through Death Valley and Joshua Tree be as rich and rewarding as ours.
Choosing Lodging for Your Adventure
Selecting the right lodging is essential to optimize your experience in these two distinct desert environments of California. Here's a breakdown of lodging options that are strategically located to enhance your daily explorations, offering comfort, convenience, and proximity to key attractions:
Lodging Options Near Death Valley National Park
Furnace Creek, Stovepipe Wells, and Beatty are key locations for lodging near Death Valley National Park, offering different levels of comfort and access to the park.
1. The Inn at Death Valley (Inside Death Valley National Park)
- Location: Furnace Creek, inside Death Valley National Park.
- Why It's Ideal: The Inn at Death Valley offers a luxurious oasis in the middle of the desert, with easy access to major park attractions like Badwater Basin, Dante's View, and Zabriskie Point. It's perfect for those who want to enjoy both comfort and proximity to the park's highlights.
- Amenities: Elegant rooms and suites, a spring-fed pool, fine dining, a spa, and beautifully landscaped grounds with palm trees. The inn's historic charm and secluded location make it a top choice for a memorable stay.
2. The Ranch at Death Valley (Inside Death Valley National Park)
- Location: Furnace Creek, inside Death Valley National Park.
- Why It's Ideal: This family-friendly resort offers a more casual and affordable option while still being centrally located within the park. It's great for exploring Death Valley's main attractions and provides plenty of on-site activities.
- Amenities: Comfortable rooms, a large pool, golf course, on-site dining, a general store, and a museum. The ranch's relaxed atmosphere is ideal for families or groups.
3. Stovepipe Wells Village (Inside Death Valley National Park)
- Location: Stovepipe Wells, inside Death Valley National Park.
- Why It's Ideal: Stovepipe Wells Village offers rustic accommodations with direct access to Mesquite Flat Sand Dunes and Mosaic Canyon. It's a great choice for those looking for an authentic desert experience with all the basic amenities.
- Amenities: Rustic rooms, a seasonal pool, an on-site restaurant and saloon, and proximity to nearby hiking trails. The village's location makes it convenient for exploring the park's western areas.
4. Panamint Springs Resort
- Location: On the western edge of Death Valley National Park.
- Why It's Ideal: Panamint Springs Resort offers basic, budget-friendly accommodations in a remote desert setting. It's ideal for travelers looking to explore the western sections of Death Valley, including Panamint Dunes and Darwin Falls.
- Amenities: Simple cabins, motel rooms, tent cabins, and camping, with an on-site restaurant and gas station. The resort's location offers a quieter, more secluded experience.
5. The Inn at Death Valley – El Rancho Motel (Beatty)
- Location: Beatty, Nevada, about 40 minutes from Death Valley National Park's eastern entrance.
- Why It's Ideal: For those looking for a more budget-friendly option just outside the park, Beatty offers basic accommodations with easy access to the eastern entrance of Death Valley.
- Amenities: Simple, clean rooms, proximity to restaurants and shops in Beatty, and easy access to Rhyolite Ghost Town and the eastern sections of Death Valley.
Lodging Options Near Joshua Tree National Park
Joshua Tree, Twentynine Palms, and Palm Springs are the primary locations for lodging near Joshua Tree National Park, providing a range of options from rustic to luxury.
1. Joshua Tree Inn
- Location: Joshua Tree Village, near the West Entrance of Joshua Tree National Park.
- Why It's Ideal: This historic inn offers a blend of charm and comfort with close proximity to the park's West Entrance. It's a great choice for those looking to explore the park's iconic areas like Hidden Valley, Keys View, and Barker Dam.
- Amenities: Southwestern-style rooms, a swimming pool, a garden, and a historic ambiance. The inn's central location in Joshua Tree Village also provides easy access to local shops and cafes.
2. Sacred Sands
- Location: Near the West Entrance of Joshua Tree National Park.
- Why It's Ideal: Sacred Sands offers luxurious, eco-friendly accommodations with stunning views of the desert landscape. It's perfect for couples or those seeking a more upscale experience while staying close to the park.
- Amenities: Private patios, outdoor showers, eco-friendly design, and proximity to Joshua Tree's attractions.
3. 29 Palms Inn
- Location: Twentynine Palms, near the North Entrance of Joshua Tree National Park.
- Why It's Ideal: This inn offers a peaceful desert retreat with easy access to the North Entrance of Joshua Tree, making it convenient for exploring the northern sections of the park, including the Oasis of Mara and Skull Rock.
- Amenities: Historic adobe bungalows, a swimming pool, a restaurant serving organic produce from the inn's garden, and a serene desert setting.
4. AutoCamp Joshua Tree
- Location: Near downtown Joshua Tree, about 10 minutes from the West Entrance.
- Why It's Ideal: For a glamping experience, AutoCamp Joshua Tree offers stylish Airstream accommodations with modern amenities. It's perfect for those who want a unique, comfortable stay with easy access to the park.
- Amenities: Airstream trailers with luxury amenities, a communal fire pit, an outdoor pool, and a clubhouse.
5. La Quinta Resort & Club
- Location: La Quinta, about 30 miles from Joshua Tree National Park's southern entrance.
- Why It's Ideal: This luxurious resort offers a blend of relaxation and elegance, perfect for unwinding after exploring the park. It's ideal if you want to combine your desert adventure with resort-style amenities.
- Amenities: Casita-style accommodations, multiple pools, golf courses, a full-service spa, and on-site dining.
Lodging Options Between Death Valley and Joshua Tree National Parks
Barstow and Twentynine Palms are centrally located, providing convenient stopovers between Death Valley and Joshua Tree.
1. The Desert Lily Bed & Breakfast
- Location: Joshua Tree, near the West Entrance of Joshua Tree National Park.
- Why It's Ideal: This charming B&B offers a cozy stay with a personal touch, making it a great midpoint between your park adventures. It's ideal for travelers seeking a more intimate and homey atmosphere.
- Amenities: Comfortable rooms and suites, a complimentary gourmet breakfast, and a peaceful garden setting.
2. Holiday Inn Express & Suites Twentynine Palms
- Location: Twentynine Palms, about 5 miles from the North Entrance of Joshua Tree National Park.
- Why It's Ideal: This modern hotel offers convenient accommodations with easy access to Joshua Tree and is a practical stopover between Death Valley and Joshua Tree.
- Amenities: Spacious rooms, complimentary breakfast, an outdoor pool, and a fitness center.
3. Ayres Hotel Barstow
- Location: Barstow, about halfway between Death Valley and Joshua Tree.
- Why It's Ideal: This hotel offers a comfortable and convenient stopover with all the amenities you need after a long drive between the parks.
- Amenities: Comfortable rooms, complimentary breakfast, an indoor pool, and proximity to restaurants and shops in Barstow.
Tips for Choosing Lodging:
- Book Early: Lodging in and around Death Valley and Joshua Tree can fill up quickly, especially during peak seasons. Early booking is recommended to secure your preferred accommodations.
- Consider Proximity: Staying close to the park entrances will maximize your time for exploration and reduce travel times, allowing you to fully enjoy your adventure.
- Balance Comfort and Access: Whether you prefer a historic inn, a modern resort, or a rustic desert lodge, choose accommodations that fit your itinerary and travel style.
By selecting the right lodging options based on your itinerary, you'll be well-positioned to enjoy the full experience of Death Valley and Joshua Tree National Parks.

Step into a world of timeless beauty with our premium, oversized hardcover book - crafted for discerning collectors and anyone who values the power of art. Perfect for your coffee table, it's more than just a book; it's a conversation starter, a window into over 30 years of William's visionary photography.
Your Support Matters
Purchasing artwork from William Stanek's collection not only brings beauty into your life but also helps us continue to share. Thank you for supporting our creative journey!

Support The Lights of Paris by Robert Stanek, William Stanek's pen name! Through vivid historical detail and deeply moving character stories, Robert takes readers on an unforgettable journey through one of history’s most transformative times.

