


Embark on a journey curated by seasoned explorers William and Hui Cha Stanek, who have spent decades immersing themselves in the diverse landscapes of North America. These itineraries are more than just travel plans - they are thoughtfully crafted adventures designed to help you connect with the natural world, discover hidden gems, and create lasting memories.
National Parks Index | US Itineraries Index | American Roadtrips Index

Bring home a Bugville Critters book and watch as your child's love for reading and learning grows with every page. Hand-painted illustrations bring the heartwarming stories to life. Ask your librarian to add Bugville Critters to the library's digital collection today!
Discover William Stanek's Exclusive Art Collection
Explore and purchase the stunning art featured on this site. Own a piece of William Stanek's unique and captivating artwork today!
(September 16, 2024) Ultimate 5-Day Adventure Through Utah's Big Five: Arches, Canyonlands, Capitol Reef, Bryce Canyon, and Zion
Introduction: A Journey Through the Heart of Utah's Red Rock Wilderness
Utah's Big Five national parks – Arches, Canyonlands, Capitol Reef, Bryce Canyon, and Zion – represent some of the most stunning and diverse landscapes in the United States. For Hui Cha and me, exploring these parks over the course of five days was an adventure we had long dreamed of. Each park offers its own unique beauty, from the delicate arches of Arches National Park to the towering cliffs of Zion. The journey takes you through a vast expanse of red rock desert, where time seems to slow down and nature's grandeur is on full display.
This trip is designed for those who want to experience the best of Utah's national parks in just five days, making the most of every moment. We'll guide you through a carefully crafted itinerary that combines iconic hikes, stunning viewpoints, and hidden gems, along with tips and insights to help you capture the beauty of these landscapes through your lens.
Join us as we take you on an unforgettable journey through Utah's Big Five, where every sunrise, hike, and canyon view will leave you in awe of the natural world.
Day 1: Arches National Park – Sculpted by Time
Morning: Sunrise at Delicate Arch
Overview
Start your adventure with a sunrise hike to Delicate Arch, one of the most iconic landmarks in Arches National Park. This freestanding arch, set against the backdrop of the La Sal Mountains, is a must-see for any visitor to the park.
Tips from William
"To catch the sunrise from Delicate Arch, start your hike around 5:00 AM. The trail is moderately challenging, so bring plenty of water and a headlamp for the early morning start. Once you reach the arch, set up your tripod and use a wide-angle lens to capture the arch and the surrounding landscape. The first light of day creates a magical glow on the red rock, making for stunning photographs."
Insights from Hui Cha
"The hike to Delicate Arch is a great way to start your journey through Utah's Big Five. The sense of anticipation builds as you approach the arch, and when you finally see it, standing alone against the sky, it takes your breath away. Dress warmly, as it can be chilly in the early morning, and bring a thermos of hot coffee or tea to enjoy while you wait for the sun to rise."
How to Access Delicate Arch
Directions:
- From the Arches Visitor Center, drive 12 miles north on Arches Scenic Drive to the Delicate Arch Trailhead parking area.
Trail Details:
- Trail Length: 3 miles round-trip
- Elevation Gain: 480 feet
- Difficulty: Moderate
Photography Tips: For the best shots of Delicate Arch, arrive early to capture the first light as it illuminates the arch and the surrounding landscape. Use a wide-angle lens to include the La Sal Mountains in the background, and a small aperture (f/16 or smaller) to keep both the arch and the distant mountains in focus. A tripod is essential for stabilizing your camera in the low light.
Alternative Activity: If the hike to Delicate Arch is too challenging, consider visiting the Windows Section, where you can see several large arches with shorter, easier walks.
Mid-Morning: Exploring the Windows Section and Double Arch
Overview
After watching the sunrise at Delicate Arch, head to the Windows Section, where you can explore some of the park's largest and most accessible arches, including the North and South Windows, Turret Arch, and Double Arch.
Tips from William
"The Windows Section is a fantastic area for photography, with multiple arches and unique rock formations to explore. Bring a wide-angle lens to capture the full scale of the arches, and a polarizing filter to enhance the colors of the sky and the red rock. The best light for photography is in the late morning when the sun is high enough to illuminate the arches but not too harsh."
Insights from Hui Cha
"The Windows Section is one of my favorite areas in Arches. The sheer size of the arches is awe-inspiring, and the views through the Windows are breathtaking. I love wandering through this area, finding new angles and perspectives to photograph."
How to Access the Windows Section
Directions:
- From Delicate Arch, drive back toward the park entrance and turn left onto the Windows Road. Follow the road to the parking area.
Trail Details:
- Trail Length: 1-mile loop (Windows Section)
- Elevation Gain: Minimal
- Difficulty: Easy
Photography Tips: For the best shots, arrive mid-morning to capture the light as it illuminates the arches. Use a wide-angle lens to include multiple arches in a single frame, and experiment with different compositions to highlight the unique shapes and textures of the rock formations.
Alternative Activity: If you prefer a quieter spot, consider exploring the nearby Sand Dune Arch, a short walk through a narrow canyon to a secluded arch surrounded by soft sand.
Afternoon: Scenic Drive to Canyonlands National Park
Overview
In the afternoon, take a scenic drive to Canyonlands National Park, a short distance from Arches. This park is divided into several districts, with Island in the Sky being the most accessible. The drive offers stunning views of the vast canyons carved by the Colorado River.
Tips from William
"The drive to Canyonlands is an adventure in itself, with breathtaking views of the red rock landscape. Bring a wide-angle lens to capture the expansive vistas, but also keep a telephoto lens handy for zooming in on the details of the canyons and the distant La Sal Mountains."
Insights from Hui Cha
"Driving through this landscape, you get a sense of the vastness and beauty of the desert. The canyons stretch out as far as the eye can see, and the play of light and shadow on the rock formations is mesmerizing. It's a peaceful and inspiring way to spend the afternoon."
How to Access Canyonlands National Park
Directions:
- From Arches, take US-191 south to UT-313 west, which leads to the Island in the Sky entrance of Canyonlands National Park.
Drive Details:
- Total Distance: 34 miles from Arches to Canyonlands (Island in the Sky)
- Elevation Gain: Minimal (depending on the stops)
- Difficulty: Easy
Photography Tips: Stop frequently along the drive to capture different perspectives of the park's unique landscapes. Use a wide-angle lens to capture the expansive views, and switch to a telephoto lens to zoom in on the details of the canyons and the distant peaks.
Alternative Activity: If you have extra time, consider taking a detour to Dead Horse Point State Park, located just outside Canyonlands, which offers stunning views of the Colorado River and the surrounding canyons.
Evening: Sunset at Mesa Arch
Overview
End your day with a visit to Mesa Arch, one of the most famous viewpoints in Canyonlands National Park. This small but dramatic arch frames a stunning view of the canyonlands below and the La Sal Mountains in the distance, making it a perfect spot to watch the sunset.
Tips from William
"Mesa Arch is a fantastic spot to capture the sunset, with wide, sweeping views of the surrounding landscape. Set up your tripod well before sunset to find the best angle, and use a wide-angle lens to capture the full scene. A graduated neutral density filter will help balance the exposure between the bright sky and the darker landscape."
Insights from Hui Cha
"Sunset at Mesa Arch is one of the most beautiful experiences you can have in Canyonlands. The way the light plays across the canyons, casting long shadows and turning the rock a deep red, is truly magical. Bring a blanket and a warm drink, and take some time to simply sit and enjoy the moment."
How to Access Mesa Arch
Directions:
- From the Island in the Sky Visitor Center, drive 6 miles southeast on Grand View Point Road to the Mesa Arch parking area.
Trail Details:
- Trail Length: 0.5 miles round-trip
- Elevation Gain: Minimal
- Difficulty: Easy
Photography Tips: For a stunning sunset shot, position yourself on the western side of the arch to capture the last light of the day as it illuminates the canyons and the La Sal Mountains. Use a small aperture (f/16 or smaller) to keep the entire scene in focus, and experiment with different shutter speeds to capture the changing light.
Alternative Activity: If you prefer a less crowded spot for sunset, consider visiting Grand View Point, which offers equally stunning views of the canyons and the distant mountains.
Day 2: Canyonlands and Capitol Reef – The Wild Heart of Utah
Morning: Sunrise at Grand View Point
Overview
Begin your second day with a sunrise at Grand View Point, one of the most breathtaking viewpoints in Canyonlands National Park. From this vantage point, you can see for miles in every direction, with the canyons, mesas, and distant mountains all bathed in the soft light of dawn.
Tips from William
"Arrive at Grand View Point by 5:30 AM to catch the first light of day. The early morning light is perfect for photography, casting a warm glow over the canyons and highlighting the details of the landscape. Bring a wide-angle lens to capture the full scene, and a graduated neutral density filter to balance the exposure between the bright sky and the darker canyons."
Insights from Hui Cha
"Sunrise at Grand View Point is a moment of pure tranquility. The vastness of the landscape, combined with the stillness of the morning, creates a sense of peace that's hard to find anywhere else. Dress warmly, as it can be chilly before the sun rises, and bring a thermos of hot coffee or tea to enjoy while you watch the show."
How to Access Grand View Point
Directions:
- From the Mesa Arch parking area, drive 6 miles back to the Island in the Sky Visitor Center, then continue southeast on Grand View Point Road for another 12 miles to the Grand View Point parking area.
Viewpoint Details:
- Location: About 12 miles southeast of the Island in the Sky Visitor Center
- Elevation Gain: None
- Difficulty: Easy
Photography Tips: For the best shots of Grand View Point, position yourself on the eastern side of the viewpoint to capture the first light as it hits the canyons and mesas. Use a small aperture (f/16 or smaller) to keep both the foreground and the distant landscape in focus. A wide-angle lens will allow you to capture the full scope of the view, and a tripod is essential for stabilizing your camera in the low light.
Alternative Activity: If the early morning start at Grand View Point is too demanding, consider watching the sunrise from the nearby Green River Overlook, which offers equally stunning views of the canyons and the river below.
Mid-Morning: Exploring the Needles District
Overview
After enjoying the sunrise, head to the Needles District of Canyonlands National Park, known for its colorful spires, arches, and canyons. This area offers some of the most dramatic and unique landscapes in the park, with plenty of opportunities for hiking and exploration.
Tips from William
"The Needles District is a fantastic area for photography, with a wide variety of rock formations and stunning vistas. Bring a wide-angle lens to capture the full scale of the landscape, but also keep a telephoto lens handy for zooming in on the details of the spires and canyons. The best light for photography is in the late morning when the sun is high enough to illuminate the rock formations but not too harsh."
Insights from Hui Cha
"The Needles District feels like a different world, with its towering spires and deep canyons. The colors of the rock, the shapes of the formations, and the sense of isolation all combine to create a truly unique experience. I love wandering through this area, finding new angles and perspectives to photograph."
How to Access the Needles District
Directions:
- From Grand View Point, drive back to the Island in the Sky Visitor Center, then take UT-211 east to the Needles District entrance.
Drive Details:
- Total Distance: 75 miles from Island in the Sky to the Needles District
- Elevation Gain: Minimal (depending on the stops)
- Difficulty: Easy
Photography Tips: Stop frequently along the drive to capture different perspectives of the park's unique landscapes. Use a wide-angle lens to capture the expansive views, and switch to a telephoto lens to zoom in on the details of the spires and the surrounding desert.
Alternative Activity: If you prefer a shorter drive, consider exploring the nearby Newspaper Rock State Historic Monument, which features a large rock panel covered in ancient petroglyphs.
Afternoon: Scenic Drive to Capitol Reef National Park
Overview
In the afternoon, take a scenic drive to Capitol Reef National Park, one of Utah's most underrated gems. This park is known for its towering cliffs, narrow canyons, and the Waterpocket Fold, a nearly 100-mile-long wrinkle in the earth's crust.
Tips from William
"The drive to Capitol Reef offers stunning views of the red rock landscape, with plenty of opportunities for photography along the way. Bring a wide-angle lens to capture the expansive vistas, but also keep a telephoto lens handy for zooming in on the details of the cliffs and canyons."
Insights from Hui Cha
"Driving through this landscape, you get a sense of the history and beauty of the land. The colors of the rock, the shapes of the formations, and the play of light and shadow create a sense of wonder and awe. It's a peaceful and inspiring way to spend the afternoon."
How to Access Capitol Reef National Park
Directions:
- From the Needles District, take UT-211 east to US-191 north, then follow UT-24 west to the Capitol Reef Visitor Center.
Drive Details:
- Total Distance: 118 miles from the Needles District to Capitol Reef
- Elevation Gain: Minimal (depending on the stops)
- Difficulty: Easy
Photography Tips: Stop frequently along the drive to capture different perspectives of the park's unique landscapes. Use a wide-angle lens to capture the expansive views, and switch to a telephoto lens to zoom in on the details of the cliffs and canyons.
Alternative Activity: If you have extra time, consider taking a detour to Goblin Valley State Park, which features bizarre, mushroom-shaped rock formations that are perfect for photography and exploration.
Evening: Sunset at Capitol Dome
Overview
End your day with a visit to Capitol Dome, one of the most iconic landmarks in Capitol Reef National Park. This towering rock formation, which resembles the dome of the U.S. Capitol building, is a must-see for any visitor to the park.
Tips from William
"Capitol Dome is a fantastic spot to capture the sunset, with wide, sweeping views of the surrounding desert and the dome itself. Set up your tripod well before sunset to find the best angle, and use a wide-angle lens to capture the full scene. A graduated neutral density filter will help balance the exposure between the bright sky and the darker landscape."
Insights from Hui Cha
"Sunset at Capitol Dome is one of the most beautiful experiences you can have in Capitol Reef. The way the light plays across the rock, casting long shadows and turning the dome a deep red, is truly magical. Bring a blanket and a warm drink, and take some time to simply sit and enjoy the moment."
How to Access Capitol Dome
Directions:
- From the Capitol Reef Visitor Center, take UT-24 east for about 3 miles to the Capitol Dome parking area, located on the left side of the road.
Viewpoint Details:
- Location: About 3 miles east of the Capitol Reef Visitor Center
- Elevation Gain: None (viewpoint is accessible by car)
- Difficulty: Easy
Photography Tips: For a stunning sunset shot, position yourself on the western side of the viewpoint to capture the last light of the day as it illuminates the dome. Use a small aperture (f/16 or smaller) to keep the entire scene in focus, and experiment with different shutter speeds to capture the changing light. If the conditions are right, consider staying after sunset to photograph the stars as they appear.
Alternative Activity: If you prefer a less crowded spot for sunset, consider visiting the nearby Goosenecks Overlook, which offers equally stunning views of the canyon and the surrounding desert.
Day 3: Capitol Reef and Bryce Canyon – Towers of Rock and Stone
Morning: Sunrise at Panorama Point
Overview
Begin your third day with a sunrise at Panorama Point, one of the most accessible and breathtaking viewpoints in Capitol Reef National Park. This spot offers sweeping views of the Waterpocket Fold, the Henry Mountains, and the rugged cliffs and canyons that make up the heart of Capitol Reef.
Tips from William
"Arrive at Panorama Point by 6:00 AM to catch the first light of day. The early morning light is perfect for photography, casting a warm glow over the red rock formations and highlighting the textures and details of the landscape. Bring a wide-angle lens to capture the full scene, and a graduated neutral density filter to balance the exposure between the bright sky and the darker foreground."
Insights from Hui Cha
"Panorama Point at sunrise is a truly magical experience. The way the light slowly creeps over the horizon, illuminating the cliffs and canyons, is something you won't forget. Dress warmly, as it can be quite chilly before the sun rises, and bring a thermos of hot coffee or tea to enjoy while you watch the show."
How to Access Panorama Point
Directions:
- From the Capitol Reef Visitor Center, take UT-24 west for about 2 miles, then turn left onto the road to Panorama Point. The parking area is located at the end of the road.
Viewpoint Details:
- Location: About 2 miles west of the Capitol Reef Visitor Center
- Elevation Gain: Minimal
- Difficulty: Easy
Photography Tips: For the best shots of Panorama Point, position yourself on the eastern side to capture the first light as it hits the cliffs and canyons. Use a small aperture (f/16 or smaller) to keep both the foreground and the distant mountains in focus. A wide-angle lens will allow you to capture the full scope of the landscape, and a tripod is essential for stabilizing your camera in the low light.
Alternative Activity: If the early morning start at Panorama Point is too demanding, consider watching the sunrise from the nearby Sunset Point, which offers equally stunning views of the Waterpocket Fold and the surrounding desert.
Mid-Morning: Exploring Hickman Bridge and the Scenic Drive
Overview
After the sunrise, take a hike to Hickman Bridge, one of Capitol Reef's most famous landmarks. This natural arch spans 133 feet across and 125 feet high, offering a stunning view of the surrounding canyon. Afterward, explore the park's scenic drive, which winds through the heart of Capitol Reef, offering breathtaking views of the Waterpocket Fold, canyons, and historic sites.
Tips from William
"The Hickman Bridge Trail is a great way to experience the beauty of Capitol Reef up close. Bring a wide-angle lens to capture the full scale of the arch, but also keep a telephoto lens handy for zooming in on the details of the rock formations and the surrounding landscape. The light in the late morning is still good for photography, so take your time and enjoy the hike."
Insights from Hui Cha
"This hike offers some of the most beautiful scenery in the park, with the trail winding through a narrow canyon before opening up to reveal the impressive Hickman Bridge. The arch is even more spectacular in person, and I love finding a quiet spot beneath it to sit and take in the beauty of the place."
How to Access Hickman Bridge
Directions:
- From Panorama Point, drive east on UT-24 to the Hickman Bridge trailhead, located about 2 miles from the Capitol Reef Visitor Center.
Trail Details:
- Trail Length: 2 miles round-trip
- Elevation Gain: 400 feet
- Difficulty: Moderate
Photography Tips: For the best shots of Hickman Bridge, arrive mid-morning to catch the soft light as it illuminates the arch. Use a wide-angle lens to capture the full scale of the arch, and experiment with different compositions to highlight the contrast between the arch and the surrounding canyon walls. For a more creative shot, try framing the arch with the desert plants that line the trail.
Alternative Activity: If the hike to Hickman Bridge is too challenging, consider exploring the nearby Grand Wash Trail, a relatively flat and easy hike that takes you through a narrow canyon with towering walls and unique rock formations.
Afternoon: Scenic Drive to Bryce Canyon National Park
Overview
In the afternoon, take a scenic drive to Bryce Canyon National Park, home to some of the most unique and otherworldly landscapes in the United States. The park is famous for its hoodoos – tall, thin spires of rock that have been eroded into strange and beautiful shapes.
Tips from William
"The drive to Bryce Canyon offers stunning views of the red rock landscape, with plenty of opportunities for photography along the way. Bring a wide-angle lens to capture the expansive vistas, but also keep a telephoto lens handy for zooming in on the details of the cliffs and hoodoos."
Insights from Hui Cha
"Driving through this landscape, you get a sense of the history and beauty of the land. The colors of the rock, the shapes of the formations, and the play of light and shadow create a sense of wonder and awe. It's a peaceful and inspiring way to spend the afternoon."
How to Access Bryce Canyon National Park
Directions:
- From Capitol Reef, take UT-12 south to Bryce Canyon National Park.
Drive Details:
- Total Distance: 115 miles from Capitol Reef to Bryce Canyon
- Elevation Gain: Minimal (depending on the stops)
- Difficulty: Easy
Photography Tips: Stop frequently along the drive to capture different perspectives of the park's unique landscapes. Use a wide-angle lens to capture the expansive views, and switch to a telephoto lens to zoom in on the details of the cliffs and hoodoos.
Alternative Activity: If you have extra time, consider taking a detour to Kodachrome Basin State Park, which features colorful sandstone spires and unique rock formations that are perfect for photography and exploration.
Evening: Sunset at Sunset Point
Overview
End your day with a visit to Sunset Point, one of the most famous viewpoints in Bryce Canyon National Park. This overlook offers panoramic views of the Bryce Amphitheater, where thousands of hoodoos rise from the canyon floor, creating a surreal and beautiful landscape.
Tips from William
"Sunset Point is a fantastic spot to capture the sunset, with wide, sweeping views of the Bryce Amphitheater and the hoodoos. Set up your tripod well before sunset to find the best angle, and use a wide-angle lens to capture the full scene. A graduated neutral density filter will help balance the exposure between the bright sky and the darker landscape."
Insights from Hui Cha
"Sunset at Sunset Point is one of the most beautiful experiences you can have in Bryce Canyon. The way the light plays across the hoodoos, casting long shadows and turning the rock a deep red, is truly magical. Bring a blanket and a warm drink, and take some time to simply sit and enjoy the moment."
How to Access Sunset Point
Directions:
- From the Bryce Canyon Visitor Center, take the main park road south for about 2 miles to the Sunset Point parking area.
Viewpoint Details:
- Location: About 2 miles south of the Bryce Canyon Visitor Center
- Elevation Gain: None (viewpoint is accessible by car)
- Difficulty: Easy
Photography Tips: For a stunning sunset shot, position yourself on the western side of the viewpoint to capture the last light of the day as it illuminates the hoodoos and the Bryce Amphitheater. Use a small aperture (f/16 or smaller) to keep the entire scene in focus, and experiment with different shutter speeds to capture the changing light. If the conditions are right, consider staying after sunset to photograph the stars as they appear.
Alternative Activity: If you prefer a less crowded spot for sunset, consider visiting the nearby Inspiration Point, which offers equally stunning views of the Bryce Amphitheater and the surrounding hoodoos.
Day 4: Bryce Canyon and Zion – Sculpted by Wind and Water
Morning: Sunrise at Bryce Point
Overview
Begin your fourth day with a sunrise at Bryce Point, one of the most dramatic and breathtaking viewpoints in Bryce Canyon National Park. This overlook offers sweeping views of the Bryce Amphitheater and the surrounding hoodoos, all bathed in the soft light of dawn.
Tips from William
"Arrive at Bryce Point by 5:30 AM to catch the first light of day. The early morning light is perfect for photography, casting a warm glow over the hoodoos and highlighting the details of the landscape. Bring a wide-angle lens to capture the full scene, and a graduated neutral density filter to balance the exposure between the bright sky and the darker hoodoos."
Insights from Hui Cha
"Sunrise at Bryce Point is a moment of pure magic. The colors of the hoodoos, the stillness of the morning, and the beauty of the landscape create a sense of peace and awe. Dress warmly, as it can be chilly before the sun rises, and bring a thermos of hot coffee or tea to enjoy while you watch the show."
How to Access Bryce Point
Directions:
- From Sunset Point, take the main park road south for about 3 miles to the Bryce Point parking area.
Viewpoint Details:
- Location: About 3 miles south of Sunset Point
- Elevation Gain: None
- Difficulty: Easy
Photography Tips: For the best shots of Bryce Point, position yourself on the eastern side of the viewpoint to capture the first light as it hits the hoodoos and the Bryce Amphitheater. Use a small aperture (f/16 or smaller) to keep both the foreground and the distant landscape in focus. A wide-angle lens will allow you to capture the full scope of the view, and a tripod is essential for stabilizing your camera in the low light.
Alternative Activity: If the early morning start at Bryce Point is too demanding, consider watching the sunrise from the nearby Sunrise Point, which offers equally stunning views of the Bryce Amphitheater and the surrounding hoodoos.
Mid-Morning: Exploring the Navajo Loop and Queen's Garden Trail
Overview
After the sunrise, take a hike along the Navajo Loop and Queen's Garden Trail, one of the most popular and scenic hikes in Bryce Canyon National Park. This trail takes you down into the Bryce Amphitheater, where you can walk among the towering hoodoos and experience the beauty of the canyon up close.
Tips from William
"The Navajo Loop and Queen's Garden Trail is a fantastic way to experience the beauty of Bryce Canyon up close. Bring a wide-angle lens to capture the full scale of the hoodoos, but also keep a telephoto lens handy for zooming in on the details of the rock formations and the surrounding landscape. The light in the late morning is still good for photography, so take your time and enjoy the hike."
Insights from Hui Cha
"This hike offers some of the most beautiful scenery in the park, with the trail winding through narrow canyons and past towering hoodoos. The colors and shapes of the rock formations are absolutely stunning, and I love finding new angles and perspectives to photograph."
How to Access the Navajo Loop and Queen's Garden Trail
Directions:
- From Bryce Point, drive back to the Sunset Point parking area, where the trailhead is located.
Trail Details:
- Trail Length: 2.9 miles round-trip
- Elevation Gain: 600 feet
- Difficulty: Moderate
Photography Tips: For the best shots of the hoodoos, arrive mid-morning to catch the soft light as it illuminates the rock formations. Use a wide-angle lens to capture the full scale of the hoodoos, and experiment with different compositions to highlight the contrast between the rock formations and the surrounding landscape. For a more creative shot, try framing the hoodoos with the trees and vegetation that line the trail.
Alternative Activity: If the hike down into the Bryce Amphitheater is too challenging, consider exploring the shorter Rim Trail, which offers beautiful views of the hoodoos and the surrounding landscape without the need for a steep descent.
Afternoon: Scenic Drive to Zion National Park
Overview
In the afternoon, take a scenic drive to Zion National Park, the final destination on your journey through Utah's Big Five. This park is known for its towering cliffs, narrow canyons, and lush vegetation, all set against the backdrop of the red rock desert.
Tips from William
"The drive to Zion offers stunning views of the red rock landscape, with plenty of opportunities for photography along the way. Bring a wide-angle lens to capture the expansive vistas, but also keep a telephoto lens handy for zooming in on the details of the cliffs and canyons."
Insights from Hui Cha
"Driving through this landscape, you get a sense of the history and beauty of the land. The colors of the rock, the shapes of the formations, and the play of light and shadow create a sense of wonder and awe. It's a peaceful and inspiring way to spend the afternoon."
How to Access Zion National Park
Directions:
- From Bryce Canyon, take UT-12 south to US-89 south, then follow UT-9 west to the Zion National Park entrance.
Drive Details:
- Total Distance: 85 miles from Bryce Canyon to Zion
- Elevation Gain: Minimal (depending on the stops)
- Difficulty: Easy
Photography Tips: Stop frequently along the drive to capture different perspectives of the park's unique landscapes. Use a wide-angle lens to capture the expansive views, and switch to a telephoto lens to zoom in on the details of the cliffs and canyons.
Alternative Activity: If you have extra time, consider taking a detour to Coral Pink Sand Dunes State Park, which features rolling sand dunes and stunning views of the surrounding desert.
Evening: Sunset at Canyon Overlook
Overview
End your day with a visit to Canyon Overlook, one of the most famous viewpoints in Zion National Park. This overlook offers panoramic views of the lower Zion Canyon, where you can see the road winding through the canyon and the towering cliffs that make Zion so iconic.
Tips from William
"Canyon Overlook is a fantastic spot to capture the sunset, with wide, sweeping views of the canyon and the surrounding cliffs. Set up your tripod well before sunset to find the best angle, and use a wide-angle lens to capture the full scene. A graduated neutral density filter will help balance the exposure between the bright sky and the darker landscape."
Insights from Hui Cha
"Sunset at Canyon Overlook is one of the most beautiful experiences you can have in Zion. The way the light plays across the cliffs, casting long shadows and turning the rock a deep red, is truly magical. Bring a blanket and a warm drink, and take some time to simply sit and enjoy the moment."
How to Access Canyon Overlook
Directions:
- From the Zion Visitor Center, take the Zion-Mount Carmel Highway (UT-9) east for about 6 miles to the Canyon Overlook parking area. The trailhead is located just before the Zion-Mount Carmel Tunnel.
Trail Details:
- Trail Length: 1 mile round-trip
- Elevation Gain: Minimal
- Difficulty: Easy to Moderate
Photography Tips: For a stunning sunset shot, position yourself on the western side of the viewpoint to capture the last light of the day as it illuminates the cliffs and the lower Zion Canyon. Use a small aperture (f/16 or smaller) to keep the entire scene in focus, and experiment with different shutter speeds to capture the changing light.
Alternative Activity: If you prefer a less crowded spot for sunset, consider visiting the nearby Watchman Trail, a 3-mile round-trip hike that offers beautiful views of the Watchman, a prominent peak in Zion, and the surrounding landscape.
Day 5: Zion National Park – A Majestic Finale
Morning: Sunrise at Angels Landing
Overview
Begin your final day with a sunrise hike to Angels Landing, one of the most famous and thrilling hikes in Zion National Park. This challenging trail takes you to the top of a towering rock formation, where you'll be rewarded with panoramic views of Zion Canyon.
Tips from William
"The hike to Angels Landing is not for the faint of heart, but the views from the top are absolutely worth it. Start your hike early to avoid the crowds and to catch the sunrise from the summit. Bring a wide-angle lens to capture the expansive views of Zion Canyon, and a telephoto lens to zoom in on the details of the cliffs and the Virgin River below. Be sure to bring plenty of water and wear sturdy hiking shoes, as the trail is steep and exposed."
Insights from Hui Cha
"Reaching the summit of Angels Landing is an accomplishment you won't soon forget. The views from the top are breathtaking, with the entire canyon spread out below you and the towering cliffs rising up on either side. Take your time on the trail, and don't forget to stop and enjoy the views along the way."
How to Access Angels Landing
Directions:
- From the Canyon Overlook parking area, drive back to the Zion Visitor Center and take the Zion Shuttle to the Grotto shuttle stop, where the trailhead is located.
Trail Details:
- Trail Length: 5 miles round-trip
- Elevation Gain: 1,500 feet
- Difficulty: Strenuous
Photography Tips: For the best shots from the summit of Angels Landing, arrive early to capture the soft light as it illuminates the canyon. Use a wide-angle lens to capture the full scope of the views, and experiment with different compositions to highlight the contrast between the cliffs and the canyon floor. For a more creative shot, try using a telephoto lens to focus on the details of the rock formations and the Virgin River below.
Alternative Activity: If the hike to Angels Landing is too challenging or long, consider exploring the shorter but equally rewarding Canyon Overlook Trail. This 1-mile round-trip hike offers stunning views of the lower Zion Canyon and the surrounding cliffs.
Mid-Morning: Exploring the Emerald Pools
Overview
After the exhilarating hike to Angels Landing, take a more leisurely walk to the Emerald Pools, one of Zion's most popular and beautiful hikes. This trail takes you to a series of pools and waterfalls, set against the backdrop of Zion's towering cliffs.
Tips from William
"The Emerald Pools Trail is a great way to experience the beauty of Zion at a more relaxed pace. Bring a wide-angle lens to capture the full scale of the pools and waterfalls, but also keep a telephoto lens handy for zooming in on the details of the water and the surrounding vegetation. The light in the late morning is still good for photography, so take your time and enjoy the hike."
Insights from Hui Cha
"This hike offers some of the most beautiful scenery in Zion, with the trail winding through lush vegetation and past cascading waterfalls. The colors and shapes of the pools and the surrounding cliffs are absolutely stunning, and I love finding new angles and perspectives to photograph."
How to Access the Emerald Pools
Directions:
- From the Grotto shuttle stop, take the Zion Shuttle to the Zion Lodge shuttle stop, where the trailhead is located.
Trail Details:
- Trail Length: 3 miles round-trip
- Elevation Gain: 400 feet
- Difficulty: Easy to Moderate
Photography Tips: For the best shots of the Emerald Pools, arrive mid-morning to catch the soft light as it illuminates the pools and waterfalls. Use a wide-angle lens to capture the full scale of the pools, and experiment with different compositions to highlight the contrast between the water and the surrounding cliffs. For a more creative shot, try framing the pools with the trees and vegetation that line the trail.
Alternative Activity: If the hike to the Emerald Pools is too challenging, consider exploring the shorter Riverside Walk, which follows the Virgin River through a narrow canyon and offers beautiful views of the water and the surrounding cliffs.
Afternoon: Exploring the Narrows
Overview
In the afternoon, embark on one of Zion's most iconic adventures – the Narrows. This hike takes you into the heart of a narrow slot canyon, where you'll walk through the Virgin River as it winds its way between towering cliffs.
Tips from William
"Hiking the Narrows is a unique and unforgettable experience, offering some of the most dramatic scenery in Zion. Bring a waterproof camera or a waterproof case for your camera, as you'll be walking through water for much of the hike. Use a wide-angle lens to capture the full scale of the canyon, but also keep a telephoto lens handy for zooming in on the details of the cliffs and the river."
Insights from Hui Cha
"The Narrows is a place of incredible beauty and adventure. The cool water, the towering cliffs, and the sense of exploration make this a hike unlike any other. Take your time as you wade through the river, and don't forget to stop and enjoy the views along the way."
How to Access the Narrows
Directions:
- From the Zion Lodge shuttle stop, take the Zion Shuttle to the Temple of Sinawava shuttle stop, where the Riverside Walk trailhead is located. The Narrows begins at the end of the Riverside Walk.
Trail Details:
- Trail Length: Variable (up to 10 miles round-trip, depending on how far you want to go)
- Elevation Gain: Minimal
- Difficulty: Moderate to Strenuous
Photography Tips: For the best shots of the Narrows, use a waterproof camera or a waterproof case for your camera to protect it from the water. A wide-angle lens will allow you to capture the full scale of the canyon, and a polarizing filter can help reduce glare from the water. Experiment with different compositions to highlight the contrast between the cliffs and the river.
Alternative Activity: If hiking the Narrows is too challenging or not possible due to weather conditions, consider exploring the nearby Weeping Rock, a short but steep hike that takes you to a dripping alcove with beautiful views of the surrounding cliffs.
Evening: Sunset at the Watchman
Overview
End your five-day adventure with a sunset hike to the Watchman, one of the most iconic peaks in Zion National Park. This short but steep hike offers stunning views of the Watchman and the surrounding landscape, making it a perfect way to say goodbye to Utah's Big Five.
Tips from William
"The Watchman is a fantastic spot to capture the sunset, with wide, sweeping views of the surrounding landscape. Set up your tripod well before sunset to find the best angle, and use a wide-angle lens to capture the full scene. A graduated neutral density filter will help balance the exposure between the bright sky and the darker landscape."
Insights from Hui Cha
"Sunset at the Watchman is a moment of pure beauty and reflection. The colors of the sky, the stillness of the evening, and the grandeur of the landscape create a sense of peace and gratitude for the journey you've just completed. Bring a blanket and a warm drink, and take some time to simply sit and enjoy the moment."
How to Access the Watchman Trail
Directions:
- From the Temple of Sinawava shuttle stop, take the Zion Shuttle back to the Zion Visitor Center, where the trailhead is located.
Trail Details:
- Trail Length: 3 miles round-trip
- Elevation Gain: 368 feet
- Difficulty: Moderate
Photography Tips: For a stunning sunset shot, position yourself on the western side of the trail to capture the last light of the day as it illuminates the Watchman and the surrounding peaks. Use a small aperture (f/16 or smaller) to keep the entire scene in focus, and experiment with different shutter speeds to capture the changing light. If the conditions are right, consider staying after sunset to photograph the stars as they appear.
Alternative Activity: If the hike to the Watchman is too challenging, consider watching the sunset from the nearby Pa'rus Trail, a flat and easy walk that offers beautiful views of the Virgin River and the surrounding cliffs.
Conclusion: A Personal Reflection
As the last rays of sunlight faded from the sky and the stars began to emerge, Hui Cha and I stood quietly at the Watchman, reflecting on the incredible journey we had just completed. From the arches of Arches National Park to the canyons of Zion, each moment had been a reminder of the sheer power and beauty of Utah's Big Five.
These parks are more than just places to visit – they are places to connect with the natural world, to find peace and inspiration, and to create memories that will last a lifetime. As we packed up our gear and prepared to leave Zion, I felt a deep sense of gratitude for the time we had spent in these wild, untamed places. They had not only shown us the beauty of the land but had also brought us closer to each other and to the world around us.
Our journey through Utah's Big Five had come to an end, but the experiences we had shared would stay with us forever. And as we drove away from the red rock desert, I knew that we would return, drawn back by the promise of new adventures and the chance to explore even deeper into the heart of Utah's wilderness.

Step into a world of timeless beauty with our premium, oversized hardcover book - crafted for discerning collectors and anyone who values the power of art. Perfect for your coffee table, it's more than just a book; it's a conversation starter, a window into over 30 years of William's visionary photography.
Your Support Matters
Purchasing artwork from William Stanek's collection not only brings beauty into your life but also helps us continue to share. Thank you for supporting our creative journey!
Discover Reader Favorites: Must-See USA Itineraries for Monday
September 16, 2024

A 3-Day Journey Through Time and Stone: Exploring Arches and Canyonlands
Read More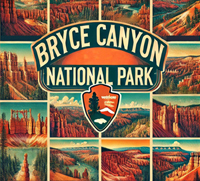
A 3-Day Journey Through Nature's Sculpted Masterpieces: Exploring Bryce Canyon and Zion
Read More
St. Thomas, St. John, and Virgin Islands National Park: A 5-Day Caribbean Adventure
Read More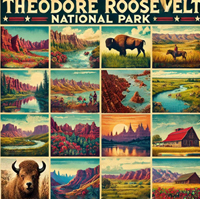
2-Day Journey into The Rugged Beauty of the Dakotas: Theodore Roosevelt and Badlands
Read MoreDiscover Your Next Great Escape: 1-5 Day Itineraries for All 63 US National Parks
Trending Today: Top National Park Guides
September 16, 2024

Island Wilderness: Isle Royale National Park
Read More
Water Wilderness: Voyageurs National Park
Read More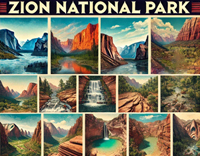
Desert Splendor: Zion National Park
Read More
Ancient Cultures: Mesa Verde National Park
Read MoreTop Picks for Your Next Adventure: Road Trips of the Day
September 16, 2024