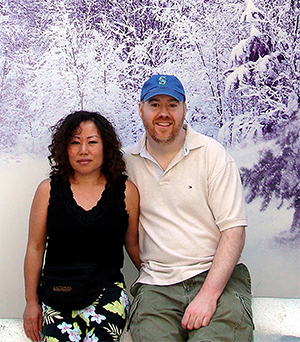
Embark on a journey curated by seasoned explorers William and Hui Cha Stanek, who have spent decades immersing themselves in the diverse landscapes of North America. These itineraries are more than just travel plans - they are thoughtfully crafted adventures designed to help you connect with the natural world, discover hidden gems, and create lasting memories.
National Parks Index | US Itineraries Index | American Roadtrips Index

Bring home a Bugville Critters book and watch as your child's love for reading and learning grows with every page. Hand-painted illustrations bring the heartwarming stories to life. Ask your librarian to add Bugville Critters to the library's digital collection today!
Discover William Stanek's Exclusive Art Collection
Explore and purchase the stunning art featured on this site. Own a piece of William Stanek's unique and captivating artwork today!
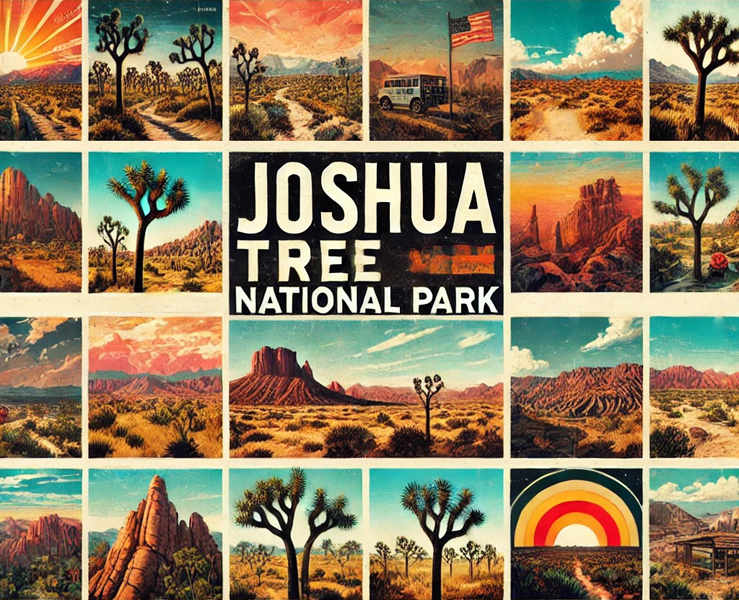
(June 7, 2025) A 5-Day Journey Through Southern California's National Parks: From Santa Monica to Joshua Tree, Death Valley, Sequoia, and Kings Canyon
Introduction: A Personal Journey Begins
William's Reflection on the Vast Wilderness of California
When Hui Cha and I set out on a road trip through California's national parks shortly after I got a new camera, we had little idea of how much the encounter would change us. Leaving behind the coastal breeze of Santa Monica, we drove inland, where the landscape transformed from the cool, oceanic blues to the stark, golden hues of the desert. Our journey would take us from the otherworldly terrain of Joshua Tree to the expansive emptiness of Death Valley, and finally, to the towering giants of Sequoia and Kings Canyon.
Each stop along the way felt like stepping into a new world – each with its own unique beauty, challenges, and rewards. It was a journey that brought us closer to the raw, untamed spirit of California's wilderness, and by the end of it, I felt a deeper connection to the land and to the simplicity of life on the road.
As we'd already made this trip before, this trip wasn't about checking off national parks from our list; it was about experiencing the full spectrum of California's natural beauty – from the hottest desert to the tallest trees. It was a journey that reminded us of the power of nature and the joy of exploration, one that we hope to share with you through this detailed itinerary.
Day 1: Santa Monica to Joshua Tree National Park
Morning: Depart from Santa Monica and Drive to Joshua Tree National Park
Overview
Your journey begins in Santa Monica, where the coastal vibes and sunny beaches slowly give way to the arid landscapes of the desert as you make your way to Joshua Tree National Park. The drive takes you east through the greater Los Angeles area, with the landscape gradually shifting from urban sprawl to open desert. Joshua Tree, known for its rugged rock formations and stark, twisted trees, is a haven for nature lovers, photographers, and rock climbers alike.
Tips from William
"Joshua Tree's unique landscape is a playground for photographers. Bring a wide-angle lens to capture the expansive desert views and a macro lens for the intricate details of the Joshua trees and cacti. The light is best in the early morning or late afternoon, so plan to arrive in time to take advantage of the golden hour."
Insights from Hui Cha
"Driving from Santa Monica to Joshua Tree, you can feel the city's energy fade as you enter the peaceful expanse of the desert. The sight of the first Joshua trees appearing along the horizon, the feel of the dry, warm air, and the anticipation of exploring one of California's most iconic landscapes make the drive an exciting start to your adventure."
How to Access Joshua Tree National Park
Directions:
- From Santa Monica, take I-10 East toward Palm Springs, then continue on CA-62 East toward Twentynine Palms, where you'll enter the park. The drive takes about 2.5 hours.
Park Details:
- Location: Joshua Tree, CA
- Difficulty: Easy to Moderate (depending on the trail)
Photography Tips: For the best shots, plan to arrive in Joshua Tree in the early morning when the sun is low in the sky. The soft light will accentuate the textures of the rock formations and the unusual shapes of the Joshua trees.
Alternative Activity: If the drive feels too long, consider stopping in Palm Springs for a quick break. You can explore the city's mid-century modern architecture or take a ride on the Palm Springs Aerial Tramway for stunning views of the surrounding desert and mountains.
Mid-Morning: Hike the Hidden Valley Trail
Overview
Once you've arrived at Joshua Tree National Park, start your exploration with a hike on the Hidden Valley Trail. This popular trail is relatively short and easy, making it perfect for a first taste of Joshua Tree's unique landscape. The trail takes you through a scenic valley surrounded by massive boulders and fascinating rock formations, making it a favorite among rock climbers and photographers alike.
Tips from William
"Hidden Valley is a fantastic spot for capturing the iconic scenery of Joshua Tree. Bring a wide-angle lens to encompass the vastness of the valley and the towering rocks, and consider using a polarizing filter to deepen the blue of the desert sky."
Insights from Hui Cha
"Hiking through Hidden Valley, you're enveloped by the dramatic rock formations and the quiet of the desert. The sight of the massive boulders stacked precariously, the feel of the warm sun on your skin, and the solitude of the desert make this hike an immersive experience in the heart of Joshua Tree."
How to Access the Hidden Valley Trail
Directions:
- The Hidden Valley Trailhead is located just off Park Boulevard, the main road through Joshua Tree National Park. Parking is available at the trailhead.
Trail Details:
- Trail Length: 1 mile loop
- Elevation Gain: Minimal
- Difficulty: Easy
Photography Tips: For the best shots, position yourself at one of the boulder overlooks in the mid-morning, when the light is still soft and the shadows are long, adding depth to your photos.
Alternative Activity: If the Hidden Valley Trail is crowded, consider hiking the nearby Barker Dam Trail, which offers a mix of desert and water views, with the potential for spotting wildlife like bighorn sheep.
Afternoon: Picnic at Keys View and Explore Skull Rock
Overview
After your hike, drive to Keys View, one of the most accessible and breathtaking viewpoints in Joshua Tree. From this vantage point, you can see the Coachella Valley, the San Andreas Fault, and, on clear days, even Mexico's Signal Mountain. It's a perfect spot for a picnic with panoramic views. After lunch, continue your exploration with a visit to Skull Rock, an iconic granite formation shaped like a skull by millions of years of erosion.
Tips from William
"Keys View is an ideal location for panoramic photography. Use a telephoto lens to capture the distant details of the Coachella Valley and the mountains beyond. At Skull Rock, a wide-angle lens will help you capture the unique shape of the rock and its surroundings."
Insights from Hui Cha
"Standing at Keys View, with the world spread out before you, is both humbling and exhilarating. The sight of the vast desert below, the sound of the wind whispering through the rocks, and the coolness of the high-altitude air make this viewpoint a highlight of the day."
How to Access Keys View and Skull Rock
Directions:
- From Hidden Valley, continue on Park Boulevard to reach Keys View. Skull Rock is located along the main road, Park Boulevard, between the Jumbo Rocks and Belle campgrounds.
Viewpoint and Trail Details:
- Keys View: Easy access, panoramic views
- Skull Rock: Located right off the road, a short walking path lets you explore the area
Photography Tips: For the best shots at Keys View, use a wide-angle lens to capture the sweeping vista, and don't forget a tripod for stability, especially if you're shooting in low light. At Skull Rock, consider shooting from a low angle to emphasize the size and shape of the formation.
Alternative Activity: If Keys View is too crowded, consider exploring the Cholla Cactus Garden, a unique area filled with dense clusters of cholla cacti that glow brilliantly during the golden hour.
Evening: Sunset at Ryan Mountain and Return to Santa Monica
Overview
End your day in Joshua Tree with a sunset hike up Ryan Mountain. This moderately challenging hike offers some of the best views in the park, with a 360-degree panorama of the surrounding desert and mountains. After the hike, return to Santa Monica for the night, reflecting on the day's adventures as the landscape transitions from desert to city.
Tips from William
"Ryan Mountain is a great location for sunset photography. Bring a tripod for long exposures and a telephoto lens to capture the distant mountain ranges as they're bathed in the warm glow of the setting sun."
Insights from Hui Cha
"Hiking up Ryan Mountain as the sun sets, you feel the desert cool down and the light change, transforming the landscape into a palette of warm colors. The sight of the sun dipping below the horizon, the sound of the desert quieting, and the sense of solitude make this a perfect way to end your day in Joshua Tree."
How to Access Ryan Mountain
Directions:
- The Ryan Mountain Trailhead is located on Park Boulevard, the main road through Joshua Tree National Park, and is easily accessible from other park highlights.
Trail Details:
- Trail Length: 3 miles round-trip
- Elevation Gain: 1,050 feet
- Difficulty: Moderate to Challenging
Photography Tips: For the best sunset shots, arrive at the summit well before sunset to set up your equipment and find the perfect angle. Use a graduated neutral density filter to balance the exposure between the bright sky and the darker desert.
Alternative Activity: If the hike to Ryan Mountain is too challenging, consider watching the sunset from the more accessible Hidden Valley picnic area, where you can still enjoy beautiful desert views without the climb.
Day 2: Joshua Tree to Death Valley National Park
Morning: Drive from Santa Monica to Death Valley National Park
Overview
On the second day of your journey, prepare for the striking contrast between the arid desert landscapes of Joshua Tree and the vast, otherworldly terrain of Death Valley National Park. The drive takes you north and east through some of the most remote and dramatic landscapes in California. Death Valley, known for its extreme temperatures and unique geological features, is one of the most fascinating and challenging environments in the United States.
Tips from William
"Death Valley's stark, wide-open spaces offer incredible opportunities for landscape photography. A wide-angle lens is essential to capture the vastness of the landscape, while a telephoto lens will help you focus on the dramatic details of the terrain, like sand dunes and salt flats."
Insights from Hui Cha
"Driving into Death Valley feels like entering another world. The sight of the barren mountains, the feel of the dry heat, and the sheer scale of the landscape remind you of the power and beauty of nature. It's a place that challenges you to look beyond the surface and appreciate the subtle nuances of the desert."
How to Access Death Valley National Park
Directions:
- From Santa Monica, take I-15 North toward Baker, then continue on CA-127 North to Death Valley Junction, where you'll enter the park. The drive takes about 4.5 hours.
Park Details:
- Location: Death Valley, CA
- Difficulty: Easy to Moderate (depending on the activity)
Photography Tips: For the best shots, aim to arrive in Death Valley in the late morning, when the sun is high enough to illuminate the landscape but not so harsh as to wash out the colors.
Alternative Activity: If you have extra time, consider stopping at the Mojave National Preserve along the way, where you can explore sand dunes, volcanic cinder cones, and Joshua tree forests in a less-visited desert environment.
Mid-Morning: Visit Zabriskie Point and Dante's View
Overview
Once in Death Valley, begin your exploration with a visit to Zabriskie Point, one of the most famous viewpoints in the park. From here, you'll have a panoramic view of the golden, undulating badlands that stretch out below you. After taking in the views at Zabriskie Point, continue to Dante's View, another breathtaking overlook that provides a sweeping view of the valley floor, the Panamint Mountains, and, on clear days, the distant Sierra Nevada.
Tips from William
"Zabriskie Point is ideal for capturing the surreal textures and colors of Death Valley's badlands. Use a wide-angle lens to capture the expansive view, and consider shooting in the early morning or late afternoon to take advantage of the soft, golden light."
Insights from Hui Cha
"Standing at Zabriskie Point, you feel as though you're looking out over another planet. The sight of the undulating badlands, the feel of the desert wind on your face, and the silence that envelops the landscape create a sense of awe and wonder."
How to Access Zabriskie Point and Dante's View
Directions:
- Zabriskie Point is located just off CA-190, about a 30-minute drive from the Furnace Creek Visitor Center. Dante's View is about a 45-minute drive from Zabriskie Point, accessible via Dante's View Road.
Viewpoint Details:
- Zabriskie Point: Short walk from the parking area to the viewpoint
- Dante's View: Easy access, panoramic views
Photography Tips: For the best shots at Zabriskie Point, position yourself on the overlook in the mid-morning to capture the light playing off the ridges and valleys. At Dante's View, use a telephoto lens to focus on the distant details of the valley floor and the mountains beyond.
Alternative Activity: If you prefer a more active morning, consider hiking the Golden Canyon Trail, which takes you through the colorful badlands that surround Zabriskie Point and offers a closer look at the unique geology of the area.
Afternoon: Explore Mesquite Flat Sand Dunes and Badwater Basin
Overview
After your morning of panoramic views, head to the Mesquite Flat Sand Dunes, one of the most accessible and photogenic dune fields in Death Valley. The dunes rise and fall like waves frozen in time, offering a unique opportunity for exploration and photography. Following your time at the dunes, visit Badwater Basin, the lowest point in North America at 282 feet below sea level. The vast salt flats of Badwater Basin stretch out as far as the eye can see, creating an otherworldly landscape that is both beautiful and stark.
Tips from William
"The Mesquite Flat Sand Dunes are a dream for landscape photographers. The interplay of light and shadow on the dunes creates endless opportunities for creative shots. At Badwater Basin, use a wide-angle lens to capture the vastness of the salt flats, and consider shooting from a low angle to emphasize the textures of the cracked salt."
Insights from Hui Cha
"Walking through the Mesquite Flat Sand Dunes, you feel like you've entered a sea of sand. The sight of the dunes stretching out before you, the sound of the wind shifting the sand, and the solitude of the desert make this a place of quiet contemplation. Badwater Basin, with its vast, white expanse, feels like the end of the earth – a place where time stands still and the beauty is found in the simplicity of the landscape."
How to Access Mesquite Flat Sand Dunes and Badwater Basin
Directions:
- The Mesquite Flat Sand Dunes are located near Stovepipe Wells, about a 30-minute drive from Dante's View. Badwater Basin is about an hour's drive from the dunes, along Badwater Road.
Dune and Basin Details:
- Mesquite Flat Sand Dunes: Easy access, explore at your own pace
- Badwater Basin: Easy access, short walk onto the salt flats
Photography Tips: For the best shots at the Mesquite Flat Sand Dunes, arrive in the early afternoon when the shadows are longest, creating dramatic patterns in the sand. At Badwater Basin, consider using a polarizing filter to reduce glare and enhance the contrast between the white salt and the blue sky.
Alternative Activity: If the dunes are too crowded, consider visiting the nearby Mosaic Canyon, where you can explore narrow, polished marble passages carved by ancient rivers.
Evening: Sunset at Artist's Palette and Overnight Stay in Furnace Creek
Overview
End your day with a visit to Artist's Palette, a series of hills in Death Valley that are vividly colored by various minerals. The best time to visit is at sunset when the colors are at their most vibrant. Afterward, head to Furnace Creek for an overnight stay. Furnace Creek offers a range of accommodations, from campgrounds to the more luxurious Inn at Death Valley, providing a perfect place to rest after a day of exploration.
Tips from William
"Artist's Palette is a feast for the eyes and the camera. Use a wide-angle lens to capture the full spectrum of colors, and consider bracketing your exposures to ensure you capture the range of light and shadows. A tripod will help stabilize your shots as the light fades."
Insights from Hui Cha
"Watching the sunset at Artist's Palette, with the hills ablaze in shades of pink, red, and green, feels like witnessing a natural masterpiece. The sight of the colors changing with the fading light, the quiet of the desert, and the sense of wonder at the beauty of the earth make this a perfect way to end your day in Death Valley."
How to Access Artist's Palette and Furnace Creek
Directions:
- Artist's Palette is located along Artist's Drive, a one-way loop road off Badwater Road, about a 30-minute drive from Badwater Basin. Furnace Creek is another 30 minutes from Artist's Palette.
Viewpoint and Lodging Details:
- Artist's Palette: Easy access, short walk from the parking area
- Furnace Creek: Range of accommodation options, including campgrounds and the Inn at Death Valley
Photography Tips: For the best shots at Artist's Palette, arrive about an hour before sunset to capture the changing light on the hills. A polarizing filter can help enhance the colors, and a small aperture (f/16 or smaller) will keep the entire scene in focus.
Alternative Activity: If Artist's Palette is too crowded, consider visiting Zabriskie Point again at sunset, where the badlands take on a different character in the softer light.
Day 3: Death Valley to Sequoia National Park
Morning: Drive to Sequoia National Park
Overview
On the third day of your journey, leave the desert behind as you make your way to the lush, mountainous landscapes of Sequoia National Park. The drive takes you west, back through the Mojave Desert and into the Sierra Nevada mountain range. Sequoia National Park is famous for its giant sequoias, some of the largest and oldest trees in the world, as well as its stunning mountain scenery.
Tips from William
"The drive from Death Valley to Sequoia offers a chance to capture the changing landscapes of California. Keep your camera ready as you transition from desert to mountains – there are plenty of opportunities to capture the diversity of the terrain."
Insights from Hui Cha
"The drive from Death Valley to Sequoia feels like a journey between worlds. As you leave the stark beauty of the desert behind, the landscape gradually transforms into lush forests and towering peaks. The anticipation of seeing the giant sequoias, the sense of moving from one extreme to another, makes this drive an exciting part of the adventure."
How to Access Sequoia National Park
Directions:
- From Furnace Creek, take CA-190 West to CA-99 North, then continue on CA-198 East into Sequoia National Park. The drive takes about 5.5 hours.
Park Details:
- Location: Sequoia, CA
- Difficulty: Easy to Moderate (depending on the activity)
Photography Tips: For the best shots, plan to arrive in Sequoia in the late morning or early afternoon, when the light is still soft and the shadows are not too harsh.
Alternative Activity: If you have extra time, consider stopping in the town of Visalia for a quick break and to stock up on supplies before heading into the mountains.
Mid-Morning: Visit the Giant Forest and See General Sherman
Overview
Once in Sequoia National Park, begin your exploration with a visit to the Giant Forest, home to some of the largest trees on earth. The highlight of the forest is the General Sherman Tree, the largest tree in the world by volume. A short, paved trail takes you from the parking area to the base of this colossal tree, where you can marvel at its immense size and age.
Tips from William
"The Giant Forest is a dream location for forest and nature photography. A wide-angle lens is essential for capturing the full height of the sequoias, and a tripod will help stabilize your shots in the low light of the forest. Consider using a small aperture (f/16 or smaller) to keep the entire scene in focus."
Insights from Hui Cha
"Standing at the base of General Sherman, you feel a deep sense of reverence for the natural world. The sight of the towering sequoias, the sound of the wind rustling through their branches, and the cool, earthy smell of the forest make this a place of quiet reflection and awe."
How to Access the Giant Forest and General Sherman
Directions:
- The Giant Forest is located along the Generals Highway, the main road through Sequoia National Park. The General Sherman Tree is easily accessible from a dedicated parking area off Wolverton Road.
Trail Details:
- Trail Length: 0.5 miles round-trip
- Elevation Gain: Minimal
- Difficulty: Easy
Photography Tips: For the best shots, arrive at the General Sherman Tree in the late morning, when the light filters softly through the forest canopy. A wide-angle lens will help you capture the full height and majesty of the sequoias.
Alternative Activity: If the General Sherman Tree area is too crowded, consider hiking the nearby Congress Trail, which offers a more secluded walk among some of the park's other giant sequoias.
Afternoon: Hike the Moro Rock Trail and Visit Crescent Meadow
Overview
After marveling at the giant sequoias, continue your exploration with a hike up Moro Rock, a granite dome that offers panoramic views of the surrounding mountains and valleys. The trail is short but steep, with a series of staircases leading to the summit. Afterward, visit Crescent Meadow, a beautiful, serene meadow surrounded by towering sequoias and often referred to as the "Gem of the Sierra."
Tips from William
"Moro Rock provides a unique opportunity for both landscape and panoramic photography. Use a wide-angle lens to capture the expansive views from the summit, and a polarizing filter to reduce glare and enhance the colors of the sky and mountains."
Insights from Hui Cha
"Hiking up Moro Rock is both challenging and rewarding. The sight of the mountains stretching out before you, the feel of the cool breeze at the summit, and the sense of accomplishment make this a must-do activity in Sequoia. Crescent Meadow, with its peaceful beauty and towering trees, offers a perfect contrast to the ruggedness of Moro Rock – a place to relax and reflect on the day's adventures."
How to Access Moro Rock and Crescent Meadow
Directions:
- Moro Rock is located along the Moro Rock/Crescent Meadow Road, just a short drive from the Giant Forest. Crescent Meadow is a short drive further down the same road.
Trail Details:
- Moro Rock Trail Length: 0.5 miles round-trip
- Elevation Gain: 300 feet
- Difficulty: Moderate (due to the steep climb)
Photography Tips: For the best shots at Moro Rock, plan your hike for the early afternoon when the light is still good but not too harsh. At Crescent Meadow, use a wide aperture to create a shallow depth of field, focusing on the meadow's vibrant wildflowers and the towering sequoias in the background.
Alternative Activity: If the climb up Moro Rock is too challenging, consider taking a leisurely stroll along the nearby Crescent Meadow Loop Trail, which offers beautiful views of the meadow and surrounding forest without the steep ascent.
Evening: Return to Lodgepole Village and Dinner
Overview
After a full day of exploring Sequoia National Park, return to Lodgepole Village, the park's main hub, for a relaxing evening. Lodgepole offers a variety of accommodations, from campgrounds to cabins, as well as a general store and a restaurant. Enjoy a hearty dinner, reflecting on the day's experiences in the tranquil setting of the Sierra Nevada.
Tips from William
"Lodgepole Village is a great spot for evening photography. Bring a portrait lens to capture the details of the cabins and surrounding forest, and a wide-angle lens for shots of the star-filled night sky."
Insights from Hui Cha
"Dinner in Lodgepole Village, surrounded by the quiet of the forest and the towering sequoias, is a perfect way to unwind after a day of adventure. The sight of the sun setting behind the mountains, the sound of the river flowing nearby, and the warmth of a good meal create a sense of peace and contentment."
How to Access Lodgepole Village
Directions:
- Lodgepole Village is located along the Generals Highway, about a 20-minute drive from Crescent Meadow. Parking is available near the lodge and restaurant.
Dining and Lodging Details:
- Location: Sequoia, CA
- Cuisine: American, farm-to-table, international
Photography Tips: For the best evening shots, position yourself along the river or in the meadow near Lodgepole Village, where you can capture the last light of the day on the surrounding peaks and trees. A tripod will help stabilize your camera for long exposures as the light fades.
Alternative Activity: If Lodgepole Village is too crowded, consider driving to the nearby Wuksachi Lodge, where you can enjoy a more upscale dining experience with equally stunning views of the surrounding mountains.
Day 4: Sequoia to Kings Canyon National Park
Morning: Drive to Kings Canyon National Park and Explore Grant Grove
Overview
On the fourth day of your journey, continue your exploration of California's giant trees with a visit to Kings Canyon National Park, home to some of the largest and oldest sequoias in the world. Start your day with a visit to Grant Grove, where you'll find the General Grant Tree, the second-largest tree on earth and known as the "Nation's Christmas Tree." The grove offers a variety of short, easy trails that take you through some of the most beautiful and accessible parts of the park.
Tips from William
"Grant Grove is another excellent location for forest photography. A wide-angle lens is essential for capturing the full height of the sequoias, and a macro lens will help you focus on the intricate details of the trees' bark and the forest floor."
Insights from Hui Cha
"Walking through Grant Grove, you feel a deep connection to the ancient world. The sight of the General Grant Tree, the sound of the wind in the treetops, and the smell of the pine needles underfoot make this a place of reverence and reflection – a reminder of the enduring power of nature."
How to Access Grant Grove
Directions:
- Grant Grove is located along the Generals Highway, about an hour's drive from Lodgepole Village. The grove is easily accessible from a parking area near the General Grant Tree.
Trail Details:
- Trail Length: 0.5 miles round-trip
- Elevation Gain: Minimal
- Difficulty: Easy
Photography Tips: For the best shots, plan to arrive at Grant Grove in the early morning, when the light filters softly through the forest canopy. A wide-angle lens will help you capture the majesty of the sequoias, while a small aperture (f/16 or smaller) will keep the entire scene in focus.
Alternative Activity: If Grant Grove is too crowded, consider exploring the nearby North Grove Loop, a less-visited area that offers equally stunning views of the sequoias and the surrounding forest.
Mid-Morning: Hike the Zumwalt Meadow Trail
Overview
After exploring Grant Grove, head deeper into Kings Canyon to hike the Zumwalt Meadow Trail, one of the most scenic and accessible trails in the park. This relatively short and easy hike takes you through a lush meadow surrounded by towering granite cliffs and dense forest, offering stunning views of the canyon and the Kings River.
Tips from William
"Zumwalt Meadow is perfect for landscape and nature photography. Use a wide-angle lens to capture the sweeping views of the meadow and surrounding cliffs, and a polarizing filter to enhance the colors of the sky and water."
Insights from Hui Cha
"Hiking through Zumwalt Meadow, with the Kings River flowing beside you and the granite cliffs towering above, feels like stepping into a natural sanctuary. The sight of the wildflowers in the meadow, the sound of the river rushing over the rocks, and the feel of the cool, fresh air create a deep sense of peace and connection to the natural world."
How to Access Zumwalt Meadow
Directions:
- The Zumwalt Meadow Trailhead is located along the Kings Canyon Scenic Byway, about an hour's drive from Grant Grove. Parking is available at the trailhead.
Trail Details:
- Trail Length: 1.5 miles round-trip
- Elevation Gain: Minimal
- Difficulty: Easy
Photography Tips: For the best shots, arrive at Zumwalt Meadow in the late morning when the light is still soft, and the meadow is bathed in warm, natural light. A wide-angle lens will help you capture the full beauty of the meadow and the surrounding canyon walls.
Alternative Activity: If the Zumwalt Meadow Trail is too crowded, consider hiking the nearby Roaring River Falls Trail, which offers a short, easy walk to a beautiful waterfall nestled within the canyon.
Afternoon: Visit the Cedar Grove Overlook and Picnic
Overview
After your hike, continue your journey deeper into Kings Canyon to the Cedar Grove Overlook, a stunning viewpoint that offers panoramic views of the canyon and the surrounding mountains. The overlook is accessible by a short, steep hike, but the views from the top are well worth the effort. After enjoying the views, find a peaceful spot for a picnic in Cedar Grove, where you can relax and take in the beauty of the canyon.
Tips from William
"Cedar Grove Overlook is ideal for panoramic photography. Use a wide-angle lens to capture the sweeping views of the canyon, and consider using a graduated neutral density filter to balance the exposure between the bright sky and the darker canyon floor."
Insights from Hui Cha
"Hiking to Cedar Grove Overlook, with the canyon unfolding before you, feels like discovering a hidden gem. The sight of the vast, open landscape, the feel of the warm sun on your skin, and the solitude of the mountains make this a place of quiet reflection and awe."
How to Access Cedar Grove Overlook
Directions:
- The Cedar Grove Overlook Trailhead is located near the Cedar Grove Visitor Center, about 45 minutes from Zumwalt Meadow. Parking is available at the trailhead.
Trail Details:
- Trail Length: 1 mile round-trip
- Elevation Gain: 500 feet
- Difficulty: Moderate to Challenging (due to the steep climb)
Photography Tips: For the best shots, plan your hike for the early afternoon when the light is still good but not too harsh. A wide-angle lens will help you capture the expansive views of the canyon and surrounding mountains.
Alternative Activity: If the hike to Cedar Grove Overlook is too challenging, consider taking a scenic drive along the Kings Canyon Scenic Byway, where you can stop at various viewpoints to enjoy the beauty of the canyon without the climb.
Evening: Return to Lodgepole Village and Stargazing
Overview
After a day of exploring Kings Canyon, return to Lodgepole Village for a relaxing evening. As night falls, take some time to stargaze in the clear mountain air. The high elevation and lack of light pollution make Sequoia and Kings Canyon one of the best places in California to observe the night sky. Lay back and watch as the stars come out, filling the sky with countless points of light.
Tips from William
"Stargazing in Sequoia and Kings Canyon is a magical experience. Bring a tripod and a wide-angle lens with a fast aperture (f/2.8 or faster) to capture the night sky. Consider using a high ISO setting to bring out the details of the Milky Way and other celestial objects."
Insights from Hui Cha
"Stargazing in the Sierra Nevada, with the Milky Way stretching out above you and the cool night air around you, is a moment of pure peace and wonder. The sight of the stars twinkling in the sky, the sound of the forest at night, and the sense of being connected to the universe create a perfect end to your day."
How to Access Lodgepole Village
Directions:
- Lodgepole Village is located along the Generals Highway, about an hour's drive from Cedar Grove. Parking is available near the lodge and campground.
Stargazing Details:
- Location: Sequoia, CA
- Difficulty: Easy
Photography Tips: For the best stargazing shots, find a location away from any artificial lights and set up your tripod in an open area with a clear view of the sky. Use a wide aperture and a long exposure to capture the stars and the Milky Way in all their glory.
Alternative Activity: If you prefer a more active evening, consider taking a night hike along one of the nearby trails, where you can enjoy the sounds of the forest and the stars above as you explore the wilderness in the dark.
Day 5: Return to Santa Monica via Kings Canyon
Morning: Scenic Drive Along the Generals Highway and Farewell to the Sierra
Overview
On your final day, take a leisurely drive back to Santa Monica, enjoying the scenic beauty of the Generals Highway as you leave Sequoia and Kings Canyon behind. The drive offers plenty of opportunities to stop and take in the views one last time before you descend from the mountains and head back toward the coast.
Tips from William
"The Generals Highway offers endless opportunities for scenic photography. Keep your camera handy to capture the changing landscapes as you drive, from the towering sequoias to the rolling foothills and beyond."
Insights from Hui Cha
"Driving along the Generals Highway, with the memories of your journey fresh in your mind, feels like saying goodbye to an old friend. The sight of the mountains fading in the rearview mirror, the feel of the road beneath your tires, and the anticipation of returning to the coast create a bittersweet end to your adventure."
How to Access the Generals Highway
Directions:
- The Generals Highway runs through Sequoia and Kings Canyon National Parks, connecting the parks to the town of Three Rivers and CA-198. Follow the highway south toward Visalia, where you'll rejoin CA-99 for the drive back to Santa Monica.
Drive Details:
- Location: Sequoia, CA
- Difficulty: Easy
Photography Tips: For the best shots, plan to stop at some of the scenic overlooks along the Generals Highway, where you can capture the beauty of the Sierra Nevada one last time. A wide-angle lens will help you capture the sweeping vistas, while a telephoto lens will allow you to focus on the details of the mountains and forests.
Alternative Activity: If you have extra time, consider taking a detour to the Giant Forest Museum, where you can learn more about the sequoias and the history of the park before heading back to the coast.
Mid-Morning: Visit Three Rivers and Lunch in Visalia
Overview
As you make your way back to Santa Monica, take a break in the town of Three Rivers, located just outside Sequoia National Park. Three Rivers is a charming small town known for its art galleries, shops, and proximity to the Kaweah River. After exploring Three Rivers, continue to the nearby city of Visalia for a relaxing lunch, where you can reflect on your journey through California's wild landscapes.
Tips from William
"Three Rivers is a great spot for capturing the charm of small-town California. Bring a portrait lens to capture the details of the shops and galleries, and a wide-angle lens for shots of the river and surrounding countryside."
Insights from Hui Cha
"Exploring Three Rivers, with its friendly atmosphere and beautiful surroundings, feels like a final embrace from the Sierra Nevada. The sight of the river flowing through town, the sound of the birds singing in the trees, and the warmth of the sun on your face make this a perfect place to pause and reflect on your journey."
How to Access Three Rivers and Visalia
Directions:
- Three Rivers is located just outside Sequoia National Park, along CA-198. Visalia is about a 30-minute drive further south along the same highway.
Town and Dining Details:
- Location: Three Rivers, CA
- Cuisine: American, farm-to-table, international
Photography Tips: For the best shots in Three Rivers, position yourself along the Kaweah River in the mid-morning to capture the soft light on the water and surrounding trees. In Visalia, focus on capturing the details of your lunch and the ambiance of the restaurant.
Alternative Activity: If you prefer a more active morning, consider taking a short hike along the Kaweah River Trail in Three Rivers, where you can enjoy beautiful views of the river and surrounding hills.
Afternoon: Return to Santa Monica and Farewell to the Mountains
Overview
After lunch, continue your drive back to Santa Monica, reflecting on the incredible journey you've just completed. As you return to the coast, take some time to appreciate the diversity of California's landscapes – from the deserts to the mountains to the sea. Once back in Santa Monica, end your trip with a relaxing stroll along the beach, where you can watch the sun set over the Pacific Ocean.
Tips from William
"The return drive to Santa Monica offers one last chance to capture the changing landscapes of California. Keep your camera handy for any final shots of the mountains, valleys, and coastline."
Insights from Hui Cha
"Returning to Santa Monica, with the memories of your journey fresh in your mind, feels like coming full circle. The sight of the ocean stretching out before you, the sound of the waves crashing on the shore, and the feel of the cool sea breeze create a perfect end to your adventure. It's a reminder that, no matter how far you travel, there's always something special about returning home."
How to Access Santa Monica
Directions:
- From Visalia, take CA-198 West to CA-99 South, then continue on I-5 South to Los Angeles. From there, follow the signs to Santa Monica via I-10 West. The drive takes about 3.5 hours.
Return Details:
- Location: Santa Monica, CA
- Difficulty: Easy
Photography Tips: For the best shots during your return to Santa Monica, consider stopping at one of the coastal viewpoints along the Pacific Coast Highway, where you can capture the beauty of the California coastline in the soft afternoon light.
Alternative Activity: If you have extra time, consider stopping in Los Angeles for a quick visit to Griffith Park, where you can enjoy panoramic views of the city and the Hollywood Hills before heading back to the coast.
Conclusion: A Personal Reflection
William's Reflection on the Journey
As we walked along the beach in Santa Monica, with the sun dipping below the horizon and the waves gently lapping at our feet, I couldn't help but reflect on the incredible journey we had just completed. Over the past five days, we had traversed some of the most diverse and beautiful landscapes that California has to offer – from the stark deserts of Joshua Tree and Death Valley to the towering giants of Sequoia and Kings Canyon.
But more than that, this journey had been a reminder of the power and beauty of the natural world, and the importance of taking the time to connect with it. Whether it was standing in awe beneath the General Sherman Tree, feeling the heat of the desert sun on our faces, or watching the stars come out in the clear mountain air, each moment had left a lasting impression on my heart.
Traveling through these wild places, I was reminded of the words of John Muir: "In every walk with nature, one receives far more than he seeks." As we returned to the hustle and bustle of city life, I knew that the memories of this journey would stay with me, a reminder of the peace, beauty, and wonder that can be found in the wilderness.

Step into a world of timeless beauty with our premium, oversized hardcover book - crafted for discerning collectors and anyone who values the power of art. Perfect for your coffee table, it's more than just a book; it's a conversation starter, a window into over 30 years of William's visionary photography.
Your Support Matters
Purchasing artwork from William Stanek's collection not only brings beauty into your life but also helps us continue to share. Thank you for supporting our creative journey!

Support The Lights of Paris by Robert Stanek, William Stanek's pen name! Through vivid historical detail and deeply moving character stories, Robert takes readers on an unforgettable journey through one of history’s most transformative times.
Discover Reader Favorites: Must-See USA Itineraries for Saturday
June 7, 2025
Exploring Mount Rainier and Olympic: A 3-Day Dual Adventure
Read More
Exploring Shenandoah and George Washington and Jefferson: A 3-Day Dual Adventure
Read More
A 2-Day Journey into the Fiery Heart of Northern California: Lassen Volcanic National Park and Lava Beds National Monument
Read More
2 Days Exploring Grand Canyon North Rim and Grand Canyon West: A Different Perspective on the Grand Canyon
Read MoreDiscover Your Next Great Escape: 1-5 Day Itineraries for All 63 US National Parks
Trending Today: Top National Park Guides
June 7, 2025
Underground Marvels: Carlsbad Caverns National Park
Read More
Ancient Cultures: Mesa Verde National Park
Read More
Mountain Majesty: Shenandoah National Park
Read More
Dazzling White Sands: White Sands National Park
Read MoreTop Picks for Your Next Adventure: Road Trips of the Day
June 7, 2025