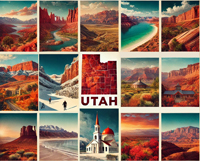
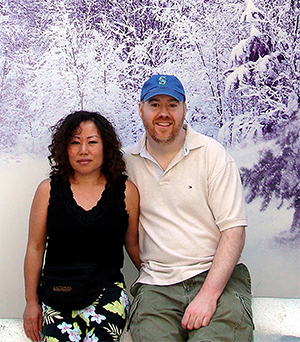
Embark on a journey curated by seasoned explorers William and Hui Cha Stanek, who have spent decades immersing themselves in the diverse landscapes of North America. These itineraries are more than just travel plans - they are thoughtfully crafted adventures designed to help you connect with the natural world, discover hidden gems, and create lasting memories.
National Parks Index | US Itineraries Index | American Roadtrips Index

Bring home a Bugville Critters book and watch as your child's love for reading and learning grows with every page. Hand-painted illustrations bring the heartwarming stories to life. Ask your librarian to add Bugville Critters to the library's digital collection today!
Discover William Stanek's Exclusive Art Collection
Explore and purchase the stunning art featured on this site. Own a piece of William Stanek's unique and captivating artwork today!
(March 12, 2025) Exploring Bryce Canyon and Zion National Parks
Introduction: A 3-Day Journey Through Nature's Sculpted Masterpieces
Personal Story: William's Unforgettable Morning at Bryce Canyon
One chilly autumn morning, before the world was fully awake, Hui Cha and I found ourselves at the rim of Bryce Canyon, wrapped in the stillness that only a place like this can offer. It was one of those mornings where the air was so crisp it felt like it could shatter. The stars above began to fade as the first hints of dawn lightened the sky. We stood there, sipping hot coffee from a thermos, watching the darkness slowly give way to a breathtaking array of colors. The hoodoos – those surreal, spire-like rock formations – began to emerge from the shadows, bathed in the soft, golden glow of the rising sun.
I had visited Bryce Canyon before, but this time felt different. Maybe it was the silence of the early morning, or perhaps it was the way the light seemed to dance across the landscape, bringing the hoodoos to life. As I set up my camera on the tripod, I couldn't help but feel a deep connection to this place – a connection that went beyond the beauty of the scenery. It was a moment of pure tranquility, where the world felt both vast and intimate, timeless yet fleeting. Hui Cha and I shared a look, knowing that this was a moment we would carry with us long after we had left the park.
About Bryce Canyon National Park
Bryce Canyon National Park, located in southern Utah, is renowned for its unique geological structures known as hoodoos. These towering spires of rock have been sculpted over millions of years through the forces of erosion, creating a landscape that feels otherworldly. Established as a national park in 1928, Bryce Canyon offers a blend of natural beauty and geological wonder that captivates every visitor who steps into its bounds.
Day 1:
Photography Tips: Capturing the Hoodoos at Sunrise
Morning: Sunrise at Sunrise Point
6:00 AM - Arrive at Sunrise Point
Overview: Begin your day with the iconic sunrise at Sunrise Point, one of the most popular and accessible spots in Bryce Canyon. The panoramic view from this vantage point offers an unparalleled perspective of the amphitheater, where the hoodoos glow in the soft light of dawn.
Tips from William: "Set up your tripod before the first light breaks. Use a wide-angle lens to capture the vastness of the amphitheater. As the sun rises, switch to a telephoto lens to zoom in on the details of the hoodoos – this is when their colors are most vibrant."
Insights from Hui Cha: "Dress warmly – mornings here can be quite cold, especially at higher elevations. A thermos of coffee or tea is essential, not just for warmth but to savor the quiet moment as the day begins."
How to Access Sunrise Point
Location: Sunrise Point is located along the rim of Bryce Canyon, near the Bryce Canyon Lodge. It's easily accessible by car, with parking available nearby.
Directions: From the Bryce Canyon Visitor Center, drive along the park road towards Bryce Canyon Lodge. Sunrise Point is clearly marked, with a short walk from the parking area to the viewpoint.
Trail Details: The walk to Sunrise Point is easy and short, less than a quarter mile on a well-maintained path. The elevation is moderate, but the trail can be a bit chilly in the early morning, so dress accordingly.
Photography Techniques:
-
Wide-Angle Magic: Start with a wide-angle lens (16-35mm) to capture the entire amphitheater. This allows you to frame the sunrise as it spreads across the landscape, highlighting the hoodoos' shadows and contours.
-
Telephoto Precision: As the sun rises, switch to a telephoto lens (70-200mm) to isolate individual hoodoos. Look for opportunities to capture the interplay of light and shadow on the spires.
-
Use of Filters: A graduated neutral density (ND) filter can help balance the exposure between the bright sky and the darker foreground, allowing you to capture the scene as you see it.
Mid-Morning: Navajo Loop Trail and Queens Garden Trail
8:00 AM - Begin Hike
Overview: After enjoying the sunrise, continue your adventure by exploring the Navajo Loop and Queens Garden Trails. This combination offers some of the best close-up views of Bryce Canyon's unique formations.
Tips from William: "This trail can be challenging, especially on the descent into the canyon. If you're not up for the entire loop, consider just doing the Queens Garden section – it's less strenuous but still offers incredible views."
Insights from Hui Cha: "Take your time on this hike. The best photos often come when you least expect them, so pause frequently to look around and appreciate the changing perspectives."
How to Access the Trail
Location: The trailhead for Navajo Loop is located near Sunset Point, which is a short drive or shuttle ride from Sunrise Point.
Directions: From Sunrise Point, drive or take the shuttle to Sunset Point. The trailhead is well-marked and begins at the rim.
Trail Details: The full loop is about 3 miles long, with a moderate difficulty level. The initial descent into the canyon can be steep, and the climb back out can be challenging. If you prefer an easier hike, consider the Queens Garden Trail alone, which is about 1.8 miles round trip and descends gradually into the amphitheater.
Photography Techniques:
-
Framing the Hoodoos: As you descend, use the natural curves of the trail to frame the hoodoos. This creates a sense of depth and scale in your photos.
-
Mid-Morning Light: The light during mid-morning is softer and less harsh, perfect for capturing the warm tones of the rocks. Use a polarizing filter to reduce glare and enhance the colors of the sky and rocks.
-
Details and Close-Ups: Switch to a macro lens or zoom in on the intricate textures of the rocks and the twisted shapes of the ancient trees that dot the landscape.
Afternoon: Scenic Drive and Inspiration Point
12:00 PM - Scenic Drive
Overview: After a morning of hiking, take a leisurely drive along the main park road, stopping at various viewpoints such as Bryce Point and Inspiration Point. These overlooks provide expansive views of the canyon and are perfect for midday photography.
Tips from William: "Midday light can be harsh, so look for areas where the hoodoos create their own shadows. This contrast can make for striking black-and-white photos."
Insights from Hui Cha: "Use this time to relax and absorb the vastness of Bryce Canyon. Pack a lunch and take it slow – there's no need to rush through these beautiful spots."
How to Access the Viewpoints
Location: The scenic drive is a straightforward route along the main park road, with clear signs leading to each viewpoint.
Directions: From Sunset Point, follow the park road south. Each viewpoint is well-marked, with parking areas and short trails leading to the best views.
Viewpoint Details: Inspiration Point is particularly known for its sweeping views of the amphitheater, while Bryce Point offers one of the highest overlooks in the park.
Photography Techniques:
-
Panoramic Shots: Use the panorama function on your camera or smartphone to capture the full scope of the amphitheater from Inspiration Point.
-
High-Contrast Scenes: Experiment with black-and-white photography to highlight the contrast between light and shadow on the rock formations.
-
Layered Compositions: Use the layers of hoodoos in the foreground and background to create depth in your photos.
Evening: Sunset at Sunset Point
5:00 PM - Sunset Viewing
Overview: Conclude your day at Sunset Point, where the golden hour transforms the canyon into a palette of warm colors. The hoodoos glow as the sun dips below the horizon, creating a serene and breathtaking experience.
Tips from William: "Arrive early to secure a good spot. As the sun sets, switch between wide-angle and telephoto lenses to capture both the grandeur and the details of the scene."
Insights from Hui Cha: "Bring a blanket or camp chair and take in the full sunset experience. This is the perfect time to reflect on the day and enjoy the beauty of Bryce Canyon."
How to Access Sunset Point
Location: Sunset Point is located near the Bryce Canyon Lodge, easily accessible from the main park road.
Directions: From any of the earlier viewpoints, drive or shuttle to Sunset Point. Parking can fill up quickly, so plan to arrive at least 30 minutes before sunset.
Viewpoint Details: Sunset Point offers a slightly different perspective of the amphitheater than Sunrise Point, with a focus on the area known as Silent City.
Photography Techniques:
-
Golden Hour Magic: Use a tripod to keep your shots steady as the light fades. The warm tones of the rocks are at their peak during this time, so make sure to capture a variety of angles.
-
Silhouettes: As the sun sets, experiment with silhouettes of the hoodoos against the colorful sky.
-
Long Exposures: After the sun has set, try longer exposures to capture the twilight and any lingering colors in the sky.
Day 2: A Deeper Dive Into Bryce Canyon
Morning: Fairyland Loop and Tower Bridge
6:30 AM - Sunrise at Fairyland Point
Overview: Begin your second day at Fairyland Point, a quieter alternative to the more popular Sunrise Point, yet offering equally stunning views. This overlook is the starting point for the Fairyland Loop, one of Bryce Canyon's most scenic and less-trafficked trails. The solitude here, combined with the breathtaking views at dawn, provides a tranquil and inspiring start to your day.
Tips from William: "The Fairyland Loop is a longer hike, about 8 miles, but it's one of the most rewarding hikes in the park. If you're not up for the full loop, hike to Tower Bridge, which is a beautiful rock formation that resembles London's famous landmark. This shorter hike is about 3 miles round trip and gives you a taste of the loop's scenery without the full commitment."
Insights from Hui Cha: "Fairyland Point is often overlooked by visitors, making it a peaceful spot for sunrise. Pack a light breakfast and a thermos of coffee to enjoy while watching the sun rise over the hoodoos. The colors here are just as vibrant as they are at Sunrise Point, but you'll likely have the view all to yourself."
How to Access Fairyland Point
Location: Fairyland Point is located near the northern entrance of Bryce Canyon National Park, slightly off the main park road.
Directions: From the Bryce Canyon Visitor Center, head north on UT-63. Turn left onto Fairyland Road and follow it to the end, where you'll find parking and the trailhead.
Trail Details: The Fairyland Loop is an 8-mile round trip hike with moderate difficulty due to its length and elevation changes. The trail descends into the canyon, winding through hoodoos, ridges, and colorful badlands. The hike to Tower Bridge is about 3 miles round trip and is less strenuous, making it a great alternative for those looking for a shorter, yet still scenic, adventure.
Photography Techniques:
-
Golden Hour Magic: The early morning light at Fairyland Point creates a warm, golden glow on the hoodoos. Use a wide-angle lens to capture the expansive views, and don't forget to include some foreground elements like trees or rocks to add depth to your shots.
-
Framing the Tower Bridge: When you reach Tower Bridge, experiment with framing techniques. Use the natural arches and rock formations to frame the structure, creating a sense of scale and context within the landscape.
-
Panoramic Shots: The Fairyland Loop offers numerous opportunities for panoramic photography. As you hike, look for high vantage points where you can capture the sweeping vistas of the Bryce Amphitheater.
Alternative Activity:
If an 8-mile hike isn't in your plans, consider driving to other viewpoints along the park road, such as Paria View or Rainbow Point. Both locations offer spectacular views without the need for a long hike. At Paria View, the low angle of the morning sun creates deep shadows, accentuating the layers of rock and making for dramatic photographs.
Mid-Morning: The Mossy Cave Trail and Waterfall
9:30 AM - Visit Mossy Cave Trail
Overview: After your morning hike, head to Mossy Cave, a hidden gem located outside the main area of Bryce Canyon. This short, easy hike leads you to a picturesque waterfall and a moss-covered cave, providing a different perspective on Bryce's diverse landscapes.
Tips from William: "Mossy Cave is perfect for a mid-morning outing. The trail is only 0.8 miles round trip, and it's mostly flat, making it accessible for all ages and fitness levels. The waterfall is especially beautiful in the spring and early summer when snowmelt from the higher elevations feeds the stream."
Insights from Hui Cha: "This is a great spot for families or those looking for a less strenuous activity. The sound of the waterfall is soothing, and the cave offers a cool respite from the sun. It's also a great place to try out some creative photography techniques with flowing water and reflections."
How to Access Mossy Cave Trail
Location: Mossy Cave Trail is located along UT-12, just outside the main entrance to Bryce Canyon National Park.
Directions: From Bryce Canyon's main entrance, drive north on UT-63 and turn right onto UT-12. The trailhead is about 4 miles down the road on the right side. There's a small parking area at the trailhead.
Trail Details: The Mossy Cave Trail is an easy 0.8-mile round trip hike that follows a stream to a small waterfall and a cave. The trail is well-maintained and suitable for all ages.
Photography Techniques:
-
Waterfall Long Exposure: Use a neutral density (ND) filter to slow down your shutter speed and create a silky effect on the waterfall. A shutter speed of 1-2 seconds is ideal for capturing the movement of the water while maintaining sharpness in the surrounding rocks.
-
Reflections and Symmetry: Look for opportunities to capture reflections of the surrounding landscape in the stream. The still waters near the cave can provide mirror-like reflections, creating a symmetrical composition that is visually pleasing.
-
Creative Compositions: The moss-covered cave offers a unique subject for creative compositions. Try shooting from inside the cave, framing the entrance with the lush greenery, or focusing on the textures of the moss against the rock.
Afternoon: Scenic Drive to Rainbow Point and Yovimpa Point
12:00 PM - Scenic Drive to Rainbow Point
Overview: Spend your afternoon exploring the southern end of Bryce Canyon National Park, where Rainbow Point and Yovimpa Point offer some of the most expansive views in the park. This area is often less crowded than the main amphitheater, allowing for a more peaceful experience.
Tips from William: "Rainbow Point is the highest elevation in the park at over 9,100 feet, so the views here are truly panoramic. On clear days, you can see for over 100 miles. It's a great spot for wide-angle landscape shots, but also for more intimate compositions focusing on the unique rock formations."
Insights from Hui Cha: "The air is thinner here due to the elevation, so take it easy if you're not used to high altitudes. Bring plenty of water and some snacks to enjoy while you take in the view. The Bristlecone Pine Trail, a short 1-mile loop, is a nice way to stretch your legs and explore the area."
How to Access Rainbow Point
Location: Rainbow Point is located at the end of the main park road, approximately 18 miles from the Bryce Canyon Visitor Center.
Directions: From the Visitor Center, drive south along the park road. The road ends at a large parking area at Rainbow Point. Yovimpa Point is a short walk from the parking lot.
Trail Details: The Bristlecone Pine Trail is a 1-mile loop that takes you through a forest of ancient bristlecone pines, some of which are over 1,600 years old. The trail is easy to moderate, with minimal elevation gain.
Photography Techniques:
-
Panoramic Landscapes: Use a wide-angle lens to capture the vastness of the landscape from Rainbow Point. On clear days, the distant horizons and layered rock formations create a stunning backdrop for panoramic shots.
-
Bristlecone Pines: These ancient trees are fascinating subjects for photography. Focus on the twisted, weathered bark and the contrast between the living and dead branches. A macro lens can help capture the intricate details of the bark and needles.
-
Telephoto Shots: Use a telephoto lens to isolate specific formations or details in the distance. The high vantage point allows you to zoom in on distant ridges and rock layers, highlighting their colors and textures.
Alternative Activity:
If you prefer a more relaxed afternoon, consider exploring the nearby Bryce Canyon Lodge. The lodge itself is a historic building with a rustic charm, offering a cozy place to relax with a cup of coffee. You can also visit the nearby General Store for snacks and souvenirs.
Evening: Stargazing at Bryce Canyon
8:00 PM - Stargazing at Bryce Amphitheater
Overview: Bryce Canyon is renowned for its dark skies, making it one of the best places in the country for stargazing. With minimal light pollution, the stars seem to blanket the sky, offering an awe-inspiring view of the Milky Way, constellations, and planets.
Tips from William: "Stargazing at Bryce is a magical experience. Bring a tripod and a wide-angle lens with a low f-stop to capture the night sky. A shutter speed of 20-30 seconds will allow you to capture the stars without too much movement."
Insights from Hui Cha: "Dress warmly – even in summer, the temperatures can drop significantly at night. Bring a blanket or a camping chair to sit back and enjoy the view. If you have a star chart or a stargazing app, it can enhance your experience by helping you identify the constellations."
How to Access Bryce Amphitheater for Stargazing
Location: Bryce Amphitheater is accessible from several viewpoints, including Sunrise Point, Sunset Point, and Inspiration Point.
Directions: Choose any of the amphitheater viewpoints for stargazing. Sunset Point is a popular choice due to its easy access and expansive views.
Stargazing Tips:
-
Wide-Angle Lens: Use a wide-angle lens with a low aperture (f/2.8 or lower) to capture as much of the sky as possible. This will allow you to include both the stars and the landscape in your composition.
-
Manual Focus: Set your camera to manual focus and adjust the focus to infinity. This will ensure that the stars appear sharp in your images.
-
Long Exposures: Experiment with long exposures (20-30 seconds) to capture the movement of the stars. If you want to create star trails, try exposures of several minutes or combine multiple shorter exposures in post-processing.
-
Light Painting: If you want to illuminate the foreground elements, such as the hoodoos or trees, try using a flashlight or headlamp to "paint" light onto the scene during the exposure. This can add a unique and artistic touch to your night photography.
Transition to Zion National Park: Day 3
After spending two days exploring the surreal landscapes of Bryce Canyon, it's time to transition to the equally breathtaking Zion National Park. Zion's towering sandstone cliffs, lush valleys, and diverse ecosystems offer a dramatic contrast to Bryce's hoodoos and open amphitheaters.
Personal Story: Hui Cha's First Drive into Zion
I'll never forget the first time I drove into Zion National Park. The road wound through the canyon, with each turn revealing a new and awe-inspiring view. As we approached the Zion-Mount Carmel Tunnel, the anticipation grew. Emerging from the tunnel, it felt like we had stepped into another world. The towering cliffs seemed to reach up to the sky, their red and orange hues glowing in the late afternoon sun. It was a humbling experience, one that reminded me of the incredible power of nature and the timeless beauty of these landscapes. Zion felt like a place where the earth's history was written in every rock layer, and I couldn't wait to explore it further.
Day 3: Exploring Zion National Park
Your first full day in Zion will be packed with exploration, from scenic drives to tranquil riverside walks, all while soaking in the park's magnificent landscapes.
Morning: The Narrows via Riverside Walk
6:30 AM - Start at the Temple of Sinawava
Overview: Begin your day with one of Zion's most iconic hikes, The Narrows. The hike starts with the Riverside Walk, a gentle trail that follows the Virgin River deep into the canyon. If you're feeling adventurous, continue into The Narrows, where you'll hike through the river itself, surrounded by towering canyon walls.
Tips from William: "The Narrows is a unique hiking experience, but it's not for everyone. If you're comfortable hiking in water and navigating slippery rocks, go for it! Otherwise, the Riverside Walk alone offers plenty of beautiful views and photo opportunities."
Insights from Hui Cha: "If you decide to hike The Narrows, rent water shoes and a walking stick from one of the outfitters in Springdale. These will make the hike much more comfortable and safe. Always check the weather forecast and water conditions before heading out – the Narrows can be dangerous during flash floods."
How to Access The Narrows via Riverside Walk
Location: The Narrows begins at the Temple of Sinawava, the last stop on the Zion Canyon Scenic Drive.
Directions: Drive or take the shuttle to the Temple of Sinawava. The Riverside Walk is an easy 1-mile trail that leads to the entrance of The Narrows.
Trail Details: The Riverside Walk is a 2-mile round trip, flat, and paved trail suitable for all ages. If you choose to enter The Narrows, the hike becomes more challenging as you wade through the river. The distance you cover in The Narrows is up to you, but even a short venture into the canyon is rewarding.
Photography Techniques:
-
Long Exposures in The Narrows: Use a tripod and a polarizing filter to reduce glare on the water and enhance the colors of the canyon walls. Experiment with long exposures to create a silky effect on the flowing water.
-
Framing the Canyon: The towering walls of The Narrows provide natural frames for your photos. Look for opportunities to capture the contrast between the dark canyon and the bright sky above.
-
Reflections and Textures: The river and wet rocks in The Narrows offer beautiful reflections and textures. Use a macro lens to capture the intricate details of the water-worn stones and the subtle patterns in the rock walls.
Alternative Activity:
If wading through The Narrows isn't your style, consider a more relaxed morning by visiting the Human History Museum near the park entrance. The museum offers fascinating exhibits on the cultural history of Zion, from Native American inhabitants to early pioneers. It's a great way to gain a deeper understanding of the park's significance before heading out to explore more of its natural wonders.
Mid-Morning: Pa'rus Trail and Lower Emerald Pools
9:30 AM - Pa'rus Trail Walk
Overview: After exploring The Narrows or the museum, take a leisurely walk along the Pa'rus Trail. This paved, accessible trail follows the Virgin River and offers beautiful views of the surrounding cliffs. It's a great spot for bird watching and capturing the reflections of the cliffs in the river.
Tips from William: "The Pa'rus Trail is an easy walk, perfect for mid-morning when the light is still soft. The trail is great for photographing wildlife, so keep your camera ready for unexpected encounters."
Insights from Hui Cha: "The Pa'rus Trail is also one of the few trails in Zion that allows bikes, so if you're up for it, rent a bike and enjoy a leisurely ride along the river."
How to Access Pa'rus Trail
Location: The Pa'rus Trail begins at the South Campground and follows the Virgin River through the canyon.
Directions: Start the trail near the Visitor Center or South Campground. It's well-marked and easy to follow.
Trail Details: The Pa'rus Trail is a 3.5-mile round trip, flat and paved trail that is accessible to all ages and abilities. It's a great option for families, cyclists, and those looking for an easy, scenic walk.
Photography Techniques:
-
Wildlife and Reflections: Keep your camera ready for wildlife, especially early in the morning when animals are more active. The still waters of the Virgin River offer beautiful reflections of the surrounding cliffs, so look for opportunities to capture these scenes.
-
Golden Light: The cliffs along the Pa'rus Trail catch the morning light beautifully. Use this golden light to highlight the textures and colors of the sandstone.
-
Wide-Angle and Close-Ups: Switch between wide-angle shots to capture the expansive views of the canyon and close-ups of the riverbank's vegetation and wildlife.
Late Morning: Lower Emerald Pools
11:00 AM - Hike to Lower Emerald Pools
Overview: Continue your exploration with a short hike to the Lower Emerald Pools. This popular trail takes you to a serene pool beneath a cascading waterfall, offering a cool and refreshing spot to relax and enjoy the natural beauty.
Tips from William: "The Lower Emerald Pool is a great place to experiment with photographing waterfalls. Use a slow shutter speed to create a silky effect on the water. The light can be tricky here, so consider using a tripod and a polarizer to get the best results."
Insights from Hui Cha: "This is a great trail for families or anyone looking for an easy hike with rewarding views. The sound of the waterfall and the cool shade make it a perfect spot to relax and enjoy a mid-morning break."
How to Access Lower Emerald Pools
Location: The trailhead for the Lower Emerald Pools is located across from the Zion Lodge on the Zion Canyon Scenic Drive.
Directions: Drive or take the shuttle to the Zion Lodge. The trailhead is clearly marked and begins with a paved path.
Trail Details: The Lower Emerald Pools Trail is an easy 1.2-mile round trip hike with minimal elevation gain. The path is paved and well-maintained, making it accessible for most visitors.
Photography Techniques:
-
Waterfall Effects: Use a tripod and a neutral density (ND) filter to slow down your shutter speed and capture the motion of the waterfall. Experiment with different exposure times to achieve the desired effect.
-
Framing the Pool: The Lower Emerald Pool offers natural framing opportunities with the surrounding trees and rock walls. Use these elements to create a sense of depth in your photos.
-
Close-Ups of Flora: The shaded, moist environment around the pool is home to a variety of plants. Use a macro lens to capture the details of ferns, moss, and other vegetation.
Afternoon: Scenic Drive to Kolob Canyons
1:00 PM - Lunch at Zion Lodge
Overview: After your morning hikes, take a break for lunch at the Zion Lodge. The lodge's restaurant offers a variety of meals, with outdoor seating that provides beautiful views of the surrounding cliffs.
Tips from William: "The outdoor seating at the lodge is perfect for a relaxed lunch. Bring your camera along to capture candid shots of the lodge's rustic architecture against the backdrop of the canyon."
Insights from Hui Cha: "After a busy morning, this is a great time to slow down and enjoy the scenery. The lodge is a peaceful spot to recharge before continuing your exploration of Zion."
How to Access Zion Lodge
Location: Zion Lodge is located about halfway along the Zion Canyon Scenic Drive, making it easily accessible from most of the park's major attractions.
Directions: Drive or take the shuttle to the lodge. Parking is available for guests, and the shuttle stops directly in front of the lodge.
Lunchtime Photography Techniques:
-
Candid Shots: Capture the atmosphere of the lodge with candid shots of fellow travelers, the staff, and the surrounding environment. Look for opportunities to photograph the interaction between people and the landscape.
-
Architecture and Landscape: The lodge's rustic architecture blends beautifully with the natural surroundings. Use a wide-angle lens to capture the building within the context of the canyon, highlighting the harmony between human-made structures and nature.
Afternoon: Kolob Canyons Scenic Drive
2:30 PM - Scenic Drive to Kolob Canyons
Overview: After lunch, take a scenic drive to the lesser-known Kolob Canyons, located in the northwest corner of Zion National Park. This area offers stunning red rock cliffs, deep canyons, and fewer crowds, making it a peaceful and visually rewarding afternoon excursion.
Tips from William: "Kolob Canyons is a photographer's dream, especially in the afternoon when the light is softer. The red cliffs here are more vibrant and dramatic, offering incredible contrast against the blue sky."
Insights from Hui Cha: "This is a quieter part of the park, perfect for those who want to escape the crowds. Take your time exploring the viewpoints, and don't forget to bring water and snacks – there are no services out here."
How to Access Kolob Canyons
Location: Kolob Canyons is located about 40 miles northwest of Zion Canyon, accessible via I-15.
Directions: From Zion Canyon, drive north on UT-9 to I-15. Take I-15 north to exit 40 for Kolob Canyons. The visitor center is just off the exit, and the scenic drive begins there.
Scenic Drive Details: The Kolob Canyons Scenic Drive is a 5-mile road that climbs into the canyon, offering several overlooks with breathtaking views. The road is paved and suitable for all vehicles.
Photography Techniques:
-
Golden Hour Shots: The late afternoon light casts a warm glow on the red cliffs of Kolob Canyons. Use this time to capture the vibrant colors and deep shadows that highlight the canyon's textures.
-
Telephoto Compositions: Use a telephoto lens to focus on specific rock formations and distant peaks. The compressed perspective will emphasize the height and grandeur of the cliffs.
-
Panoramic Views: The overlooks along the drive offer expansive views of the canyons. Use the panorama function on your camera or smartphone to capture the full scope of the landscape.
Evening: Sunset at Kolob Canyons Viewpoint
5:30 PM - Sunset Viewing
Overview: Conclude your day with a sunset view at Kolob Canyons Viewpoint, the last overlook on the scenic drive. This spot offers a panoramic view of the canyons, with the setting sun casting a golden light on the red rock walls.
Tips from William: "Sunset at Kolob Canyons is a serene experience. The light here is magical, turning the cliffs into a fiery red as the sun dips below the horizon. Use a tripod to capture the changing light and consider bracketing your exposures to create HDR images that capture the full dynamic range."
Insights from Hui Cha: "Bring a jacket – the temperature can drop quickly as the sun sets. This is a great time to reflect on your day and take in the quiet beauty of Zion's less-traveled areas."
How to Access Kolob Canyons Viewpoint
Location: Kolob Canyons Viewpoint is at the end of the Kolob Canyons Scenic Drive.
Directions: Continue along the Kolob Canyons Scenic Drive to the last viewpoint. There's a parking area with plenty of space to set up for sunset photography.
Photography Techniques:
-
HDR Photography: Use exposure bracketing to capture multiple exposures of the same scene. This technique is especially useful for sunset shots where the contrast between the bright sky and the darker landscape can be challenging to balance.
-
Silhouettes: As the sun sets, try capturing silhouettes of the cliffs against the colorful sky. This technique creates a dramatic effect, highlighting the shape and scale of the landscape.
-
Star Trails: After the sun has set, consider staying for some night photography. The clear skies and minimal light pollution in Kolob Canyons make it a great place for capturing star trails or even the Milky Way.
Conclusion: A Dual Adventure Across Utah's Natural Wonders
Personal Reflection: Hui Cha's Closing Thoughts on Bryce and Zion
As our journey through Bryce Canyon and Zion National Parks came to an end, I found myself reflecting on the contrasts and connections between these two incredible landscapes. Bryce, with its surreal hoodoos and wide-open spaces, felt like a place where time had stood still – where the earth's history was laid bare in the layers of rock. Zion, on the other hand, felt alive and immediate, with its towering cliffs and lush valleys pulsing with life and energy. Together, these parks offered a dual adventure that was both humbling and exhilarating, reminding us of the beauty and power of the natural world.
Whether you're drawn to the quiet solitude of Bryce's amphitheaters or the dynamic landscapes of Zion's canyons, these parks have something to offer every traveler. Take your time, immerse yourself in the experience, and let the landscapes speak to you. And as you explore these incredible places, remember that the journey is just as important as the destination. Every sunrise, every hike, every quiet moment by the river is a part of the adventure, a part of the story that you'll carry with you long after you've left the parks behind.
Next Steps: Continuing Your Exploration
With Bryce and Zion behind you, the possibilities for further exploration are endless. Whether you choose to continue your journey through Utah's Mighty 5 National Parks, or venture into neighboring states for more adventures, remember to take the time to connect with each place you visit. Every park, every landscape has its own story to tell, and the more you listen, the richer your journey will be.
Happy adventuring!

Step into a world of timeless beauty with our premium, oversized hardcover book - crafted for discerning collectors and anyone who values the power of art. Perfect for your coffee table, it's more than just a book; it's a conversation starter, a window into over 30 years of William's visionary photography.
Your Support Matters
Purchasing artwork from William Stanek's collection not only brings beauty into your life but also helps us continue to share. Thank you for supporting our creative journey!

Support The Lights of Paris by Robert Stanek, William Stanek's pen name! Through vivid historical detail and deeply moving character stories, Robert takes readers on an unforgettable journey through one of history’s most transformative times.
