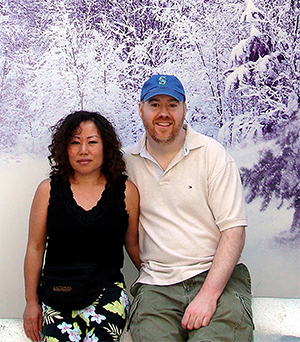
Embark on a journey curated by seasoned explorers William and Hui Cha Stanek, who have spent decades immersing themselves in the diverse landscapes of North America. These itineraries are more than just travel plans - they are thoughtfully crafted adventures designed to help you connect with the natural world, discover hidden gems, and create lasting memories.
National Parks Index | US Itineraries Index | American Roadtrips Index

Bring home a Bugville Critters book and watch as your child's love for reading and learning grows with every page. Hand-painted illustrations bring the heartwarming stories to life. Ask your librarian to add Bugville Critters to the library's digital collection today!
Discover William Stanek's Exclusive Art Collection
Explore and purchase the stunning art featured on this site. Own a piece of William Stanek's unique and captivating artwork today!
(March 13, 2025) The Majestic Northern Rockies: A 5-Day Journey Through Theodore Roosevelt National Park, Glacier National Park, and Hidden Gems Along the Way
Introduction: A Journey Through the Heart of the American Wilderness
There's something deeply profound about the landscapes of the Northern Rockies, where sweeping prairies meet towering peaks, and the rugged beauty of the wilderness is matched only by its sheer vastness. This five-day journey will take you through some of the most iconic and awe-inspiring landscapes in the American West, starting with the rolling hills and rich history of Theodore Roosevelt National Park in North Dakota and culminating in the breathtaking alpine vistas of Glacier National Park in Montana.
Along the way, we'll explore hidden gems and noteworthy stops that provide a deeper connection to the land, its history, and its people. Whether you're gazing out over the endless plains, hiking through pristine forests, or standing in awe beneath towering mountains, this journey promises to be one of discovery, reflection, and unforgettable experiences.
Join us as we embark on a journey through the heart of the American wilderness, where every day brings new adventures and every moment is a reminder of the incredible beauty and diversity of our natural world.
Day 1: Theodore Roosevelt National Park – Exploring the Badlands
Morning: Sunrise at Painted Canyon Overlook
Overview
Begin your journey with a sunrise visit to the Painted Canyon Overlook, one of the most breathtaking vistas in Theodore Roosevelt National Park. The overlook offers stunning views of the park's rugged badlands, with their layered rock formations and deep ravines. Watching the sunrise here is a peaceful and awe-inspiring experience, as the first light of the day illuminates the landscape in shades of pink, orange, and gold.
Tips from William
"The Painted Canyon Overlook is a fantastic spot for sunrise photography. Bring a tripod and a wide-angle lens to capture the full scope of the canyon, and consider using a graduated neutral density filter to balance the exposure between the bright sky and the darker landscape. The best light for photography is just after sunrise when the colors are most vibrant."
Insights from Hui Cha
"Arriving at the Painted Canyon Overlook before dawn allows you to experience the park in its quietest and most serene moments. The stillness of the morning, the crisp air, and the sight of the sun slowly rising over the badlands create a sense of calm and connection to nature."
How to Access Painted Canyon Overlook
Directions:
- The Painted Canyon Overlook is located just off I-94 at exit 32, near Medora, North Dakota. The overlook is part of the Painted Canyon Visitor Center, which offers parking and restrooms.
Viewpoint Details:
- Location: Theodore Roosevelt National Park, ND
- Elevation Gain: Minimal
- Difficulty: Easy
Photography Tips: For the best shots at the Painted Canyon Overlook, position yourself along the rim to capture the sweeping views of the badlands below. Use a small aperture (f/16 or smaller) to keep the entire scene in focus, and experiment with different compositions to highlight the layers and textures of the rock formations.
Alternative Activity: If an early morning visit to the Painted Canyon Overlook sounds too demanding, consider visiting later in the morning when the light is still good for photography, and you can explore the nearby Painted Canyon Nature Trail, a short hike that offers equally stunning views.
Mid-Morning: Exploring the South Unit Scenic Loop Drive
Overview
After your sunrise experience, take a leisurely drive along the South Unit Scenic Loop, a 36-mile loop that winds through the heart of Theodore Roosevelt National Park's South Unit. The drive offers breathtaking views of the park's badlands, prairies, and river valleys, with numerous pullouts where you can stop to take in the scenery and capture photos.
Tips from William
"The South Unit Scenic Loop is perfect for landscape and wildlife photography. Bring a telephoto lens to capture close-up shots of the bison, pronghorn, and wild horses that roam the park, and a wide-angle lens for landscape shots that include the badlands and river valleys. The best light for photography is in the mid-morning when the sun is high enough to illuminate the landscape but not too harsh."
Insights from Hui Cha
"Driving the South Unit Scenic Loop is a journey through one of the most beautiful and rugged landscapes in North Dakota. The sight of the badlands from the road, the sound of the wind in the grass, and the views of the wildlife create a sense of connection to the land and the natural world."
How to Access the South Unit Scenic Loop
Directions:
- The South Unit Scenic Loop begins at the South Unit Visitor Center in Medora, North Dakota. The loop is well-marked and offers several pullouts for scenic views and wildlife viewing.
Scenic Drive Details:
- Location: Theodore Roosevelt National Park, ND
- Difficulty: Easy (drive with short walks)
Photography Tips: For the best wildlife shots, focus on capturing the animals in their natural habitat, with the badlands as a backdrop. Use a telephoto lens to zoom in on the details, and a tripod or monopod to stabilize your camera for sharp images.
Alternative Activity: If driving the entire loop sounds too long, consider stopping at the Wind Canyon Trail, a short hike that offers beautiful views of the Little Missouri River and the surrounding badlands.
Afternoon: Hiking the Wind Canyon Trail
Overview
In the afternoon, stretch your legs with a hike on the Wind Canyon Trail, a short but scenic trail that offers stunning views of the Little Missouri River and the surrounding badlands. The trail follows the rim of a canyon, with several overlooks that provide perfect spots for photography and wildlife viewing.
Tips from William
"The Wind Canyon Trail is perfect for landscape photography. Bring a wide-angle lens to capture the expansive views of the river and badlands, and a telephoto lens for close-up shots of the plants and wildlife. The best light for photography is in the late afternoon when the sun is low in the sky and the shadows are long."
Insights from Hui Cha
"Hiking the Wind Canyon Trail is a peaceful and inspiring experience. The sight of the river from the trail, the sound of the wind in the canyon, and the views of the badlands create a sense of connection to the land and the natural world."
How to Access the Wind Canyon Trail
Directions:
- The Wind Canyon Trailhead is located along the South Unit Scenic Loop, about 6 miles from the South Unit Visitor Center. The trail is well-marked and easy to follow.
Trail Details:
- Trail Length: 0.4 miles round-trip
- Elevation Gain: Minimal
- Difficulty: Easy
Photography Tips: For the best shots along the Wind Canyon Trail, focus on capturing the contrast between the rugged badlands and the winding river. A tripod can help stabilize your camera for sharp images, especially in the low light under the canyon walls.
Alternative Activity: If the Wind Canyon Trail sounds too short, consider exploring the longer Jones Creek Trail, a 4-mile round-trip hike that offers beautiful views of the park's badlands and the chance to see wildlife.
Evening: Sunset at Buck Hill
Overview
End your day with a sunset visit to Buck Hill, the highest point in Theodore Roosevelt National Park. The hill offers panoramic views of the park's badlands, prairies, and river valleys, making it a perfect spot to watch the sun set over the rugged landscape.
Tips from William
"Buck Hill is a fantastic spot for sunset photography. Bring a wide-angle lens to capture the full scope of the landscape, and consider using a graduated neutral density filter to balance the exposure between the bright sky and the darker land. The best light for photography is in the late evening when the sun is low in the sky and the shadows are long."
Insights from Hui Cha
"Watching the sunset from Buck Hill is a peaceful and awe-inspiring experience. The colors of the sky, the stillness of the badlands, and the sound of the wind create a sense of calm and connection to nature. It's a perfect way to end the day."
How to Access Buck Hill
Directions:
- Buck Hill is located along the South Unit Scenic Loop, about 15 miles from the South Unit Visitor Center. A short, steep road leads to the parking area near the summit.
Viewpoint Details:
- Location: Buck Hill, Theodore Roosevelt National Park, ND
- Elevation Gain: Minimal (from the parking area)
- Difficulty: Easy
Photography Tips: For a stunning sunset shot, position yourself on the western side of the hill to capture the last light of the day as it illuminates the badlands and surrounding landscape. Use a small aperture (f/16 or smaller) to keep the entire scene in focus, and experiment with different compositions to highlight the layers and textures of the land.
Alternative Activity: If watching the sunset from Buck Hill sounds too isolated, consider heading to the nearby River Bend Overlook, where you can enjoy equally beautiful views of the Little Missouri River and the surrounding badlands.
Day 2: Journey to Glacier National Park – Hidden Gems Along the Way
Morning: Departure from Theodore Roosevelt National Park
Overview
Start your second day with an early departure from Theodore Roosevelt National Park as you make your way westward toward Glacier National Park in Montana. The drive will take you through the rolling plains and small towns of North Dakota and eastern Montana, offering plenty of opportunities to explore hidden gems and noteworthy stops along the way.
Mid-Morning: Explore the Fort Union Trading Post National Historic Site
Overview
One of the most interesting stops along your journey is the Fort Union Trading Post National Historic Site, located on the border between North Dakota and Montana. This reconstructed trading post was once the most important fur trading post on the Upper Missouri River and played a key role in the history of the American West. The site offers a fascinating glimpse into the lives of traders, Native Americans, and explorers who passed through this region in the 19th century.
Tips from William
"Fort Union is a great spot for historic and documentary photography. Bring a wide-angle lens to capture the full scope of the fort and surrounding landscape, and a telephoto lens for close-up shots of the artifacts and exhibits. The best light for photography is in the mid-morning when the sun is high enough to illuminate the fort but not too harsh."
Insights from Hui Cha
"Exploring Fort Union Trading Post is a journey through the history of the American West. The sight of the old fort, the sound of the wind on the plains, and the stories of the people who lived and worked here create a sense of connection to the past and the challenges of life on the frontier."
How to Access Fort Union Trading Post
Directions:
- Fort Union Trading Post is located near Williston, North Dakota, just off ND-1804. The site is easily accessible by car, with parking available near the visitor center.
Site Details:
- Location: Fort Union Trading Post National Historic Site, ND/MT
- Difficulty: Easy (short walk from the parking area)
Photography Tips: For the best shots at Fort Union, focus on capturing the texture and details of the reconstructed buildings and the surrounding landscape. A tripod can help stabilize your camera for sharp images, especially in the low light inside the fort.
Alternative Activity: If exploring Fort Union sounds too time-consuming, consider stopping at the nearby Missouri-Yellowstone Confluence Interpretive Center, which offers beautiful views of the Missouri and Yellowstone rivers and informative exhibits about the history of the region.
Afternoon: Lunch in Lewistown, Montana
Overview
Continue your journey westward, stopping for lunch in the small town of Lewistown, Montana. Nestled in the heart of the state, Lewistown is a charming town with a rich history and a strong sense of community. Take some time to explore the downtown area, with its historic buildings, local shops, and friendly atmosphere.
Tips from William
"Lewistown is a great place to capture the charm of small-town Montana. Bring a wide-angle lens to capture the historic buildings and streetscapes, and a telephoto lens for close-up shots of the details. The best light for photography is in the early afternoon when the sun is high in the sky and the shadows are minimal."
Insights from Hui Cha
"Lunch in Lewistown is a relaxing and enjoyable experience. The sight of the historic downtown, the sound of people going about their day, and the warmth of the community create a sense of connection to the heart of Montana."
How to Access Lewistown
Directions:
- Lewistown is located in central Montana, along US-87. The town is easily accessible from the highway, with parking available throughout the downtown area.
Dining Details:
- Location: Lewistown, MT
- Difficulty: Easy (drive with short walks)
Photography Tips: For the best shots in Lewistown, focus on capturing the historic buildings and streetscapes, with the mountains in the background. Use a wide-angle lens to capture the full scene, and a telephoto lens to zoom in on the architectural details.
Alternative Activity: If you have time, consider visiting the nearby Judith Mountains, which offer beautiful views of the surrounding landscape and opportunities for hiking and wildlife viewing.
Late Afternoon: Arrive in Great Falls, Montana
Overview
After lunch, continue your journey to Great Falls, Montana, a city known for its stunning waterfalls, rich history, and connection to the Lewis and Clark Expedition. Arriving in the late afternoon gives you time to explore some of the city's most noteworthy attractions, including the Lewis and Clark Interpretive Center and Giant Springs State Park.
Tips from William
"Great Falls is a fantastic spot for landscape and historic photography. Bring a wide-angle lens to capture the expansive views of the waterfalls and river, and a telephoto lens for close-up shots of the exhibits and details. The best light for photography is in the late afternoon when the sun is low in the sky and the shadows are long."
Insights from Hui Cha
"Exploring Great Falls is a journey through the history and natural beauty of Montana. The sight of the waterfalls, the sound of the river, and the stories of Lewis and Clark create a sense of connection to the past and the natural world."
How to Access Great Falls
Directions:
- Great Falls is located along I-15 in central Montana. The city is easily accessible from the highway, with parking available near the main attractions.
Attraction Details:
- Location: Great Falls, MT
- Difficulty: Easy (drive with short walks)
Photography Tips: For the best shots in Great Falls, focus on capturing the waterfalls and river, with the city in the background. Use a wide-angle lens to capture the full scene, and a telephoto lens to zoom in on the details of the exhibits and landscape.
Alternative Activity: If exploring the city sounds too urban, consider taking a short hike on the River's Edge Trail, which offers beautiful views of the Missouri River and the surrounding landscape.
Evening: Sunset at Giant Springs State Park
Overview
End your day with a sunset visit to Giant Springs State Park, home to one of the largest freshwater springs in the country. The park offers stunning views of the Missouri River, as well as opportunities to explore the historic fish hatchery and the scenic trails that wind through the park. Watching the sunset here is a peaceful and beautiful experience, as the last light of the day illuminates the river and surrounding landscape.
Tips from William
"Giant Springs State Park is a fantastic spot for sunset photography. Bring a wide-angle lens to capture the full scope of the river and springs, and consider using a graduated neutral density filter to balance the exposure between the bright sky and the darker landscape. The best light for photography is in the late evening when the sun is low in the sky and the shadows are long."
Insights from Hui Cha
"Watching the sunset at Giant Springs is a peaceful and inspiring experience. The colors of the sky, the stillness of the river, and the sound of the water create a sense of calm and connection to nature. It's a perfect way to end the day."
How to Access Giant Springs State Park
Directions:
- Giant Springs State Park is located just east of Great Falls, along the Missouri River. The park is easily accessible from the city, with parking available near the main entrance.
Viewpoint Details:
- Location: Giant Springs State Park, MT
- Elevation Gain: Minimal
- Difficulty: Easy
Photography Tips: For a stunning sunset shot, position yourself along the riverbank to capture the last light of the day as it illuminates the springs and surrounding landscape. Use a small aperture (f/16 or smaller) to keep the entire scene in focus, and experiment with different compositions to highlight the reflections in the water.
Alternative Activity: If watching the sunset at Giant Springs sounds too crowded, consider heading to the nearby Ryan Dam, where you can enjoy equally beautiful views of the river and waterfalls in a more secluded setting.
Day 3: Glacier National Park – Majestic Peaks and Pristine Lakes
Morning: Sunrise at Lake McDonald
Overview
Begin your first full day in Glacier National Park with a sunrise visit to Lake McDonald, the largest lake in the park. Surrounded by towering mountains, the lake's calm waters provide stunning reflections, making it one of the most photographed spots in Glacier. Watching the sunrise here is a serene and awe-inspiring experience, as the first light of the day illuminates the peaks and creates a mirror-like reflection on the lake's surface.
Tips from William
"Lake McDonald is a photographer's paradise, especially at sunrise when the light is soft and the reflections are perfect. Bring a tripod and a wide-angle lens to capture the full scope of the lake and mountains, and consider using a polarizing filter to reduce glare and enhance the reflections. The best light for photography is just after sunrise when the colors are most vibrant."
Insights from Hui Cha
"Arriving at Lake McDonald before dawn allows you to experience the park in its quietest and most peaceful moments. The stillness of the lake, the crisp morning air, and the sight of the sun slowly rising over the mountains create a sense of calm and connection to nature."
How to Access Lake McDonald
Directions:
- Lake McDonald is located along the Going-to-the-Sun Road in Glacier National Park. The lake is easily accessible from the Apgar Visitor Center, with parking available near the lake's shore.
Viewpoint Details:
- Location: Lake McDonald, Glacier National Park, MT
- Elevation Gain: Minimal
- Difficulty: Easy
Photography Tips: For the best shots at Lake McDonald, position yourself on the eastern shore to capture the reflections of the mountains in the water. Use a small aperture (f/16 or smaller) to keep the entire scene in focus, and experiment with long exposures to smooth the water's surface and enhance the reflections.
Alternative Activity: If an early morning visit to Lake McDonald sounds too demanding, consider visiting later in the morning when the light is still good for photography, and you can explore the nearby Trail of the Cedars, a short hike that offers equally beautiful views of the forest and creek.
Mid-Morning: Hiking the Avalanche Lake Trail
Overview
After your sunrise experience, continue your exploration of Glacier National Park with a hike to Avalanche Lake, one of the park's most popular and scenic trails. The trail takes you through an ancient forest and along Avalanche Creek before reaching the stunning Avalanche Lake, surrounded by towering cliffs and waterfalls.
Tips from William
"The Avalanche Lake Trail is perfect for landscape photography. Bring a wide-angle lens to capture the expansive views of the lake and surrounding mountains, and a telephoto lens for close-up shots of the wildflowers and waterfalls along the trail. The best light for photography is in the mid-morning when the sun is high enough to illuminate the landscape but not too harsh."
Insights from Hui Cha
"Hiking to Avalanche Lake is a journey through some of the most beautiful alpine landscapes in Glacier National Park. The sight of the clear blue water, the sound of the waterfalls, and the views of the snow-capped peaks create a sense of wonder and connection to the natural world."
How to Access the Avalanche Lake Trail
Directions:
- The trailhead for Avalanche Lake is located along the Going-to-the-Sun Road, near the Avalanche Creek Campground. The trail is well-marked and includes several scenic viewpoints along the way.
Trail Details:
- Trail Length: 4.5 miles round-trip
- Elevation Gain: 730 feet
- Difficulty: Moderate
Photography Tips: For the best shots at Avalanche Lake, position yourself on the eastern shore to capture the reflections of the mountains and waterfalls in the water. A tripod can help stabilize your camera for sharp images, especially in the low light under the trees.
Alternative Activity: If the hike to Avalanche Lake sounds too challenging, consider taking the shorter Trail of the Cedars, a 1-mile loop that offers beautiful views of an ancient forest and the chance to see the cascading waters of Avalanche Creek.
Afternoon: Going-to-the-Sun Road – A Journey Through the Heart of Glacier
Overview
In the afternoon, take a drive along the Going-to-the-Sun Road, one of the most scenic and iconic roads in the United States. This 50-mile road winds through the heart of Glacier National Park, offering breathtaking views of the park's towering peaks, pristine lakes, and lush valleys. Along the way, you'll have plenty of opportunities to stop and take in the scenery, with numerous pullouts and trailheads providing access to some of the park's most famous sights.
Tips from William
"Going-to-the-Sun Road offers endless opportunities for landscape photography. Bring a wide-angle lens to capture the expansive views of the mountains and valleys, and a telephoto lens for zooming in on the details of the alpine wildflowers and wildlife. The best light for photography is in the late afternoon when the sun is low in the sky and the shadows are long."
Insights from Hui Cha
"Driving Going-to-the-Sun Road is a journey through the heart of Glacier National Park. The sight of the towering peaks, the sound of the wind in the trees, and the views from the Continental Divide create a sense of awe and connection to the wild beauty of this place. Be sure to dress warmly, as temperatures can be much cooler at higher elevations."
How to Access Going-to-the-Sun Road
Directions:
- Going-to-the-Sun Road begins at the West Glacier entrance of Glacier National Park and continues eastward across the park to St. Mary. The road is typically open from late June to mid-September, depending on weather conditions.
Scenic Drive Details:
- Location: Glacier National Park, MT
- Elevation Gain: 3,500 feet (from West Glacier to Logan Pass)
- Difficulty: Easy (drive with short walks)
Photography Tips: For the best shots along Going-to-the-Sun Road, focus on capturing the play of light and shadow on the mountains and valleys. Use a wide-angle lens to capture the expansive views and a telephoto lens to zoom in on the details of the alpine plants and animals.
Alternative Activity: If driving the entire length of Going-to-the-Sun Road sounds too long, consider stopping at the Logan Pass Visitor Center, where you can take a short hike on the Hidden Lake Overlook Trail, offering panoramic views of the surrounding mountains and valleys.
Evening: Sunset at Logan Pass
Overview
End your day with a sunset visit to Logan Pass, the highest point on Going-to-the-Sun Road and one of the most scenic spots in Glacier National Park. The pass offers stunning views of the surrounding peaks, with the chance to see mountain goats, bighorn sheep, and other wildlife. Watching the sunset here is a peaceful and awe-inspiring experience, as the last light of the day illuminates the mountains and valleys below.
Tips from William
"Logan Pass is a fantastic spot for sunset photography. Bring a wide-angle lens to capture the full scope of the landscape, and consider using a graduated neutral density filter to balance the exposure between the bright sky and the darker land. The best light for photography is in the late evening when the sun is low in the sky and the shadows are long."
Insights from Hui Cha
"Watching the sunset from Logan Pass is a peaceful and awe-inspiring experience. The colors of the sky, the stillness of the mountains, and the sound of the wind create a sense of calm and connection to nature. It's a perfect way to end the day."
How to Access Logan Pass
Directions:
- Logan Pass is located along Going-to-the-Sun Road, about 32 miles from the West Glacier entrance. The pass is easily accessible from the road, with parking available near the visitor center.
Viewpoint Details:
- Location: Logan Pass, Glacier National Park, MT
- Elevation Gain: Minimal (from the parking area)
- Difficulty: Easy
Photography Tips: For a stunning sunset shot, position yourself on the western side of the pass to capture the last light of the day as it illuminates the mountains and surrounding landscape. Use a small aperture (f/16 or smaller) to keep the entire scene in focus, and experiment with different compositions to highlight the layers and textures of the land.
Alternative Activity: If watching the sunset from Logan Pass sounds too crowded, consider heading to the nearby Hidden Lake Overlook, where you can enjoy equally beautiful views of the mountains and valleys in a more secluded setting.
Day 4: Hiking the Highline Trail – Glacier's Iconic Adventure
Morning: Start the Highline Trail at Logan Pass
Overview
Begin your fourth day with an early start on the Highline Trail, one of Glacier National Park's most iconic and scenic hikes. The trail follows the Continental Divide along the Garden Wall, offering breathtaking views of the park's rugged peaks, deep valleys, and alpine meadows. The trail is known for its dramatic cliffs, wildflower-filled meadows, and abundant wildlife, making it a must-do for any hiker in Glacier.
Tips from William
"The Highline Trail is perfect for landscape and wildlife photography. Bring a wide-angle lens to capture the expansive views of the mountains and valleys, and a telephoto lens for close-up shots of the wildflowers and animals along the trail. The best light for photography is in the morning when the sun is low in the sky and the shadows are long."
Insights from Hui Cha
"Hiking the Highline Trail is a journey through some of the most beautiful and dramatic landscapes in Glacier National Park. The sight of the mountains from the trail, the sound of the wind in the trees, and the views of the wildlife create a sense of awe and connection to the natural world."
How to Access the Highline Trail
Directions:
- The Highline Trailhead is located at Logan Pass, along Going-to-the-Sun Road. The trail is well-marked and includes several scenic viewpoints along the way.
Trail Details:
- Trail Length: 11.6 miles one-way to The Loop (with shuttle return)
- Elevation Gain: 1,950 feet (mostly descent)
- Difficulty: Strenuous (due to length and exposure)
Photography Tips: For the best shots along the Highline Trail, focus on capturing the contrast between the rugged mountains and the lush meadows. A tripod can help stabilize your camera for sharp images, especially in the low light under the cliffs.
Alternative Activity: If the full Highline Trail sounds too challenging, consider taking the shorter hike to Haystack Butte, a 7.2-mile round-trip hike that offers stunning views of the park with less exposure and elevation change.
Mid-Morning: Rest and Refresh at Haystack Butte
Overview
After a few miles on the Highline Trail, take a break at Haystack Butte, a prominent feature along the trail that offers stunning views of the surrounding mountains and valleys. This is a great spot to rest, enjoy a snack, and take in the breathtaking scenery before continuing on the trail.
Tips from William
"Haystack Butte is a great spot for landscape photography. Bring a wide-angle lens to capture the expansive views of the mountains and valleys, and a telephoto lens for close-up shots of the wildflowers and wildlife. The best light for photography is in the mid-morning when the sun is high enough to illuminate the landscape but not too harsh."
Insights from Hui Cha
"Resting at Haystack Butte is a peaceful and inspiring experience. The sight of the mountains from the trail, the sound of the wind in the trees, and the views of the wildlife create a sense of calm and connection to nature."
How to Access Haystack Butte
Directions:
- Haystack Butte is located about 3.6 miles along the Highline Trail from Logan Pass. The trail is well-marked and includes several scenic viewpoints along the way.
Rest Area Details:
- Location: Highline Trail, Glacier National Park, MT
- Elevation Gain: 1,000 feet (from Logan Pass)
- Difficulty: Moderate
Photography Tips: For the best shots at Haystack Butte, focus on capturing the contrast between the rugged mountains and the lush meadows. Use a wide-angle lens to capture the full scene, and a telephoto lens to zoom in on the details of the wildflowers and animals.
Alternative Activity: If resting at Haystack Butte sounds too exposed, consider continuing on to the Granite Park Chalet, where you can rest and enjoy equally stunning views of the park's mountains and valleys.
Afternoon: Descend to The Loop and Shuttle Return
Overview
In the afternoon, continue your hike on the Highline Trail as it descends toward The Loop, a scenic switchback on Going-to-the-Sun Road. The trail offers stunning views of the park's rugged peaks, deep valleys, and alpine meadows, with plenty of opportunities to see wildlife such as mountain goats, bighorn sheep, and marmots. Once you reach The Loop, you can take a shuttle back to Logan Pass or continue your exploration of the park.
Tips from William
"The descent to The Loop offers endless opportunities for landscape and wildlife photography. Bring a wide-angle lens to capture the expansive views of the mountains and valleys, and a telephoto lens for close-up shots of the wildflowers and animals along the trail. The best light for photography is in the late afternoon when the sun is low in the sky and the shadows are long."
Insights from Hui Cha
"Hiking the Highline Trail to The Loop is a journey through some of the most beautiful and dramatic landscapes in Glacier National Park. The sight of the mountains from the trail, the sound of the wind in the trees, and the views of the wildlife create a sense of awe and connection to the natural world."
How to Access The Loop
Directions:
- The Loop is located along Going-to-the-Sun Road, about 8 miles from Logan Pass. The trail is well-marked and includes several scenic viewpoints along the way.
Trail Details:
- Trail Length: 11.6 miles one-way from Logan Pass
- Elevation Loss: 2,200 feet
- Difficulty: Strenuous (due to length and exposure)
Photography Tips: For the best shots along the descent to The Loop, focus on capturing the contrast between the rugged mountains and the lush meadows. Use a wide-angle lens to capture the full scene, and a telephoto lens to zoom in on the details of the wildflowers and animals.
Alternative Activity: If the full descent to The Loop sounds too challenging, consider turning back at Haystack Butte or continuing to Granite Park Chalet, where you can rest and enjoy equally stunning views of the park's mountains and valleys.
Evening: Dinner in West Glacier
Overview
After a long day of hiking, treat yourself to a well-deserved dinner in the charming town of West Glacier, located near the western entrance of Glacier National Park. The town offers a variety of dining options, from casual cafes to upscale restaurants, where you can enjoy a delicious meal and relax after a day of adventure.
Tips from William
"West Glacier is a great place to capture the charm of small-town Montana. Bring a wide-angle lens to capture the historic buildings and streetscapes, and a telephoto lens for close-up shots of the details. The best light for photography is in the early evening when the sun is low in the sky and the shadows are minimal."
Insights from Hui Cha
"Dinner in West Glacier is a relaxing and enjoyable experience. The sight of the historic downtown, the sound of people going about their day, and the warmth of the community create a sense of connection to the heart of Montana."
How to Access West Glacier
Directions:
- West Glacier is located near the western entrance of Glacier National Park, along US-2. The town is easily accessible from the highway, with parking available throughout the downtown area.
Dining Details:
- Location: West Glacier, MT
- Difficulty: Easy (drive with short walks)
Photography Tips: For the best shots in West Glacier, focus on capturing the historic buildings and streetscapes, with the mountains in the background. Use a wide-angle lens to capture the full scene, and a telephoto lens to zoom in on the architectural details.
Alternative Activity: If dining in town sounds too crowded, consider picking up a takeout meal and enjoying a quiet dinner along the shores of Lake McDonald, where you can relax and watch the sunset over the water.
Day 5: Exploring Hidden Gems Along the Way Home
Morning: Departing Glacier National Park
Overview
Start your final day with a leisurely departure from Glacier National Park as you begin your journey home. As you drive eastward, take the time to explore some of the hidden gems and noteworthy stops along the way, offering a deeper connection to the land, its history, and its people.
Mid-Morning: Stop at Two Medicine
Overview
One of the first stops along your journey is the Two Medicine area of Glacier National Park, located in the southeastern part of the park. This less-visited area offers stunning views of the park's mountains and lakes, as well as opportunities for hiking, fishing, and wildlife viewing. Take a short walk along the shore of Two Medicine Lake, or explore one of the area's many trails.
Tips from William
"Two Medicine is a great spot for landscape and wildlife photography. Bring a wide-angle lens to capture the expansive views of the lake and surrounding mountains, and a telephoto lens for close-up shots of the wildflowers and animals. The best light for photography is in the mid-morning when the sun is high enough to illuminate the landscape but not too harsh."
Insights from Hui Cha
"Exploring Two Medicine is a peaceful and inspiring experience. The sight of the mountains from the shore, the sound of the water, and the views of the wildlife create a sense of calm and connection to nature."
How to Access Two Medicine
Directions:
- Two Medicine is located in the southeastern part of Glacier National Park, along MT-49. The area is easily accessible from the highway, with parking available near the lake.
Viewpoint Details:
- Location: Two Medicine, Glacier National Park, MT
- Elevation Gain: Minimal
- Difficulty: Easy
Photography Tips: For the best shots at Two Medicine, position yourself along the shore to capture the reflections of the mountains in the water. Use a small aperture (f/16 or smaller) to keep the entire scene in focus, and experiment with different compositions to highlight the reflections and layers of the landscape.
Alternative Activity: If exploring Two Medicine sounds too time-consuming, consider stopping at the nearby Running Eagle Falls, a short hike that offers beautiful views of a unique waterfall that emerges from a cave.
Afternoon: Explore the Rocky Mountain Front
Overview
As you continue your journey eastward, take the time to explore the Rocky Mountain Front, a stunning region where the plains meet the mountains. This area is known for its dramatic landscapes, abundant wildlife, and rich history, offering plenty of opportunities for hiking, photography, and wildlife viewing. Consider stopping at the Sun River Wildlife Management Area, which offers beautiful views of the mountains and the chance to see elk, deer, and other wildlife.
Tips from William
"The Rocky Mountain Front is perfect for landscape and wildlife photography. Bring a wide-angle lens to capture the expansive views of the plains and mountains, and a telephoto lens for close-up shots of the wildlife and details. The best light for photography is in the early afternoon when the sun is high in the sky and the shadows are minimal."
Insights from Hui Cha
"Exploring the Rocky Mountain Front is a journey through some of the most beautiful and rugged landscapes in Montana. The sight of the mountains from the plains, the sound of the wind in the grass, and the views of the wildlife create a sense of awe and connection to the land."
How to Access the Rocky Mountain Front
Directions:
- The Rocky Mountain Front is located along US-287 and MT-200, between Glacier National Park and Great Falls. The area is easily accessible from the highway, with parking available at various trailheads and viewpoints.
Viewpoint Details:
- Location: Rocky Mountain Front, MT
- Elevation Gain: Varies (depending on the trail)
- Difficulty: Easy to Moderate
Photography Tips: For the best shots along the Rocky Mountain Front, focus on capturing the contrast between the rugged mountains and the rolling plains. Use a wide-angle lens to capture the expansive views and a telephoto lens to zoom in on the details of the wildlife and landscape.
Alternative Activity: If exploring the Rocky Mountain Front sounds too rugged, consider taking a scenic drive along the Sun River Road, which offers beautiful views of the mountains and valleys from the comfort of your car.
Late Afternoon: Return to Theodore Roosevelt National Park
Overview
As your journey comes full circle, consider making a final stop at Theodore Roosevelt National Park to reflect on your trip and take in the beauty of the badlands one last time. Whether you choose to explore a new area of the park or revisit a favorite spot, this is the perfect way to end your five-day adventure through the Northern Rockies.
Tips from William
"Returning to Theodore Roosevelt National Park offers a great opportunity to capture the beauty of the badlands in the late afternoon light. Bring a wide-angle lens to capture the expansive views of the landscape, and a telephoto lens for close-up shots of the wildlife and details. The best light for photography is in the late afternoon when the sun is low in the sky and the shadows are long."
Insights from Hui Cha
"Returning to Theodore Roosevelt National Park is a peaceful and inspiring experience. The sight of the badlands from the road, the sound of the wind in the grass, and the views of the wildlife create a sense of connection to the land and the natural world."
How to Access Theodore Roosevelt National Park
Directions:
- Theodore Roosevelt National Park is located just off I-94 in western North Dakota. The park is easily accessible from the highway, with parking available at various trailheads and viewpoints.
Viewpoint Details:
- Location: Theodore Roosevelt National Park, ND
- Elevation Gain: Varies (depending on the trail)
- Difficulty: Easy to Moderate
Photography Tips: For the best shots in Theodore Roosevelt National Park, focus on capturing the play of light and shadow on the badlands and surrounding landscape. Use a wide-angle lens to capture the expansive views and a telephoto lens to zoom in on the details of the wildlife and rock formations.
Alternative Activity: If returning to Theodore Roosevelt National Park sounds too time-consuming, consider taking a scenic drive along the Enchanted Highway, a 32-mile stretch of road that features large metal sculptures and offers beautiful views of the North Dakota countryside.
Conclusion: A Personal Reflection
As the sun began to set on our final day, we found ourselves back where our journey began – amid the rugged beauty of Theodore Roosevelt National Park. From the sweeping plains and hidden gems of North Dakota to the majestic peaks and pristine lakes of Glacier National Park, each day of our adventure had been a reminder of the incredible beauty and diversity of the Northern Rockies.
These landscapes are more than just places to visit – they are places to connect with the land, to find peace and inspiration, and to create memories that will last a lifetime. As we packed up our gear and prepared to head home, I felt a deep sense of gratitude for the time we had spent in these wild, untamed places. They had not only shown us the beauty of the American West but had also brought us closer to each other and to the world around us.
Our journey through Theodore Roosevelt National Park, Glacier National Park, and the hidden gems along the way had come to an end, but the experiences we had shared would stay with us forever. And as we drove away from the park, I knew that we would return, drawn back by the promise of new adventures and the chance to explore even deeper into the heart of the Northern Rockies.

Step into a world of timeless beauty with our premium, oversized hardcover book - crafted for discerning collectors and anyone who values the power of art. Perfect for your coffee table, it's more than just a book; it's a conversation starter, a window into over 30 years of William's visionary photography.
Your Support Matters
Purchasing artwork from William Stanek's collection not only brings beauty into your life but also helps us continue to share. Thank you for supporting our creative journey!

Support The Lights of Paris by Robert Stanek, William Stanek's pen name! Through vivid historical detail and deeply moving character stories, Robert takes readers on an unforgettable journey through one of history’s most transformative times.
