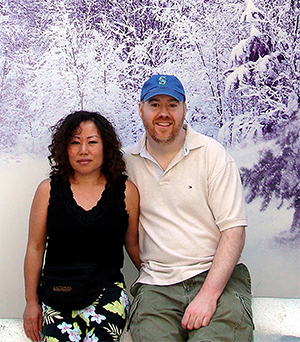
Embark on a journey curated by seasoned explorers William and Hui Cha Stanek, who have spent decades immersing themselves in the diverse landscapes of North America. These itineraries are more than just travel plans - they are thoughtfully crafted adventures designed to help you connect with the natural world, discover hidden gems, and create lasting memories.
National Parks Index | US Itineraries Index | American Roadtrips Index

Bring home a Bugville Critters book and watch as your child's love for reading and learning grows with every page. Hand-painted illustrations bring the heartwarming stories to life. Ask your librarian to add Bugville Critters to the library's digital collection today!
Discover William Stanek's Exclusive Art Collection
Explore and purchase the stunning art featured on this site. Own a piece of William Stanek's unique and captivating artwork today!
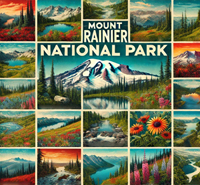
(May 17, 2025) Exploring Mount Rainier and Olympic: A 3-Day Dual Adventure
Introduction: A Journey Through Washington's Wild and Wonderful Landscapes
There's something about the Pacific Northwest that stirs the soul – the towering mountains, the misty rainforests, and the rugged coastlines create a landscape that feels both ancient and alive. For us, William and Hui Cha, Washington has always been a place of wonder and adventure, where every turn reveals a new vista more breathtaking than the last. Our journey through Mount Rainier National Park and Olympic National Park was one that we had long anticipated – a dual adventure through two of the most iconic and diverse landscapes in the state.
For Hui Cha, the trip was a return to the forests and mountains that had shaped her childhood in South Korea. The towering trees and mist-covered peaks of the Pacific Northwest reminded her of the stories her grandmother used to tell – of ancient forests filled with spirits and mountains that touched the sky. For me, William, it was an opportunity to capture the incredible contrasts between these two parks – from the icy glaciers and alpine meadows of Mount Rainier to the temperate rainforests and wild coastlines of Olympic.
This journey wasn't just about photography; it was about reconnecting with nature in a profound way, experiencing the peace that comes from being surrounded by such vast, untouched wilderness. In this guide, we'll take you through our detailed itineraries, share specific tips and techniques for photographing these stunning landscapes, and offer alternative activities for those seeking a less strenuous adventure. Whether you have just one day or a full three days to explore, this guide will help you make the most of your journey through Washington's majestic national parks.
Day 1: Discovering the Majestic Beauty of Mount Rainier National Park
Morning: Sunrise at Sunrise Point
6:00 AM - Sunrise at Sunrise Point
Overview: Begin your adventure with a sunrise at Sunrise Point, one of the most iconic viewpoints in Mount Rainier National Park. At 6,400 feet, Sunrise Point offers a breathtaking view of Mount Rainier, with the first light of day illuminating the snow-capped peak and casting a warm glow over the surrounding valleys.
Tips from William: "Arrive at least 45 minutes before sunrise to set up your shot. Use a wide-angle lens to capture the full scope of the scene, including Mount Rainier and the surrounding ridges. A tripod is essential for keeping your camera steady in the low light. The early morning light is perfect for bringing out the details of the glaciers and the ridges that surround the mountain. Focus on capturing the contrast between the warm tones of the sunrise and the cool blues of the glaciers."
Insights from Hui Cha: "Mornings at Sunrise Point can be quite cold, even in the summer, so dress warmly and bring a thermos of hot tea or coffee. The quiet solitude of the early morning, combined with the awe-inspiring view of Mount Rainier, creates a moment of peace and reflection that is truly special. Take a moment to simply enjoy the view and the stillness before the park comes to life."
How to Access Sunrise Point:
- Location: Sunrise Point is located in the Sunrise area of Mount Rainier National Park, near the northeastern entrance.
- Travel Directions: From the White River entrance, follow Sunrise Road for about 14 miles until you reach Sunrise Point. The drive takes about 45 minutes from the park entrance.
- Trail Details: The viewpoint is easily accessible from the parking area, with only a short walk required to reach the overlook.
Alternative Activity: Sunrise Nature Trail
- If you prefer a slightly more immersive experience, consider hiking the Sunrise Nature Trail. This 1.5-mile loop trail offers stunning views of Mount Rainier and the surrounding meadows and is located just a short drive from Sunrise Point.
Photographic Techniques:
- Golden Hour Lighting: The soft, golden light of sunrise will enhance the warm tones of Mount Rainier and the surrounding landscape. Use this light to highlight the ridges and valleys, creating a sense of depth in your images.
- Wide-Angle Shots: Use a wide-angle lens to capture the entire scene, including Mount Rainier, the meadows, and the distant ridges.
- Glacier Details: If you have a telephoto lens, use it to zoom in on the glaciers and snowfields, capturing the intricate details of the ice and snow.
Exploring the Area:
- After photographing the sunrise at Sunrise Point, consider taking a short hike on one of the nearby trails, such as the Sourdough Ridge Trail or the Dege Peak Trail. Both trails offer stunning views of Mount Rainier and the surrounding landscape, and provide additional opportunities for morning photography.
Midday: Hiking the Skyline Trail at Paradise
10:00 AM - Skyline Trail Hike
Overview: The Skyline Trail is one of Mount Rainier National Park's most popular hikes, offering a moderately challenging trek through alpine meadows, past cascading waterfalls, and up to Panorama Point, where you'll be rewarded with breathtaking views of Mount Rainier and the surrounding peaks. The trail is especially beautiful in the summer, when the wildflowers are in full bloom.
Tips from William: "The midday light can be harsh, but it's perfect for capturing the vibrant colors of the wildflowers and the deep blue of the sky. Use a mid-range zoom lens (24-70mm) to capture both the sweeping views of the meadows and the close-up details of the flowers and waterfalls. A polarizing filter can help reduce glare and enhance the colors of the landscape."
Insights from Hui Cha: "This hike is moderately challenging, with some steep sections, so wear sturdy shoes and bring plenty of water. The trail is well-maintained and offers beautiful views throughout, with the reward of an incredible panorama at the top. The sight of Mount Rainier towering above the meadows is truly awe-inspiring, and the sense of accomplishment when you reach Panorama Point is well worth the effort."
How to Access the Skyline Trail:
- Location: The trailhead for the Skyline Trail is located at the Paradise parking area, near the Paradise Inn.
- Travel Directions: From the Nisqually entrance, follow Paradise Road for about 19 miles until you reach the Paradise parking area. The drive takes about 40 minutes from the park entrance.
- Trail Details: The Skyline Trail is a 5.5-mile loop with a moderate difficulty level. The trail gains about 1,700 feet in elevation and includes some steep, rocky sections.
Alternative Activity: Nisqually Vista Trail
- For a shorter, easier hike, consider the Nisqually Vista Trail. This 1.2-mile loop offers beautiful views of the Nisqually Glacier and Mount Rainier, and is a great option for those looking for a less strenuous adventure.
Photographic Techniques:
- Wildflower Meadows: Use a wide-angle lens to capture the sweeping views of the wildflower meadows, including some foreground elements such as the flowers or rocks to add depth to your composition.
- Waterfalls: Capture the motion of the waterfalls with a long exposure, using a tripod to stabilize your camera. This technique will give the water a smooth, silky appearance, contrasting with the sharp details of the surrounding rocks and vegetation.
- Panoramic Views: The view from Panorama Point is perfect for panoramic photography. Take multiple shots from left to right and stitch them together in post-processing to create a wide, sweeping view of the landscape.
Exploring the Area:
- After your hike, consider stopping for lunch at the Paradise Inn, where you can enjoy a meal with stunning views of Mount Rainier. The inn offers a cozy atmosphere and is a great place to relax and recharge before continuing your adventure.
Afternoon: Exploring Reflection Lakes and Narada Falls
1:30 PM - Reflection Lakes and Narada Falls
Overview: Spend your afternoon exploring Reflection Lakes, a series of picturesque lakes that offer stunning reflections of Mount Rainier on calm days. Just a short drive away, Narada Falls is one of the park's most beautiful waterfalls, cascading 168 feet down a rocky cliff.
Tips from William: "The afternoon light can be harsh, so focus on capturing the reflections in the water and the details of the waterfall. Use a polarizing filter to reduce glare on the water and enhance the colors of the reflections. A tripod is essential for keeping your camera steady during long exposures at Narada Falls."
Insights from Hui Cha: "Reflection Lakes is a peaceful spot to relax and enjoy the beauty of Mount Rainier. The lakes are especially beautiful in the afternoon, when the reflections are most vivid. Narada Falls is just a short drive away and offers a refreshing break from the heat of the day. The sound of the water and the cool mist make it a perfect place to relax and recharge."
How to Access Reflection Lakes and Narada Falls:
- Location: Reflection Lakes are located along Stevens Canyon Road, just a few miles east of Paradise. Narada Falls is located along Paradise Road, just west of the Paradise area.
- Travel Directions: From Paradise, head east on Stevens Canyon Road for about 2 miles to reach Reflection Lakes. To reach Narada Falls, head west on Paradise Road for about 2 miles. Both drives take less than 10 minutes from Paradise.
- Trail Details: Both Reflection Lakes and Narada Falls are easily accessible from the parking areas, with short trails leading to the best viewpoints.
Alternative Activity: Christine Falls
- For another beautiful waterfall experience, consider visiting Christine Falls. This 69-foot waterfall is located just a short drive from Narada Falls and is easily accessible via a short trail.
Photographic Techniques:
- Reflections: Use a polarizing filter to reduce glare and enhance the clarity of the reflections in the lakes. Position yourself so that Mount Rainier is fully reflected in the water for a striking composition.
- Waterfall Motion: Use a slow shutter speed (1/4 second or longer) to capture the motion of the waterfall, creating a smooth, silky effect. A polarizing filter can help reduce glare on the water and enhance the colors of the surrounding foliage.
- Foreground Interest: Include some of the wildflowers, rocks, or trees in the foreground to add depth and interest to your landscape shots.
Exploring the Area:
- After exploring Reflection Lakes and Narada Falls, consider taking a scenic drive along Stevens Canyon Road, which offers additional opportunities for photography and exploration. The road winds through beautiful forests and past several other scenic viewpoints.
Evening: Sunset at Tipsoo Lake
6:30 PM - Sunset at Tipsoo Lake
Overview: End your day in Mount Rainier National Park with a sunset at Tipsoo Lake, one of the park's most beautiful and easily accessible lakes. From here, you can enjoy stunning views of Mount Rainier reflected in the calm waters of the lake, with the sun setting behind the mountain and casting a warm glow over the landscape.
Tips from William: "Arrive about an hour before sunset to set up your shot. Use a wide-angle lens to capture the entire scene, including Mount Rainier, the lake, and the surrounding wildflowers. A graduated neutral density filter can help balance the exposure between the bright sky and the darker foreground. The best shots often come just after the sun has dipped below the horizon when the sky is filled with soft, pastel colors."
Insights from Hui Cha: "This is a peaceful spot to reflect on your day and take in the beauty of the park. Bring a light jacket, as it can get cool in the evening, and enjoy the quiet as the sun dips below the horizon. The views are breathtaking, and it's a perfect way to end your day in Mount Rainier."
How to Access Tipsoo Lake:
- Location: Tipsoo Lake is located near the eastern entrance of Mount Rainier National Park, along SR-410 (Chinook Pass).
- Travel Directions: From Reflection Lakes, head east on Stevens Canyon Road and then north on SR-410 for about 20 miles until you reach Tipsoo Lake. The drive takes about 40 minutes from Reflection Lakes.
- Trail Details: Tipsoo Lake is easily accessible from the parking area, with only a short walk required to reach the lake and the surrounding meadows.
Alternative Activity: Sunrise at Tipsoo Lake
- For a different perspective, consider visiting Tipsoo Lake at sunrise. The lake offers equally stunning views in the early morning light, with the added bonus of fewer crowds.
Photographic Techniques:
- Golden Hour Lighting: The warm, golden light just before sunset is ideal for landscape photography. Use this light to highlight the contours of Mount Rainier and the reflections in the lake.
- Reflections: If the water is calm, use a polarizing filter to enhance the reflections of Mount Rainier and the surrounding landscape in the lake.
- Silhouettes: As the sun sets behind the mountain, the ridges and trees can create dramatic silhouettes against the colorful sky. Position yourself so that the sun is just behind the mountain to create a striking image.
Exploring the Area:
- After sunset, consider staying a bit longer for some stargazing. The night sky at Tipsoo Lake is incredibly clear, making it an excellent place for night photography. The view of the Milky Way rising above Mount Rainier is particularly stunning, and you can capture it in all its glory.
Day 2: Embracing the Wilderness of Olympic National Park
Morning: Exploring Hurricane Ridge
9:00 AM - Hurricane Ridge
Overview: Start your day in Olympic National Park with a visit to Hurricane Ridge, one of the most accessible and scenic areas in the park. From the ridge, you can enjoy panoramic views of the Olympic Mountains, the Strait of Juan de Fuca, and, on clear days, even Vancouver Island in Canada. The area is also home to several short trails that offer stunning views of the surrounding landscape.
Tips from William: "The early morning light is perfect for capturing the details of the mountains and the valleys below. Use a wide-angle lens to capture the expansive views, and a polarizing filter to deepen the blue of the sky and reduce glare on the mountains. The ridge offers several vantage points, so take your time to explore different angles and compositions."
Insights from Hui Cha: "Hurricane Ridge is a breathtaking place to start your day in Olympic National Park. The views are simply stunning, and the peacefulness of the early morning makes it a perfect spot to reflect and connect with nature. The short trails are easy and offer beautiful views throughout, making it a great place for a morning walk."
How to Access Hurricane Ridge:
- Location: Hurricane Ridge is located in the northern part of Olympic National Park, near the town of Port Angeles.
- Travel Directions: From Port Angeles, follow Hurricane Ridge Road for about 17 miles until you reach the Hurricane Ridge Visitor Center. The drive takes about 40 minutes from Port Angeles.
- Trail Details: Hurricane Ridge offers several short trails, including the Hurricane Hill Trail, a 3.2-mile round-trip hike that offers stunning views of the Olympic Mountains and the surrounding valleys.
Alternative Activity: Elwha Valley
- For a different morning adventure, consider exploring the Elwha Valley. This area offers beautiful river views, old-growth forests, and several short trails that are perfect for a morning hike.
Photographic Techniques:
- Panoramic Views: The sweeping vistas at Hurricane Ridge are perfect for panoramic photography. Take multiple shots from left to right and stitch them together in post-processing to create a wide, sweeping view of the landscape.
- Wide-Angle Shots: Use a wide-angle lens to capture the full scope of the scene, including the mountains, the valleys, and the distant waters of the Strait of Juan de Fuca.
- Telephoto Details: Use a telephoto lens to zoom in on the details of the mountains, such as the ridges, snowfields, and glaciers. These close-ups can add variety to your landscape portfolio.
Exploring the Area:
- After exploring Hurricane Ridge, consider visiting the Hurricane Ridge Visitor Center, where you can learn more about the park's geology, wildlife, and history. The visitor center also offers a gift shop and a snack bar, making it a great place to take a break before continuing your adventure.
Midday: Exploring the Hoh Rainforest
12:00 PM - Hoh Rainforest
Overview: The Hoh Rainforest is one of the most magical places in Olympic National Park, with its lush, green landscape, towering trees, and vibrant mosses. The forest receives over 140 inches of rain each year, creating a dense, temperate rainforest that feels like something out of a fairy tale. The Hoh Rainforest is home to several easy trails that offer a chance to immerse yourself in this unique ecosystem.
Tips from William: "The midday light filtering through the trees can create beautiful patterns and textures on the mosses and ferns. Use a mid-range zoom lens (24-70mm) to capture both the wide views of the forest and the close-up details of the plants and trees. A polarizing filter can help reduce glare and enhance the colors of the foliage."
Insights from Hui Cha: "The Hoh Rainforest is a peaceful and enchanting place to explore. The sound of the rain, the soft light filtering through the trees, and the vibrant greens of the mosses and ferns create a sense of calm and wonder. Take your time to wander the trails and soak in the beauty of the forest."
How to Access the Hoh Rainforest:
- Location: The Hoh Rainforest is located in the western part of Olympic National Park, about 31 miles south of Forks.
- Travel Directions: From Forks, follow Highway 101 south for about 15 miles, then turn east onto Upper Hoh Road and continue for 16 miles to the Hoh Rainforest Visitor Center. The drive takes about 45 minutes from Forks.
- Trail Details: The Hoh Rainforest offers several easy trails, including the Hall of Mosses Trail, a 0.8-mile loop that takes you through some of the most beautiful sections of the forest.
Alternative Activity: Quinault Rainforest
- For a different rainforest experience, consider exploring the Quinault Rainforest, located in the southern part of the park. This area offers similar lush, green landscapes and several easy trails that are perfect for a midday adventure.
Photographic Techniques:
- Moss and Ferns: Focus on the intricate textures and patterns of the mosses, ferns, and other plants. Use a macro lens to capture the details, or a wide-angle lens to include more of the forest in your composition.
- Rainforest Canopy: Look up to capture the towering trees and the dense canopy above. A wide-angle lens is ideal for capturing the full scope of the forest and creating a sense of scale.
- Soft Light: The soft, diffused light in the rainforest is perfect for capturing the vibrant greens of the foliage. Use a polarizing filter to reduce glare and enhance the colors.
Exploring the Area:
- After exploring the Hoh Rainforest, consider stopping for a picnic along the Hoh River. The river offers beautiful views of the surrounding forest and mountains and provides a peaceful setting to relax and enjoy a meal.
Afternoon: Visiting Rialto Beach
2:30 PM - Rialto Beach
Overview: Rialto Beach is one of the most stunning coastal areas in Olympic National Park, with its rugged coastline, dramatic sea stacks, and tide pools filled with marine life. The beach is also known for its powerful waves and stunning sunsets, making it a perfect spot to end your day in the park.
Tips from William: "The afternoon light can be harsh, but it's perfect for capturing the contrast between the dark rocks and the bright sky. Use a wide-angle lens to capture the full scope of the scene, including the sea stacks, the waves, and the distant mountains. A polarizing filter can help reduce glare and enhance the colors of the water and the sky."
Insights from Hui Cha: "Rialto Beach is a wild and beautiful place, with the sound of the waves crashing against the rocks and the smell of the salty sea air. The beach is a perfect place to relax and take in the beauty of the Pacific Ocean. Be sure to explore the tide pools, where you can see colorful sea stars, anemones, and other marine life."
How to Access Rialto Beach:
- Location: Rialto Beach is located in the western part of Olympic National Park, about 12 miles west of Forks.
- Travel Directions: From Forks, follow Highway 110 west for about 8 miles, then turn right onto Mora Road and continue for 4 miles to the beach. The drive takes about 30 minutes from Forks.
- Trail Details: The beach is easily accessible from the parking area, with a short trail leading down to the sand and the tide pools.
Alternative Activity: Second Beach
- For a slightly more secluded experience, consider visiting Second Beach, located just a few miles south of Rialto Beach. The beach is accessible via a short, easy hike and offers similar stunning views of the coastline and sea stacks.
Photographic Techniques:
- Sea Stacks: Use a wide-angle lens to capture the dramatic sea stacks and the waves crashing against them. A polarizing filter can help reduce glare and enhance the colors of the water and the sky.
- Tide Pools: Focus on the details of the tide pools, such as the sea stars, anemones, and other marine life. A macro lens is ideal for capturing the intricate details of these fascinating creatures.
- Sunset Silhouettes: If you stay for sunset, use the sea stacks as silhouettes against the colorful sky. A graduated neutral density filter can help balance the exposure between the bright sky and the darker foreground.
Exploring the Area:
- After exploring Rialto Beach, consider taking a drive along the coastal roads of Olympic National Park, which offer additional opportunities for photography and exploration. The roads wind through beautiful forests and past several other scenic viewpoints.
Evening: Sunset at Ruby Beach
6:30 PM - Sunset at Ruby Beach
Overview: End your day in Olympic National Park with a sunset at Ruby Beach, one of the park's most iconic coastal destinations. The beach is known for its striking sea stacks, dramatic cliffs, and beautiful tide pools. As the sun sets over the Pacific Ocean, the beach is bathed in a warm, golden light, creating a truly magical atmosphere.
Tips from William: "Arrive about an hour before sunset to set up your shot. Use a wide-angle lens to capture the entire scene, including the sea stacks, the waves, and the reflections in the wet sand. A graduated neutral density filter can help balance the exposure between the bright sky and the darker foreground. The best shots often come just after the sun has dipped below the horizon when the sky is filled with soft, pastel colors."
Insights from Hui Cha: "Ruby Beach is a peaceful and beautiful place to watch the sunset. The sound of the waves, the smell of the salty air, and the stunning views of the coastline create a perfect ending to your day in Olympic National Park. Bring a light jacket, as it can get cool in the evening, and enjoy the quiet as the sun dips below the horizon."
How to Access Ruby Beach:
- Location: Ruby Beach is located in the southern part of Olympic National Park, along Highway 101.
- Travel Directions: From Rialto Beach, head south on Highway 101 for about 25 miles until you reach the Ruby Beach parking area. The drive takes about 45 minutes from Rialto Beach.
- Trail Details: Ruby Beach is easily accessible from the parking area, with a short trail leading down to the sand and the tide pools.
Alternative Activity: Kalaloch Beach
- For a different sunset experience, consider visiting Kalaloch Beach, located just a few miles south of Ruby Beach. The beach offers similar stunning views of the coastline and sea stacks, with the added bonus of fewer crowds.
Photographic Techniques:
- Golden Hour Lighting: The warm, golden light just before sunset is ideal for landscape photography. Use this light to highlight the contours of the sea stacks and the reflections in the wet sand.
- Reflections: If the sand is wet, use it to capture reflections of the sea stacks and the sunset. A polarizing filter can help enhance the clarity of the reflections.
- Silhouettes: As the sun sets behind the sea stacks, use them as silhouettes against the colorful sky. A graduated neutral density filter can help balance the exposure between the bright sky and the darker foreground.
Exploring the Area:
- After sunset, consider staying a bit longer for some stargazing. The night sky at Ruby Beach is incredibly clear, making it an excellent place for night photography. The view of the Milky Way rising above the sea stacks is particularly stunning, and you can capture it in all its glory.
Day 3: Connecting the Parks and Capturing the Final Moments
Morning: Revisiting Sunrise Point for Sunrise (Again)
6:00 AM - Sunrise at Sunrise Point
Overview: Return to Mount Rainier National Park for a second sunrise at Sunrise Point, this time with the benefit of familiarity. With your previous experience, you can experiment with different compositions and techniques that you may have missed on your first visit.
Tips from William: "This time, focus on capturing the subtle changes in the light as the sun rises. Use a wide-angle lens to capture the entire scene, and a telephoto lens to zoom in on the details of Mount Rainier and the surrounding ridges. The morning light can create beautiful, long shadows that add depth and interest to your images."
Insights from Hui Cha: "Returning to a location can offer a deeper connection to it. Take this opportunity to explore different angles and perspectives, and to notice the subtle changes in the light and atmosphere that make each visit unique."
How to Access Sunrise Point:
- Location: Same as Day 1 – Sunrise Point is located in the Sunrise area of Mount Rainier National Park, near the northeastern entrance.
- Travel Directions: Follow the same route as before to reach Sunrise Point.
- Trail Details: The overlook remains the same – easily accessible with only a short walk required to reach the viewpoint.
Photographic Techniques:
- Morning Light: The soft, golden light just after sunrise is ideal for capturing the warm tones of Mount Rainier and the surrounding landscape. Adjust your white balance to enhance these colors.
- Detail Shots: Focus on the intricate details of Mount Rainier, the glaciers, and the surrounding ridges. These close-ups can add variety to your images and tell a deeper story about the site.
- Wide-Angle Landscapes: The sweeping views of Mount Rainier provide a beautiful backdrop for your sunrise shots. Use a wide-angle lens to capture the full scope of the landscape.
Exploring the Area:
- After photographing Sunrise Point, consider exploring the nearby Shadow Lake Trail, which offers additional opportunities for photography and exploration.
Midday: Hiking the Sol Duc Falls Trail
11:00 AM - Sol Duc Falls Hike
Overview: The Sol Duc Falls Trail is one of the most beautiful hikes in Olympic National Park, offering a short but rewarding trek through old-growth forest to a stunning waterfall. The trail follows the Sol Duc River as it winds through the lush, green forest, eventually leading to the falls, where the river cascades down a series of moss-covered rocks.
Tips from William: "The midday light filtering through the trees can create beautiful patterns and textures on the water and rocks. Use a slow shutter speed (1/4 second or longer) to capture the motion of the waterfall, creating a smooth, silky effect. A tripod is essential for keeping your camera steady during long exposures. The surrounding forest is also full of photographic opportunities – look for interesting patterns in the leaves and rocks."
Insights from Hui Cha: "This hike is short and easy, making it a great option for a midday adventure. The forest is incredibly peaceful, with the sound of the river and the cool shade of the trees adding to the sense of tranquility. The falls themselves are stunning, and the surrounding forest is filled with beautiful plants and wildlife."
How to Access the Sol Duc Falls Trail:
- Location: The trailhead for Sol Duc Falls is located in the Sol Duc area of Olympic National Park, about 12 miles south of Highway 101.
- Travel Directions: From Highway 101, follow Sol Duc Hot Springs Road south for about 12 miles until you reach the trailhead. The drive takes about 30 minutes from Highway 101.
- Trail Details: The Sol Duc Falls Trail is a 1.6-mile round-trip hike with a moderate difficulty level. The trail is well-maintained and suitable for all visitors.
Alternative Activity: Marymere Falls
- For a different waterfall experience, consider hiking the Marymere Falls Trail, located just a short drive from Sol Duc Falls. This 1.8-mile round-trip hike offers beautiful views of the falls and the surrounding forest.
Photographic Techniques:
- Waterfall Motion: Use a slow shutter speed (1/4 second or longer) to capture the motion of the waterfall, creating a smooth, silky effect. A polarizing filter can help reduce glare on the water and enhance the colors of the surrounding foliage.
- Foreground Interest: Include some of the rocks, ferns, or moss in the foreground to add depth and interest to your waterfall shots.
- Textures and Patterns: Focus on the intricate textures and patterns in the rocks, leaves, and water. These close-ups can create abstract, almost otherworldly images that highlight the beauty of the forest.
Exploring the Area:
- After your hike, consider visiting the nearby Sol Duc Hot Springs Resort, where you can relax in the natural hot springs and enjoy a meal at the resort's restaurant.
Afternoon: Exploring Lake Crescent
2:00 PM - Lake Crescent Exploration
Overview: Lake Crescent is one of the most beautiful lakes in Olympic National Park, with its clear, blue waters, surrounded by dense forests and towering mountains. The lake is a popular spot for kayaking, swimming, and picnicking, and offers several short trails that provide stunning views of the water and the surrounding landscape.
Tips from William: "The afternoon light can be harsh, but it's perfect for capturing the contrast between the deep blue of the lake and the green of the surrounding forest. Use a polarizing filter to enhance the colors of the water and reduce glare. The lake offers several beautiful vantage points, so take your time to explore different angles and compositions."
Insights from Hui Cha: "Lake Crescent is a peaceful and serene place to spend an afternoon. The clear, blue water is incredibly inviting, and the surrounding mountains create a beautiful backdrop. Whether you're kayaking on the lake or simply enjoying a picnic on the shore, the lake offers a perfect place to relax and take in the beauty of Olympic National Park."
How to Access Lake Crescent:
- Location: Lake Crescent is located in the northern part of Olympic National Park, along Highway 101.
- Travel Directions: From Sol Duc Falls, head north on Sol Duc Hot Springs Road and then east on Highway 101 for about 20 miles until you reach Lake Crescent. The drive takes about 40 minutes from Sol Duc Falls.
- Exploration Details: Lake Crescent offers several short trails, including the Moments in Time Trail, a 0.5-mile loop that provides beautiful views of the lake and the surrounding forest.
Alternative Activity: Barnes Creek Trail
- For a longer hike, consider the Barnes Creek Trail, which follows the shoreline of Lake Crescent and offers beautiful views of the lake and the surrounding mountains.
Photographic Techniques:
- Lake Views: Use a wide-angle lens to capture the expansive views of the lake, including some foreground elements such as rocks or trees to add depth to your composition.
- Reflections: If the water is calm, use a polarizing filter to enhance the reflections of the mountains and the sky in the lake.
- Detail Shots: Focus on the intricate textures and patterns of the rocks, leaves, and water. These close-ups can create interesting, abstract images that highlight the beauty of the lake.
Exploring the Area:
- After exploring Lake Crescent, consider stopping for a late lunch or snack at Lake Crescent Lodge, where you can enjoy a meal with stunning views of the lake. The lodge offers a cozy atmosphere and is a great place to relax and reflect on your day's adventure.
Evening: Stargazing at Hurricane Ridge
8:00 PM - Stargazing at Hurricane Ridge
Overview: End your adventure with a night of stargazing at Hurricane Ridge. The park's remote location, away from city lights, makes it an excellent place for stargazing. The clear, dark skies offer a stunning view of the stars, with the Milky Way stretching across the horizon and countless constellations twinkling overhead.
Tips from William: "Use a wide-angle lens with a large aperture (f/2.8 or wider) to capture the night sky. A tripod is essential for long exposures – start with a 20-30 second exposure at ISO 3200 and adjust as needed. If you want to capture star trails, set your camera for an exposure of several minutes, or take multiple shorter exposures and stack them in post-processing."
Insights from Hui Cha: "There's something incredibly peaceful about sitting under the stars in the quiet of the mountains. Bring a blanket or camping chair, and just take a moment to appreciate the vastness of the universe. It's a perfect way to end your journey through these incredible parks."
How to Access the Stargazing Spots:
- Location: Hurricane Ridge is located in the northern part of Olympic National Park, near the town of Port Angeles.
- Travel Directions: From Lake Crescent, head east on Highway 101 and then south on Hurricane Ridge Road. The drive takes about 1 hour from Lake Crescent.
- Viewing Points: Hurricane Ridge offers several beautiful spots for stargazing, including the area near the visitor center and the nearby trails.
Photographic Techniques:
- Milky Way Photography: Plan your session around the new moon to avoid light pollution. Use a wide-angle lens and set your ISO high (3200 or above) to capture the details of the Milky Way.
- Star Trails: To capture star trails, use a remote shutter release to minimize camera shake. Set your camera to bulb mode for exposures longer than 30 seconds. Alternatively, take multiple short exposures and stack them in post-processing to create the effect.
- Foreground Elements: Include some of the trees or the surrounding landscape in the foreground to add depth and interest to your night sky images.
Exploring the Area:
- After your stargazing session, take a quiet drive back to your accommodations. The night sky will continue to accompany you on your journey, providing a serene and reflective end to your adventure.
Conclusion: A Journey Through Washington's Wild and Wonderful Landscapes
As we packed up our gear and began the drive back through the forests and mountains of Washington, the night sky filled with stars, I felt a deep sense of peace and fulfillment. Our journey through Mount Rainier and Olympic had been more than just a photographic adventure; it had been a journey through some of the most diverse and awe-inspiring landscapes that Washington has to offer.
These parks are places where the natural world still reigns supreme, where the beauty of the land is matched only by the sense of peace that comes from being surrounded by such vast, untouched wilderness. From the towering peaks of Mount Rainier to the wild coastlines of Olympic, these landscapes offer a chance to connect with nature in a way that is both profound and humbling.
For us, this trip was a reminder of the importance of taking the time to explore and appreciate the natural world. It was a chance to capture the beauty of these places, to experience the peace that comes from being in such awe-inspiring surroundings, and to reconnect with each other and with ourselves.
As you embark on your own adventure through Mount Rainier and Olympic, we hope that our insights and experiences will help you make the most of your journey. Take your time, respect the land, and let the beauty of these parks inspire you. And when you look back on your photographs, may they remind you not just of the places you visited, but of the moments you lived.
Happy travels, and may your journey through Mount Rainier and Olympic be as rich and rewarding as ours.
Choosing Lodging for Your Adventure
Selecting the right lodging is essential to optimize your time and experience in these two majestic Washington state parks. Here's a breakdown of lodging options that are strategically located to enhance your daily explorations, offering comfort, convenience, and proximity to key attractions:
Lodging Options Near Mount Rainier National Park
Ashford, Packwood, and Enumclaw are the primary gateway towns to Mount Rainier, offering a variety of accommodations with easy access to the park's entrances.
1. Paradise Inn (Inside Mount Rainier National Park)
- Location: Inside Mount Rainier National Park, near the Paradise area.
- Why It's Ideal: Paradise Inn is the best option for staying within the park, providing direct access to the Paradise area's hiking trails, wildflower meadows, and stunning views of Mount Rainier. It's perfect for early morning starts and evening strolls.
- Amenities: Historic charm, comfortable rooms with no TVs or phones to maintain a rustic experience, an on-site restaurant, and a gift shop. The inn is ideal for those who want to stay immersed in the park's natural beauty.
2. National Park Inn (Inside Mount Rainier National Park)
- Location: Longmire, inside Mount Rainier National Park.
- Why It's Ideal: Located in the Longmire Historic District, National Park Inn offers a more intimate lodging option with easy access to the park's southwestern entrance and popular trails like the Wonderland Trail.
- Amenities: Cozy rooms, a family-friendly atmosphere, an on-site restaurant, and proximity to Longmire Museum and hiking trails.
3. Alexander's Lodge
- Location: Ashford, about 6 miles from the Nisqually Entrance of Mount Rainier National Park.
- Why It's Ideal: This historic lodge offers comfortable accommodations close to the park's Nisqually Entrance, making it a convenient base for exploring the Paradise area. It's great for those seeking a blend of rustic charm and modern amenities.
- Amenities: Cozy rooms, on-site dining, a garden, and proximity to local shops and restaurants in Ashford.
4. Alta Crystal Resort
- Location: Near Crystal Mountain, about 7 miles from the Sunrise Entrance of Mount Rainier National Park.
- Why It's Ideal: Alta Crystal Resort offers cabin-style accommodations with modern amenities and easy access to the Sunrise area of the park. It's perfect for families or groups looking for a more private, self-contained lodging option.
- Amenities: Fully equipped cabins, a seasonal outdoor pool, hot tub, and activities like hiking and skiing in the surrounding area.
5. Packwood Lodge
- Location: Packwood, about 10 miles from the Stevens Canyon Entrance of Mount Rainier National Park.
- Why It's Ideal: This lodge offers budget-friendly accommodations with a convenient location near the park's southern entrance. It's an excellent choice for those looking to explore the Ohanapecosh area and the southeastern section of the park.
- Amenities: Comfortable rooms, proximity to local dining and shopping, and easy access to the park.
Lodging Options Near Olympic National Park
Port Angeles, Forks, and Lake Quinault are key locations offering a variety of accommodations that provide easy access to different sections of Olympic National Park.
1. Lake Crescent Lodge (Inside Olympic National Park)
- Location: Inside Olympic National Park, on the shores of Lake Crescent.
- Why It's Ideal: Lake Crescent Lodge offers stunning lakeside accommodations within the park, making it an ideal base for exploring the northern section of Olympic, including Hurricane Ridge and the Sol Duc Valley.
- Amenities: Historic charm, comfortable rooms and cabins, an on-site restaurant, boat rentals, and access to hiking trails along Lake Crescent.
2. Kalaloch Lodge (Inside Olympic National Park)
- Location: On the Pacific Coast, within Olympic National Park.
- Why It's Ideal: Kalaloch Lodge is perfect for exploring Olympic's coastal areas, including Ruby Beach and the Kalaloch Tree Root Cave. It's ideal for those who want to stay close to the ocean and enjoy the park's rugged coastline.
- Amenities: Cozy cabins and lodge rooms, an on-site restaurant, and easy access to the beach and coastal trails.
3. Red Lion Hotel Port Angeles Harbor
- Location: Port Angeles, about 17 miles from the Hurricane Ridge Entrance of Olympic National Park.
- Why It's Ideal: This hotel offers modern accommodations with stunning views of the Strait of Juan de Fuca. It's a great base for exploring Hurricane Ridge, as well as the northern and eastern sections of Olympic National Park.
- Amenities: Spacious rooms, an on-site restaurant, fitness center, and proximity to the ferry terminal for trips to Victoria, BC.
4. Quinault Lodge (Inside Olympic National Park)
- Location: On the shores of Lake Quinault, within Olympic National Park.
- Why It's Ideal: Quinault Lodge is perfect for exploring the Quinault Rainforest and the southern sections of Olympic National Park. The historic lodge offers a peaceful, lakeside setting with access to trails and scenic drives.
- Amenities: Historic rooms and cabins, an on-site restaurant, indoor pool, and boat rentals for exploring Lake Quinault.
5. Pacific Inn Motel
- Location: Forks, about 12 miles from the Hoh Rain Forest Entrance of Olympic National Park.
- Why It's Ideal: This budget-friendly motel in Forks offers convenient access to the Hoh Rain Forest and the park's western coastal areas. It's a great option for those planning to explore the park's lush rainforests and remote beaches.
- Amenities: Clean, comfortable rooms, proximity to local dining and shopping, and easy access to the park.
Lodging Options Between Mount Rainier and Olympic National Parks
Olympia and Hood Canal are conveniently located between the two parks, offering a good midpoint for travelers looking to explore both areas.
1. Alderbrook Resort & Spa
- Location: Union, on the shores of Hood Canal.
- Why It's Ideal: This luxurious resort offers a peaceful stopover with stunning views of the Olympic Mountains. It's a perfect place to relax and recharge between your park adventures, with easy access to both Mount Rainier and Olympic National Parks.
- Amenities: Elegant rooms and cottages, a full-service spa, on-site dining, and a marina with kayak rentals.
2. Hotel RL Olympia
- Location: Olympia, about 60 miles from Mount Rainier and 75 miles from Olympic National Park.
- Why It's Ideal: This modern hotel offers comfortable accommodations in Washington's capital city, making it a convenient midpoint between the two parks. It's also close to local attractions like the Washington State Capitol and the Puget Sound waterfront.
- Amenities: Spacious rooms, a fitness center, an on-site restaurant, and proximity to downtown Olympia's shops and restaurants.
3. Robin Hood Village Resort
- Location: Union, along the Hood Canal.
- Why It's Ideal: This resort offers charming cabins and cottages with a rustic feel, providing a cozy and scenic stopover between your park visits. It's a great option for those seeking a quieter, more intimate lodging experience.
- Amenities: Cabins with kitchenettes, outdoor hot tubs, fire pits, and proximity to hiking and boating activities in the Hood Canal area.
Tips for Choosing Lodging:
- Book Early: Lodging in popular areas like Mount Rainier and Olympic National Parks can fill up quickly, especially during peak seasons (summer). Early booking is essential to secure your preferred accommodations.
- Consider Proximity: Staying within or close to the park entrances will maximize your time for exploration and reduce travel times, allowing you to make the most of your adventure.
- Balance Comfort and Access: Whether you prefer historic lodges, modern hotels, or rustic cabins, choose accommodations that fit your itinerary and travel style.
By selecting the right lodging options based on your itinerary, you'll be well-positioned to fully experience the beauty and diversity of Mount Rainier and Olympic National Parks.
.

Step into a world of timeless beauty with our premium, oversized hardcover book - crafted for discerning collectors and anyone who values the power of art. Perfect for your coffee table, it's more than just a book; it's a conversation starter, a window into over 30 years of William's visionary photography.
Your Support Matters
Purchasing artwork from William Stanek's collection not only brings beauty into your life but also helps us continue to share. Thank you for supporting our creative journey!

Support The Lights of Paris by Robert Stanek, William Stanek's pen name! Through vivid historical detail and deeply moving character stories, Robert takes readers on an unforgettable journey through one of history’s most transformative times.

