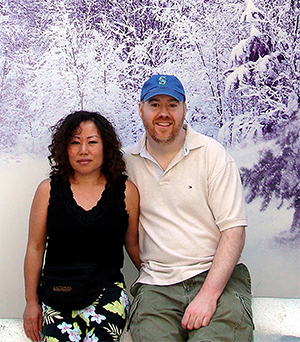
Embark on a journey curated by seasoned explorers William and Hui Cha Stanek, who have spent decades immersing themselves in the diverse landscapes of North America. These itineraries are more than just travel plans - they are thoughtfully crafted adventures designed to help you connect with the natural world, discover hidden gems, and create lasting memories.
National Parks Index | US Itineraries Index | American Roadtrips Index

Bring home a Bugville Critters book and watch as your child's love for reading and learning grows with every page. Hand-painted illustrations bring the heartwarming stories to life. Ask your librarian to add Bugville Critters to the library's digital collection today!
Discover William Stanek's Exclusive Art Collection
Explore and purchase the stunning art featured on this site. Own a piece of William Stanek's unique and captivating artwork today!
(April 19, 2025) Exploring Yellowstone and Grand Teton: A 3-Day Dual Adventure
Introduction: A Personal Journey
It was a crisp September morning when I, William Stanek, first set foot in Yellowstone National Park. The air was cool, with a slight bite that hinted at the approaching winter. My breath formed small clouds as I exhaled, adding a tangible quality to the excitement I felt as I drove along the winding roads. I was alone on this trip, with Hui Cha joining me later in Grand Teton. It wasn't just the thrill of capturing the raw beauty of these two magnificent parks that stirred me, but also the memories of my grandfather, who had often spoken of his love for Yellowstone.
My grandfather was a man of the outdoors – a rugged individual who thrived in the wilderness. He had taken me on countless camping trips as a boy, but Yellowstone had always been the one that got away. It was his dream destination, the one place he talked about but never got the chance to visit before he passed. Standing at the edge of Yellowstone Lake, watching the first light of dawn kiss the water's surface, I felt a connection with him as if he were there with me, sharing in the awe of this majestic landscape.
This trip was more than just photography for me; it was a journey to honor my grandfather's memory, to walk in the footsteps he never got to take, and to bring back images that would make him proud.
Day 1: Discovering Yellowstone National Park
Morning: The Majesty of Yellowstone Lake at Sunrise
6:00 AM - Sunrise at Yellowstone Lake
Overview: Begin your journey in Yellowstone with a sunrise at Yellowstone Lake, one of the park's most iconic locations. The vast expanse of water, framed by rugged mountains, offers a serene and breathtaking view as the first light of day breaks over the horizon.
Tips from William: "Arrive at least 30 minutes before sunrise to set up your gear. A wide-angle lens is essential here to capture the full expanse of the lake and the mountains beyond. Use a low ISO setting and a small aperture (f/11 or f/16) to achieve sharpness throughout the scene. If the wind is calm, the lake's surface will be mirror-like, reflecting the sky's colors and creating a stunning double image."
Insights from Hui Cha: "Bring a thermos of hot coffee or tea to keep warm. The mornings can be quite chilly, especially as autumn approaches. Also, pack a lightweight blanket or mat to sit on as you wait for the perfect shot."
How to Access Yellowstone Lake Views:
- Location: Yellowstone Lake is accessible from various points within the park, but one of the best spots for sunrise photography is from the West Thumb Geyser Basin area.
- Travel Directions: From the park's South Entrance, take the Grand Loop Road (US-89) north. The drive to West Thumb Geyser Basin takes about 30 minutes. Parking is available near the basin.
- Trail Details: The West Thumb Geyser Basin offers boardwalk trails that provide easy access to the lake's edge, making it an ideal spot for sunrise photography. The trails are flat and well-maintained, suitable for all fitness levels.
Photographic Techniques:
- Neutral Density (ND) Filter: Consider using an ND filter to extend your exposure time and smooth out the water's surface, especially if the wind picks up.
- Bracketing: Given the dynamic range of the scene, with the bright sky and darker foreground, bracketing your shots can help ensure you capture all the details. Later, you can merge these images in post-processing to create a high dynamic range (HDR) photo.
Exploring the Area:
- After capturing the sunrise, take a leisurely stroll along the West Thumb Geyser Basin's boardwalks. The steam rising from the geysers and hot springs creates an ethereal atmosphere, perfect for capturing close-ups and abstract shots.
Midday: The Vibrant Palette of the Grand Prismatic Spring
11:00 AM - Grand Prismatic Spring
Overview: The Grand Prismatic Spring is Yellowstone's largest hot spring and one of its most photographed features. The vibrant colors of the spring – ranging from deep blues to fiery oranges – are a photographer's dream.
Tips from William: "The best time to photograph the Grand Prismatic Spring is late morning when the sun is high enough to illuminate the colors fully. Use a polarizing filter to reduce glare and enhance the saturation of the colors. A drone would be ideal for capturing aerial views, but if that's not an option, head to the Fairy Falls Trail for an elevated perspective."
Insights from Hui Cha: "Be prepared for crowds, especially during peak tourist season. Patience is key here – waiting for the right moment when the boardwalks clear can make all the difference in your shots."
How to Access Grand Prismatic Spring:
- Location: The Grand Prismatic Spring is located in the Midway Geyser Basin, about a 20-minute drive north from the West Thumb Geyser Basin.
- Travel Directions: From the West Thumb area, continue north on Grand Loop Road until you reach the Midway Geyser Basin parking area.
- Trail Details: The boardwalk trail around the Grand Prismatic Spring is about 0.8 miles round-trip and is mostly flat. It's an easy walk, but the boardwalks can get slippery, so watch your step.
Photographic Techniques:
- Use of Tripod: Set your tripod on the boardwalk to stabilize your camera and avoid any shake, especially when shooting with slower shutter speeds.
- Framing: Frame your shot with some of the surrounding landscape, like the distant hills or trees, to give context to the size of the spring.
- Post-Processing: Enhance the colors in post-processing by adjusting the saturation and vibrancy carefully. However, avoid over-editing, as the natural colors are already striking.
Exploring the Area:
- If time permits, hike the Fairy Falls Trail, a 5-mile round-trip hike that offers an elevated view of the Grand Prismatic Spring. For those preferring a shorter, easier option, consider taking the short hike up to the overlook (about 1 mile round-trip), which offers a similar vantage point with much less effort.
Afternoon: The Drama of the Lower Falls at the Grand Canyon of the Yellowstone
3:00 PM - Lower Falls of the Yellowstone River
Overview: The Lower Falls, located in the Grand Canyon of the Yellowstone, is the park's most dramatic waterfall, plunging 308 feet into the canyon below. The falls are framed by the canyon's vibrant yellow and orange walls, making it a perfect subject for photography.
Tips from William: "The best time to photograph the Lower Falls is mid-afternoon when the sun is shining directly into the canyon. Use a telephoto lens to zoom in on the waterfall and capture the details of the water cascading over the edge. For a more expansive shot, use a wide-angle lens to include the canyon walls and the river below."
Insights from Hui Cha: "Don't rush your visit here. Spend some time exploring different vantage points, such as Artist Point and Lookout Point. Each offers a unique perspective of the falls and the canyon."
How to Access the Lower Falls:
- Location: The Lower Falls is located in the Canyon Village area, about a 45-minute drive from the Midway Geyser Basin.
- Travel Directions: From the Midway Geyser Basin, continue north on Grand Loop Road until you reach the Canyon Village area. Follow the signs to the Lower Falls parking area.
- Trail Details: The hike to the various viewpoints, such as Artist Point and Lookout Point, is short and easy, with paved paths leading to the overlooks.
Photographic Techniques:
- Long Exposure: To capture the motion of the water, try using a long exposure. Set your camera to a slow shutter speed (1/4 to 1 second) and use a neutral density (ND) filter to avoid overexposure.
- Vertical Framing: Consider framing your shot vertically to emphasize the height of the falls and the depth of the canyon.
- Zooming In: If you're using a telephoto lens, zoom in to focus on the point where the water begins to fall. The details of the water's power and the surrounding mist can create a dramatic image.
Exploring the Area:
- After photographing the falls, take some time to explore the nearby trails. The North Rim Trail offers additional views of the canyon and the river, while the South Rim Trail leads to the brink of the falls for an up-close experience.
Day 2: Immersing in the Beauty of Grand Teton National Park
Morning: Sunrise at Oxbow Bend
6:00 AM - Oxbow Bend, Grand Teton
Overview: Start your day in Grand Teton National Park with a sunrise at Oxbow Bend, one of the park's most iconic locations. The calm waters of the Snake River reflect the majestic Teton Range, creating a perfect mirror image that's a photographer's dream.
Tips from William: "Arrive at least 45 minutes before sunrise to secure your spot and set up your gear. Use a wide-angle lens to capture the full scene, and don't forget to include some foreground elements, such as the riverbank or nearby trees, to add depth to your composition."
Insights from Hui Cha: "Bring layers, as the early morning temperatures can be quite chilly. A light blanket or shawl can keep you comfortable while you wait for the perfect shot."
How to Access Oxbow Bend:
- Location: Oxbow Bend is located on the eastern side of Grand Teton National Park, just off U.S. Highway 26/89/191.
- Travel Directions: From the Jackson Lake Junction, drive about 1.5 miles east on U.S. Highway 26/89/191 until you see the turnout for Oxbow Bend on the left.
- Trail Details: There is no formal trail at Oxbow Bend, but the area offers plenty of space along the riverbank to set up your gear and explore different angles.
Photographic Techniques:
- Mirror Reflections: To capture the reflection of the mountains in the water, wait until the wind is calm and the water is still. Use a tripod and set your camera to a small aperture (f/11 or f/16) to ensure both the foreground and background are in sharp focus.
- Foreground Interest: Including foreground elements such as rocks, plants, or driftwood can add interest to your composition and lead the viewer's eye into the scene.
- Panorama: Consider creating a panoramic shot by taking multiple images of the scene from left to right and stitching them together in post-processing. This technique can capture the grandeur of the entire landscape.
Exploring the Area:
- After photographing Oxbow Bend, take a short drive to the nearby Jackson Lake Dam. The views from the dam are stunning, and the calm morning light creates ideal conditions for capturing the reflections in the lake.
Midday: Hiking and Photography at Jenny Lake
11:00 AM - Jenny Lake
Overview: Jenny Lake is one of the most picturesque spots in Grand Teton National Park. Surrounded by towering peaks and lush forests, the lake offers numerous hiking trails and scenic viewpoints.
Tips from William: "The hike around Jenny Lake is a must-do. For photography, consider starting with the Hidden Falls and Inspiration Point trails. The falls are particularly beautiful when the light filters through the trees, creating a dappled effect on the water."
Insights from Hui Cha: "If you're not up for a long hike, consider taking the shuttle boat across the lake. This option cuts down on hiking time and still allows you to experience the beauty of the area."
How to Access Jenny Lake:
- Location: Jenny Lake is located in the central part of Grand Teton National Park, about 30 minutes from Oxbow Bend.
- Travel Directions: From Oxbow Bend, drive south on U.S. Highway 26/89/191 and follow the signs to the Jenny Lake parking area.
- Trail Details: The hike to Hidden Falls is about 2 miles round-trip and is moderately easy. If you continue to Inspiration Point, the hike extends to about 3.5 miles round-trip and involves some elevation gain.
Photographic Techniques:
- Waterfall Shots: At Hidden Falls, use a tripod and set your camera to a slow shutter speed (1/4 to 1 second) to create a smooth, silky effect on the water. Be sure to use a polarizing filter to reduce glare and enhance the colors of the surrounding foliage.
- Framing with Trees: When photographing the lake, use the surrounding trees to frame your shots. This technique adds depth and context to the images and highlights the natural beauty of the area.
- Inspiration Point: At Inspiration Point, use a wide-angle lens to capture the sweeping views of the lake and the valley below. The elevated position provides a fantastic vantage point for panoramic shots.
Exploring the Area:
- After your hike, consider spending some time on the lake itself. Renting a canoe or kayak is a peaceful way to explore the shoreline and get closer to some of the more secluded areas.
Afternoon: Capturing the Teton Range from Snake River Overlook
3:00 PM - Snake River Overlook
Overview: The Snake River Overlook is one of the most famous viewpoints in Grand Teton National Park, made iconic by Ansel Adams' legendary photograph of the Tetons. The view from this spot is quintessentially Grand Teton, with the Snake River winding its way through the valley and the mountains standing tall in the background.
Tips from William: "This location is all about the composition. Use a wide-angle lens to capture the entire scene, but don't be afraid to experiment with a telephoto lens to zoom in on the peaks or the river's curves. Late afternoon light creates long shadows that add depth and dimension to the landscape."
Insights from Hui Cha: "Take your time here. The light changes rapidly in the mountains, and waiting for the perfect moment can result in some truly magical shots. Bring a snack and enjoy the view while you wait for the light to be just right."
How to Access Snake River Overlook:
- Location: The Snake River Overlook is located along U.S. Highway 26/89/191, about 15 minutes north of the town of Jackson.
- Travel Directions: From Jenny Lake, head south on U.S. Highway 26/89/191. The overlook is well-marked and has a parking area just off the highway.
- Trail Details: There's no formal trail at Snake River Overlook, but the area is open and accessible, with plenty of room to set up your gear and explore different angles.
Photographic Techniques:
- Leading Lines: Use the curves of the Snake River as leading lines to draw the viewer's eye into the image and towards the mountains in the background.
- Golden Hour: The best light for photography here is during the golden hour, shortly before sunset. The warm light enhances the colors of the landscape and creates beautiful contrasts between light and shadow.
- Monochrome: Consider experimenting with black-and-white photography to capture the scene in a way that pays homage to Ansel Adams' original image. The dramatic contrasts and textures lend themselves well to monochrome photography.
Exploring the Area:
- After capturing your shots at Snake River Overlook, take a leisurely drive along the nearby roads. There are numerous pullouts and viewpoints that offer different perspectives of the Tetons, each with its own unique charm.
Day 3: Connecting the Parks and Capturing the Final Moments
Morning: The Tranquility of Mormon Row at Sunrise
6:00 AM - Mormon Row Historic District
Overview: Start your final day with a visit to Mormon Row, where you can capture the iconic image of the old barns set against the backdrop of the Tetons. This area is particularly beautiful at sunrise when the first light illuminates the mountains and casts a warm glow on the historic structures.
Tips from William: "Arrive early to secure your spot. The most famous barn, known as the Moulton Barn, is the prime subject, but don't overlook the other buildings and the surrounding landscape. Use a wide-angle lens to capture the entire scene, and consider shooting from a low angle to emphasize the scale of the mountains."
Insights from Hui Cha: "This area is rich in history, so take some time to appreciate the stories behind these old homesteads. A cup of hot coffee and a quiet moment of reflection as the sun rises can make this experience even more special."
How to Access Mormon Row:
- Location: Mormon Row is located just off Antelope Flats Road, about 15 minutes from the town of Jackson.
- Travel Directions: From Jackson, head north on U.S. Highway 26/89/191 and turn right onto Antelope Flats Road. Follow the signs to the Mormon Row Historic District.
- Trail Details: There's no formal trail at Mormon Row, but the area is open and accessible, allowing you to explore the barns and surrounding fields freely.
Photographic Techniques:
- Foreground Elements: Use the old fences, grasses, or flowers as foreground elements to add depth to your composition and lead the viewer's eye towards the barns and the mountains.
- HDR Photography: Given the dynamic range of light during sunrise, consider bracketing your shots and combining them into an HDR image to capture the full range of details in both the shadows and highlights.
- Panoramas: The wide-open landscape here is perfect for panoramic photography. Capture multiple shots of the scene from left to right and stitch them together in post-processing to create a sweeping view of the entire area.
Exploring the Area:
- After photographing the barns, take some time to walk around the fields and soak in the tranquility of the area. The early morning light and the peaceful atmosphere make it a perfect place for reflection and relaxation.
Midday: The Journey from Grand Teton to Yellowstone
11:00 AM - Scenic Drive through Jackson Hole and into Yellowstone
Overview: As you transition from Grand Teton to Yellowstone, take the scenic route through Jackson Hole. This drive offers stunning views of the Tetons and the surrounding landscape, with plenty of opportunities for photography and exploration.
Tips from William: "This is a great time to experiment with motion blur techniques. Set your camera to a slower shutter speed and photograph the landscape from a moving car (as long as it's safe to do so). The resulting images can convey a sense of speed and movement, adding a dynamic element to your portfolio."
Insights from Hui Cha: "Pack a picnic lunch and stop at one of the many scenic pullouts along the way. This is a beautiful drive, and taking your time to enjoy it will make the journey as memorable as the destination."
How to Access the Scenic Drive:
- Location: The drive from Grand Teton National Park to Yellowstone's South Entrance takes about 1.5 hours.
- Travel Directions: From Jackson, head north on U.S. Highway 26/89/191 through Grand Teton National Park. Continue on this road as it enters Yellowstone National Park via the South Entrance.
- Points of Interest: Along the way, consider stopping at places like Moose Junction, the Snake River Overlook, and the Lewis River Channel. Each offers unique perspectives and opportunities for photography.
Photographic Techniques:
- Panning: To capture the motion of the landscape as you drive, try panning your camera with the movement of the car. This technique blurs the background while keeping the subject in focus, creating a sense of speed and excitement.
- Reflections: Look for opportunities to capture reflections of the Tetons in the rivers and lakes along the route. The Snake River, in particular, offers many such opportunities.
- Storytelling: Use this time to capture a series of images that tell the story of your journey. Include shots of the road, the passing landscape, and even your travel companions.
Exploring the Area:
- If time permits, take a detour to explore the Jackson Lake area or visit the historic Chapel of the Transfiguration. Both offer unique photo opportunities and a deeper connection to the park's cultural heritage.
Afternoon: The Drama of the Yellowstone River and Hayden Valley
3:00 PM - Hayden Valley, Yellowstone National Park
Overview: Hayden Valley is one of the best places in Yellowstone to observe wildlife. The open grasslands and winding Yellowstone River create a picturesque setting, and it's common to see bison, elk, and even bears in this area.
Tips from William: "Patience is key when photographing wildlife. Set up your tripod and wait for the perfect moment. A telephoto lens is essential for capturing distant animals, but remember to keep a safe distance and respect the wildlife. Use a fast shutter speed to freeze the action and a wide aperture to create a beautiful bokeh effect that isolates the subject from the background."
Insights from Hui Cha: "Bring a good pair of binoculars or a spotting scope to help locate wildlife in the distance. Also, pack a light snack and some water, as you might be here for a while waiting for the perfect shot."
How to Access Hayden Valley:
- Location: Hayden Valley is located in the central part of Yellowstone National Park, about a 45-minute drive north of Yellowstone Lake.
- Travel Directions: From the Fishing Bridge area, head north on Grand Loop Road. The valley begins just after you pass the Mud Volcano area.
- Viewing Points: There are several pullouts along the road where you can park and observe the wildlife. The best spots are typically along the Yellowstone River, where the animals often come to drink.
Photographic Techniques:
- Golden Hour Wildlife: The best time for wildlife photography is during the golden hour, either just after sunrise or before sunset. The warm light adds a beautiful glow to the animals' fur and the landscape.
- Framing with Landscape: Include some of the valley's rolling hills or the Yellowstone River in your composition to create a sense of place and context for the wildlife.
- Behavioral Shots: Instead of just focusing on portrait shots, try capturing animals in action – grazing, playing, or interacting with each other. These shots tell a story and add dynamism to your portfolio.
Exploring the Area:
- After your time in Hayden Valley, consider visiting the nearby Mud Volcano area. The bubbling mud pots and steaming fumaroles offer a stark contrast to the peaceful valley and provide another unique photographic opportunity.
Conclusion: A Journey Completed
As the sun set on our final day in Yellowstone, I found myself reflecting on the journey that Hui Cha and I had undertaken. This trip had been about more than just capturing beautiful images; it was a way to connect with the land, with history, and with each other. Standing at the edge of Yellowstone Lake, watching the last light of day fade into the horizon, I felt a deep sense of gratitude – not just for the incredible beauty we had witnessed, but for the opportunity to share these experiences with those who inspire and support me.
For those of you who embark on this dual adventure between Yellowstone and Grand Teton, I hope you find the same sense of wonder and connection that we did. These parks are more than just destinations; they are places where memories are made, where the past and present converge, and where the natural world speaks in a language all its own.
As you explore these magnificent landscapes, remember to take your time, respect the land, and capture not just the images, but the feelings that these places evoke. And when you look back at your photographs, may they remind you not just of the places you visited, but of the moments you lived.
Happy travels, and may your journey be as enriching and inspiring as ours.

Step into a world of timeless beauty with our premium, oversized hardcover book - crafted for discerning collectors and anyone who values the power of art. Perfect for your coffee table, it's more than just a book; it's a conversation starter, a window into over 30 years of William's visionary photography.
Your Support Matters
Purchasing artwork from William Stanek's collection not only brings beauty into your life but also helps us continue to share. Thank you for supporting our creative journey!

Support The Lights of Paris by Robert Stanek, William Stanek's pen name! Through vivid historical detail and deeply moving character stories, Robert takes readers on an unforgettable journey through one of history’s most transformative times.
