 Photography Tips for Everyday Moments
The most extraordinary beauty is often found in ordinary moments. In this series, William Stanek helps you see the world through a new lens, transforming everyday experiences into stunning photographic memories.

Transform your life with practical wisdom. Discover William Stanek's 'Living Well' series—your guide to a balanced and fulfilling life.
Discover William Stanek's Exclusive Art Collection
Explore and purchase the stunning art featured on this site. Own a piece of William Stanek's unique and captivating artwork today!
(April 25, 2025) Storytelling with Light: Advanced Lighting Techniques for Dramatic Impact
Light is one of the most powerful tools in a photographer’s arsenal. It can shape the mood, define the subject, and tell a story all on its own. While mastering the basics of lighting is essential, advancing to more complex techniques allows you to push the boundaries of your creativity, transforming ordinary scenes into dramatic works of art. Here, we’ll explore advanced lighting techniques that will help you create images with greater depth, texture, and emotion. From backlighting for drama to side lighting for texture and light painting for unique effects, we’ll guide you through the art of storytelling with light.
Introduction: The Power of Light in Photography
In photography, light is more than just a practical necessity—it’s a narrative tool. The way you use light can dramatically alter the mood, focus, and emotional impact of your images. It can create shadows that evoke mystery, highlights that draw attention, and textures that bring your subjects to life. Advanced lighting techniques take this a step further, allowing you to control and manipulate light with precision to achieve a specific artistic vision.
Whether you’re shooting portraits, landscapes, or still life, understanding how to work with different types of light opens up new creative possibilities. In this article, we’ll delve into three advanced lighting techniques—backlighting, side lighting, and light painting—each of which offers unique ways to tell stories and create dramatic impact in your photography.
Backlighting for Drama: Creating Silhouettes and Halos
Backlighting is a technique where the light source is positioned behind the subject, casting the front of the subject into shadow while creating a bright outline or halo around it. This technique can add a sense of drama, mystery, and depth to your images, making it a powerful tool for storytelling.
Creating Silhouettes: One of the most striking effects of backlighting is the silhouette. By positioning your subject in front of a strong light source—such as the setting sun, a bright window, or an artificial light—you can create a dark outline that emphasizes the shape and form of the subject while obscuring details. Silhouettes are particularly effective for conveying drama, emotion, or tension, as they reduce the subject to its most basic elements, allowing the viewer to focus on the overall composition and mood.
To create a silhouette, expose for the background rather than the subject, ensuring that the light source is properly exposed while the subject remains in shadow. This will result in a strong contrast between the bright background and the dark subject, enhancing the dramatic effect.
Enhancing with Halos: Backlighting can also create a beautiful halo effect around your subject, especially if there’s a light source like the sun or a lamp directly behind them. This halo adds a magical, ethereal quality to the image, highlighting the edges of the subject and creating a soft glow. Halos work particularly well in portraits, where the light wraps around the subject’s hair or body, adding depth and dimension.
To achieve this effect, position the light source directly behind the subject, and adjust your exposure to balance the brightness of the background with the shadows on the subject. You may also want to use a reflector or fill light to add some detail to the front of the subject without losing the overall impact of the backlight.
Playing with Flare: Lens flare, often seen as an imperfection, can be used creatively in backlit images to add an extra layer of drama. By allowing the light source to partially enter the frame, you can create streaks or bursts of light that add visual interest and a sense of spontaneity to your image. Experiment with different angles and lens settings to control the amount and appearance of the flare.
Pro Tip: When working with backlighting, pay attention to the position of your subject relative to the light source. Small adjustments in angle or distance can significantly change the look and intensity of the backlight, allowing you to fine-tune the effect.
Exercise: Practice creating silhouettes and halo effects using natural or artificial backlighting. Experiment with different subjects, light sources, and exposure settings to see how backlighting can alter the mood and impact of your images. Reflect on how these techniques help you tell a more dramatic and engaging story through light.
Side Lighting for Texture: Emphasizing Form and Surface Detail
Side lighting is a technique where the light source is positioned to the side of the subject, casting strong shadows that emphasize texture, form, and depth. This technique is ideal for bringing out the details in your subjects, whether it’s the rough texture of wood, the delicate wrinkles in fabric, or the contours of a person’s face.
Revealing Texture: Side lighting is particularly effective for revealing the texture of surfaces. When the light hits the subject from the side, it casts shadows across the surface, highlighting the peaks and valleys of the texture. This is especially useful in still life photography, where you want to showcase the material qualities of the subject—such as the grain of wood, the weave of cloth, or the texture of a leaf. Side lighting adds a three-dimensional quality to the image, making it more tactile and visually interesting.
To achieve this effect, position your light source at a 90-degree angle to the subject, so that the light grazes the surface. Adjust the distance and angle of the light to control the intensity and direction of the shadows, and use reflectors or diffusers to soften the light if needed.
Emphasizing Form: In portrait photography, side lighting can be used to emphasize the form and structure of the subject’s face. By lighting one side of the face while leaving the other in shadow, you create a sense of depth and dimension, highlighting the contours of the face and adding a sculptural quality to the image. This technique is often used in dramatic portraits, where the interplay of light and shadow adds intensity and emotion to the image.
When using side lighting in portraits, consider the angle and distance of the light source. A closer light will create more intense shadows, while a more distant or diffused light will soften the effect. Experiment with different positions to find the one that best suits the mood and character of your subject.
Creating Depth: Side lighting can also be used to create a sense of depth in landscapes or architectural photography. By lighting one side of the scene, you can accentuate the shape and structure of the elements within the frame, such as the ridges of a mountain, the lines of a building, or the rows of crops in a field. This adds a sense of three-dimensionality to the image, making it more engaging and dynamic.
Pro Tip: When using side lighting, pay attention to the contrast between light and shadow. High contrast can create a dramatic, moody effect, while lower contrast results in a softer, more subtle look. Adjust your exposure settings and consider using reflectors or fill lights to control the balance between light and shadow.
Exercise: Explore side lighting by photographing subjects with interesting textures, such as fabric, wood, or skin. Experiment with different angles and intensities of light to see how side lighting enhances the texture and form of your subjects. Reflect on how this technique adds depth and dimension to your images, and how it helps you tell a more compelling story through light.
Light Painting: Using Light as a Brush to Create Unique Effects
Light painting is an advanced lighting technique that involves using a moving light source to “paint” light onto a scene during a long exposure. This technique allows you to create unique, surreal, and artistic effects that are impossible to achieve with traditional lighting methods. Light painting can be used to add dramatic highlights, create abstract patterns, or even draw images with light, making it a versatile tool for creative storytelling.
Choosing Your Light Source: The light source you choose for light painting will greatly affect the final image. Flashlights, LED strips, glow sticks, and even sparklers can all be used to create different effects. The color, intensity, and shape of the light will determine how it appears in the image, so experiment with different tools to find the one that best suits your vision.
Setting Up Your Camera: To capture light painting, you’ll need to set your camera to a long exposure, typically ranging from a few seconds to several minutes, depending on the complexity of the light painting. Use a tripod to keep the camera steady and prevent blur, and set your aperture and ISO to achieve the desired exposure. A low ISO and a small aperture (high f-stop) will help keep the image sharp and prevent overexposure.
Painting with Light: Once your camera is set up, use your light source to “paint” light onto the scene. This can be done by moving the light source around the subject, waving it in front of the camera, or even drawing shapes and patterns in the air. The key is to move the light source continuously and deliberately, as the camera will capture the path of the light over the duration of the exposure.
Creating Abstract Effects: Light painting allows for a great deal of creativity and experimentation. You can create abstract effects by moving the light source in random patterns, or by combining different colors of light to create a dynamic, multi-colored image. You can also use light painting to highlight specific parts of a scene, such as tracing the edges of a subject or adding highlights to a landscape. The possibilities are endless, so don’t be afraid to experiment and try new ideas.
Combining Light Painting with Other Techniques: Light painting can be combined with other lighting techniques, such as backlighting or side lighting, to create even more complex and dramatic effects. For example, you could use side lighting to illuminate a subject’s face while using light painting to add a halo or abstract pattern around them. This layering of light techniques adds depth and interest to the image, making it more visually engaging.
Pro Tip: When light painting, consider the color and intensity of your light source. Warm colors like red, orange, and yellow create a more vibrant, energetic effect, while cool colors like blue and green can add a sense of calm or mystery. You can also use colored gels or filters to change the color of your light source and create different moods in your image.
Exercise: Set up a light painting session using a long exposure and a portable light source. Experiment with different movements, colors, and intensities of light to create unique effects. Reflect on how light painting allows you to manipulate light as if it were a physical brush, and how this technique can add an artistic and imaginative dimension to your photography.
Mastering the Art of Light: Creating Images with Dramatic Impact
Advanced lighting techniques open up a world of creative possibilities, allowing you to tell stories with light in ways that go beyond the ordinary. Whether you’re creating dramatic silhouettes, emphasizing texture and form with side lighting, or painting with light to create surreal effects, these techniques give you the tools to transform your photography into a powerful visual narrative.
The Intersection of Light and Story: Light is not just a technical element in photography—it’s a storytelling device. The way you choose to light a scene can convey emotion, highlight important details, and guide the viewer’s eye through the image. By mastering advanced lighting techniques, you gain greater control over how your stories are told, allowing you to create images that resonate with depth and drama.
Pro Tip: Practice and experimentation are key to mastering advanced lighting techniques. The more you work with different types of light, the more intuitive your understanding of light will become. Use each photoshoot as an opportunity to explore new ideas and refine your skills, and don’t be afraid to push the boundaries of what’s possible with light.
Exercise: Plan a photoshoot that incorporates all three advanced lighting techniques: backlighting, side lighting, and light painting. Choose a subject or theme that allows you to explore the dramatic potential of light, and experiment with different approaches until you achieve the desired effect. Reflect on how these techniques enhance your ability to tell stories through your photography, and how they contribute to the overall impact of your images.
Conclusion: Telling Stories with Light
Advanced lighting techniques are essential tools for photographers looking to create images with dramatic impact and artistic depth. By mastering backlighting, side lighting, and light painting, you can manipulate light to enhance the mood, texture, and narrative of your photos, transforming ordinary scenes into powerful visual stories.
As you continue to explore the art of lighting in your photography, remember that light is more than just a practical element—it’s a creative force that can shape the way your images are seen and felt. Use light intentionally, experiment with different techniques, and let your imagination guide you in creating images that are not only visually stunning but also deeply meaningful.
Share your lighting-focused photography with us on Instagram using #StorytellingWithLight. We’re excited to see how you’re using advanced lighting techniques to create dramatic and impactful images.

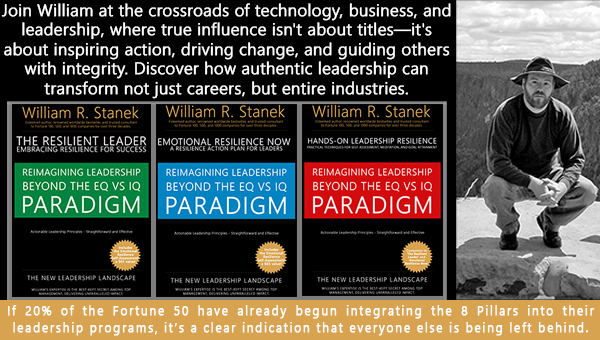
Join William at the crossroads of technology, business, and leadership, where true influence isn't about titles - it's about inspiring action, driving change, and guiding others with integrity. Discover how authentic leadership can transform not just careers, but entire industries.
Bring Inspiration Home
Enhance your space with William Stanek's evocative art. Each piece is crafted to inspire and uplift your everyday life.

Support The Lights of Paris by Robert Stanek, William Stanek's pen name! Through vivid historical detail and deeply moving character stories, Robert takes readers on an unforgettable journey through one of history’s most transformative times.


