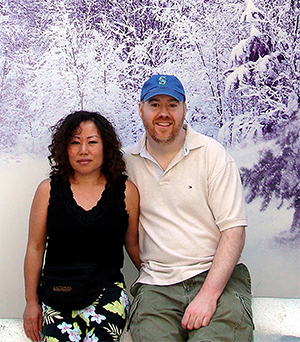
Embark on a journey curated by seasoned explorers William and Hui Cha Stanek, who have spent decades immersing themselves in the diverse landscapes of North America. These itineraries are more than just travel plans - they are thoughtfully crafted adventures designed to help you connect with the natural world, discover hidden gems, and create lasting memories.
National Parks Index | US Itineraries Index | American Roadtrips Index

Bring home a Bugville Critters book and watch as your child's love for reading and learning grows with every page. Hand-painted illustrations bring the heartwarming stories to life. Ask your librarian to add Bugville Critters to the library's digital collection today!
Discover William Stanek's Exclusive Art Collection
Explore and purchase the stunning art featured on this site. Own a piece of William Stanek's unique and captivating artwork today!
(March 14, 2025) Exploring Sequoia and Kings Canyon National Parks: A 3-Day Dual Adventure
Introduction: A Personal Connection to the Giants
It was the summer of 1996 when Hui Cha and I first set foot in Sequoia National Park. We had just moved to the West Coast, and the Sierra Nevada mountains called to us with promises of towering trees, deep canyons, and star-filled skies. Our first visit was meant to be a brief weekend getaway, but it quickly became something much more profound.
I still remember the first time we stood beneath the General Sherman Tree. The sheer size of it was overwhelming, almost humbling. For Hui Cha, who had grown up surrounded by the sprawling urban landscapes of Seoul, it was a moment of deep connection with nature. For me, it was like stepping back in time to a place where the world moved a little slower, where the ancient sequoias had stood for thousands of years, silently watching the world change around them.
This trip was the beginning of a long love affair with Sequoia and Kings Canyon National Parks – a love that has drawn us back time and time again, each visit revealing new wonders and deeper connections. This guide is a reflection of our years of exploration and discovery in these majestic parks. Whether you're a seasoned traveler or a first-time visitor, we hope our insights will help you make the most of your journey into the heart of these incredible natural landscapes.
Day 1: Discovering the Giants of Sequoia National Park
Morning: Sunrise at Moro Rock
5:30 AM - Sunrise at Moro Rock
Overview: Start your journey with a sunrise at Moro Rock, one of the most iconic viewpoints in Sequoia National Park. The short but steep climb to the top rewards you with panoramic views of the Great Western Divide and the vast wilderness beyond.
Tips from William: "Arrive at least 30 minutes before sunrise to get set up. The hike is just under half a mile, but it's steep, with over 350 steps carved into the rock. Use a wide-angle lens to capture the expansive views. A polarizing filter can help reduce glare and enhance the colors of the sky and the distant peaks."
Insights from Hui Cha: "Bring a flashlight or headlamp for the early morning ascent, and dress warmly – the air at this elevation can be quite cold before dawn. I like to bring a thermos of hot tea to enjoy at the top as the sun rises."
How to Access Moro Rock:
- Location: Moro Rock is located in the Giant Forest area of Sequoia National Park.
- Travel Directions: From the park's entrance at Ash Mountain, take the Generals Highway for about 40 minutes until you reach the Moro Rock parking area. The trailhead is well-marked.
- Trail Details: The trail to the top of Moro Rock is a short but steep climb, covering about 0.5 miles round-trip. The path is paved, but the steps can be narrow and steep, so take your time.
Photographic Techniques:
- Golden Hour Lighting: The golden hour light at sunrise will cast a warm glow over the mountains. Use this to your advantage by positioning the sun just above the horizon to create dramatic shadows and highlights.
- HDR Imaging: Consider bracketing your shots and using HDR (High Dynamic Range) imaging to capture the full range of light, especially if there's a big difference between the brightness of the sky and the darker valleys below.
Exploring the Area:
- After sunrise, take some time to explore the nearby Crescent Meadow, often referred to as the "Gem of the Sierra." The meadow is a beautiful spot for morning photography, especially as the light filters through the trees.
Midday: Walking Among Giants at the General Sherman Tree
10:00 AM - General Sherman Tree
Overview: No visit to Sequoia National Park is complete without standing beneath the General Sherman Tree, the largest tree on Earth by volume. This ancient giant is not just a tree, but a living testament to the passage of time.
Tips from William: "The best time to photograph the General Sherman Tree is mid-morning when the light is soft, but the crowds are still thin. Use a wide-angle lens to capture the entire tree, or focus on the base for a more intimate portrait. A circular polarizer can help reduce glare from the sunlight filtering through the canopy."
Insights from Hui Cha: "Take your time here. The General Sherman Tree is surrounded by other giant sequoias, each with its own unique character. Don't forget to look up – the perspective from beneath these towering giants is something you won't want to miss."
How to Access the General Sherman Tree:
- Location: The General Sherman Tree is located in the Giant Forest area, about a 10-minute drive from the Moro Rock parking area.
- Travel Directions: From Moro Rock, continue along the Generals Highway to the designated parking area for the General Sherman Tree. The trailhead is well-marked, and there's a shuttle service available during peak seasons.
- Trail Details: The trail to the General Sherman Tree is an easy 0.5-mile walk down a paved path. The return trip is uphill, so take it slow if you need to.
Photographic Techniques:
- Vertical Panorama: Given the immense height of the tree, consider creating a vertical panorama by stitching together multiple shots. This technique allows you to capture the entire tree without distortion.
- Detail Shots: Don't just focus on the whole tree – get in close to capture the texture of the bark, the massive roots, and the play of light and shadow on the forest floor.
Exploring the Area:
- After visiting the General Sherman Tree, take a stroll along the Congress Trail, a 2-mile loop that winds through a grove of some of the park's most impressive sequoias. The trail is relatively flat and offers plenty of opportunities for photography and quiet reflection.
Afternoon: Exploring the Depths of Kings Canyon
1:30 PM - Kings Canyon Scenic Byway
Overview: Transitioning from the towering trees of Sequoia to the deep valleys of Kings Canyon, this scenic drive offers breathtaking views of one of the deepest canyons in North America. The Kings Canyon Scenic Byway (Highway 180) takes you deep into the heart of the canyon, following the course of the Kings River.
Tips from William: "The drive itself is incredibly photogenic. Use a polarizing filter to bring out the blue of the river and the green of the trees. Stop frequently at the various overlooks to capture wide-angle shots of the canyon and the distant peaks."
Insights from Hui Cha: "This drive can be quite long, so plan to take your time and enjoy the journey. Pack a picnic lunch and find a quiet spot along the river to take a break and soak in the beauty of the canyon."
How to Access Kings Canyon:
- Location: The Kings Canyon Scenic Byway begins at Grant Grove and extends for about 30 miles to the Cedar Grove area.
- Travel Directions: From the General Sherman Tree, head back to the Generals Highway and continue north to the Kings Canyon Visitor Center at Grant Grove. From there, follow Highway 180 east into the canyon.
- Points of Interest: Along the way, be sure to stop at Junction View, Grizzly Falls, and Roaring River Falls, each offering unique perspectives of the canyon's rugged beauty.
Photographic Techniques:
- Long Exposures: At Grizzly Falls and Roaring River Falls, use a tripod and set your camera to a slow shutter speed to create a smooth, silky effect on the water. A neutral density (ND) filter can help you achieve longer exposures even in daylight.
- Framing: Use the natural landscape to frame your shots. The towering cliffs and dense forests make excellent foregrounds for capturing the grandeur of the canyon.
Exploring the Area:
- Consider a short hike to Zumwalt Meadow, one of the most scenic spots in Kings Canyon. The 1.5-mile loop trail offers stunning views of the meadow, the river, and the surrounding granite walls. It's an easy hike, suitable for all ages.
Evening: Sunset at Panoramic Point
6:30 PM - Sunset at Panoramic Point
Overview: End your day with a sunset at Panoramic Point, located near Grant Grove. This lesser-known spot offers sweeping views of the High Sierra, with peaks that glow in the golden light of dusk.
Tips from William: "Arrive about an hour before sunset to set up your shot. Use a telephoto lens to zoom in on the distant peaks, and a wide-angle lens for capturing the entire scene. The light changes quickly, so be ready to adjust your settings as the sun dips below the horizon."
Insights from Hui Cha: "Panoramic Point is a bit off the beaten path, so you're likely to have it mostly to yourself. Bring a blanket or camping chair, and enjoy a quiet moment as the day comes to a close."
How to Access Panoramic Point:
- Location: Panoramic Point is located near the Kings Canyon Visitor Center in Grant Grove.
- Travel Directions: From the Kings Canyon Visitor Center, take the Panoramic Point Road for about 2.3 miles to the parking area. The road is narrow and winding, so drive carefully.
- Trail Details: The walk from the parking area to Panoramic Point is a short, easy stroll of about 0.25 miles. The trail is paved and accessible.
Photographic Techniques:
- Golden Hour and Blue Hour: The transition from golden hour to blue hour can be particularly striking at Panoramic Point. Keep shooting as the light fades to capture the deepening colors of the sky and the silhouette of the mountains.
- Panoramas: The view from Panoramic Point is ideal for a panoramic shot. Take multiple images from left to right and stitch them together in post-processing to create a wide, sweeping vista.
Exploring the Area:
- If you're up for it, consider staying after sunset for some stargazing. The lack of light pollution in this area makes for incredible views of the night sky. Use a tripod and long exposure settings to capture the stars and the Milky Way.
Day 2: Delving Deeper into Kings Canyon National Park
Morning: Mist Falls Hike
7:00 AM - Mist Falls Hike
Overview: Start your second day with a hike to Mist Falls, one of the most popular trails in Kings Canyon. The trail offers a mix of serene river views, lush forests, and the powerful Mist Falls itself.
Tips from William: "The best time to start this hike is early morning, when the light is soft, and the trail is less crowded. Use a mid-range zoom lens (24-70mm) to capture the diverse scenery along the trail. The falls are particularly photogenic in the morning light, with the mist creating a soft, ethereal effect."
Insights from Hui Cha: "This hike is about 9 miles round-trip, so be prepared with plenty of water, snacks, and sturdy footwear. The trail is mostly flat with a moderate incline near the falls, making it accessible to most hikers."
How to Access the Mist Falls Trail:
- Location: The trailhead for Mist Falls is located at the end of the Kings Canyon Scenic Byway in the Cedar Grove area.
- Travel Directions: From Grant Grove, take Highway 180 east to the Roads End parking area in Cedar Grove. The trailhead is well-marked.
- Trail Details: The hike to Mist Falls is approximately 9 miles round-trip, with a moderate incline near the falls. The trail is well-maintained and follows the South Fork of the Kings River for much of the way.
Alternative Activity: Roaring River Falls
- For a shorter and easier hike, visit Roaring River Falls. The trail to the falls is just 0.3 miles round-trip and offers a beautiful, cascading waterfall surrounded by granite cliffs.
Photographic Techniques:
- Waterfall Photography: To capture the motion of the water at Mist Falls, use a slow shutter speed (1/4 to 1 second) and a neutral density filter. Position yourself to capture the falls from different angles, including side views that highlight the mist.
- Forests and Rivers: Along the trail, focus on the interplay of light and shadow in the forest, and the reflections in the river. A polarizing filter can help reduce glare and enhance the colors of the foliage.
Exploring the Area:
- After reaching Mist Falls, take some time to explore the area around the falls. There are several spots where you can sit and enjoy the sound of the rushing water, making it a perfect place for a mid-morning break.
Midday: Exploring the Ancient Grant Grove
12:00 PM - Grant Grove
Overview: After your morning hike, head to Grant Grove, home to the General Grant Tree, the second-largest tree in the world by volume. This area is rich in history and natural beauty, offering a peaceful respite in the heart of the forest.
Tips from William: "Midday light can be harsh, so focus on close-ups of the trees' bark and roots, where the shadows can add texture and depth. The General Grant Tree is challenging to capture in one shot due to its size, so consider using a wide-angle lens or stitching together a vertical panorama."
Insights from Hui Cha: "Take the time to explore the entire grove. The fallen sequoia known as the Fallen Monarch is a fascinating subject, especially when you consider its history as a shelter for early settlers and a stable for the U.S. Cavalry."
How to Access Grant Grove:
- Location: Grant Grove is located near the Kings Canyon Visitor Center, making it easily accessible.
- Travel Directions: From Cedar Grove, return west on Highway 180 to the Grant Grove Village area.
- Trail Details: The Grant Grove loop is an easy, 0.5-mile walk along a paved trail that winds through some of the park's most impressive sequoias.
Photographic Techniques:
- Close-Up Shots: Focus on the details – the texture of the bark, the patterns in the roots, and the contrast between the sequoias and the surrounding forest. A macro lens can help you capture these intricate details.
- Wide-Angle Views: For capturing the entire tree or a group of trees, use a wide-angle lens. Position yourself at the base of the tree and shoot upwards to emphasize its towering height.
Exploring the Area:
- After visiting the Grant Grove, stop by the Grant Grove Village for a bite to eat at the local restaurant or a coffee at the caf�. The village also has a visitor center with exhibits on the history and ecology of the area.
Afternoon: Hiking the Big Baldy Ridge Trail
3:00 PM - Big Baldy Ridge Trail
Overview: The Big Baldy Ridge Trail offers panoramic views of the Sierra Nevada mountains and the surrounding wilderness. This moderately challenging hike takes you to the summit of Big Baldy, where you'll be rewarded with 360-degree views of the park.
Tips from William: "The trail is exposed, so the best time to hike is in the late afternoon when the light is softer, and the temperatures are cooler. Use a polarizing filter to enhance the deep blues of the sky and the distant mountains. A telephoto lens can help you capture details in the landscape, such as distant peaks or clusters of trees."
Insights from Hui Cha: "The trail is about 4 miles round-trip, with a steady incline. Bring plenty of water and take breaks as needed. The summit is a great place to enjoy a quiet moment and take in the expansive views."
How to Access the Big Baldy Ridge Trail:
- Location: The trailhead for Big Baldy Ridge is located off the Generals Highway, about 20 minutes from Grant Grove.
- Travel Directions: From Grant Grove, take the Generals Highway south for about 8 miles until you see the turnoff for the Big Baldy trailhead.
- Trail Details: The trail is about 4 miles round-trip with a moderate incline. The path is well-maintained, but the elevation gain can be challenging for some hikers.
Alternative Activity: Buena Vista Peak
- For a shorter and easier hike with similar views, consider Buena Vista Peak. The trail is about 2 miles round-trip and offers stunning views of the Sierra Nevada and Kings Canyon.
Photographic Techniques:
- Panoramas: The summit of Big Baldy is perfect for panoramic photography. Take multiple shots from left to right and stitch them together to capture the full scope of the landscape.
- Detail Shots: Use a telephoto lens to zoom in on distant features, such as mountain peaks, forested valleys, or patches of snow. These shots can add variety to your landscape portfolio.
Exploring the Area:
- After your hike, take a leisurely drive back along the Generals Highway, stopping at any viewpoints that catch your eye. The late afternoon light is perfect for capturing the beauty of the park's forests and mountains.
Evening: Stargazing at Kings Canyon Overlook
8:00 PM - Kings Canyon Overlook
Overview: End your day with a stargazing session at Kings Canyon Overlook, a perfect spot to witness the night sky in all its glory. The clear, high-altitude air of the Sierra Nevada offers some of the best stargazing conditions in California.
Tips from William: "Use a wide-angle lens with a large aperture (f/2.8 or wider) to capture the night sky. A tripod is essential for long exposures – start with a 20-30 second exposure at ISO 3200 and adjust as needed. If you want to capture star trails, set your camera for an exposure of several minutes, or take multiple shorter exposures and stack them in post-processing."
Insights from Hui Cha: "Dress warmly, even in summer – the temperature can drop quickly after sunset. Bring a blanket or chair to sit on while you enjoy the view. This is a peaceful way to end your day, and the stars here are truly mesmerizing."
How to Access Kings Canyon Overlook:
- Location: Kings Canyon Overlook is located along the Kings Canyon Scenic Byway, not far from the Grant Grove area.
- Travel Directions: From Grant Grove, take Highway 180 east for about 15 minutes. The overlook is well-marked, with a small parking area.
- Viewing Points: The overlook offers unobstructed views of the canyon and the night sky, making it an ideal spot for both landscape and astrophotography.
Photographic Techniques:
- Star Trails: For star trails, use a remote shutter release to minimize camera shake. Set your camera to bulb mode for exposures longer than 30 seconds. Alternatively, take multiple short exposures and stack them in post-processing to create the effect.
- Milky Way Photography: If you're shooting the Milky Way, plan your session around the new moon to avoid light pollution. Use a wide-angle lens and set your ISO high (3200 or above) to capture the details of the galaxy.
Exploring the Area:
- If you're feeling adventurous, consider driving to another nearby overlook to vary your shots. The different angles and elevations offer unique perspectives on the night sky.
Day 3: A Final Exploration of Sequoia and Kings Canyon
Morning: Climbing Moro Rock (Again)
5:30 AM - Moro Rock
Overview: Return to Moro Rock for a second sunrise, this time with the added benefit of familiarity. This will allow you to experiment with different compositions and techniques that you may have missed on your first visit.
Tips from William: "This time, focus on capturing the changing light as it moves across the landscape. Try using a telephoto lens to zoom in on specific areas of the park, such as the ridges or valleys. Experiment with different angles and perspectives – there's always something new to discover, even in a familiar spot."
Insights from Hui Cha: "Revisiting a location can deepen your connection to it. Take this opportunity to sit quietly and observe the subtle changes in the light, the sounds, and the atmosphere. It's these small moments that make each visit unique."
How to Access Moro Rock:
- Location: Moro Rock is located in the Giant Forest area of Sequoia National Park, just as before.
- Travel Directions: Follow the same route as on Day 1 to reach the Moro Rock parking area.
- Trail Details: The trail remains the same – a short, steep climb up 350 steps to the top of the rock.
Photographic Techniques:
- Revisiting Shots: Look at your photos from Day 1 and think about what you could improve. Maybe there's a shot you wish you had taken from a slightly different angle or with different settings – now's your chance to get it right.
- Long Exposure: Consider bringing a neutral density filter to experiment with long exposures, even in the morning light. This can create a surreal effect with any moving clouds or distant waterfalls.
Exploring the Area:
- After photographing Moro Rock, take a different path through the Giant Forest to see new sights or revisit places that caught your eye on Day 1. The early morning light casts a different glow on everything, making it feel like a new experience.
Midday: Exploring the Remote Mineral King Valley
10:00 AM - Mineral King Valley
Overview: Mineral King is one of Sequoia National Park's most remote and less-visited areas. The valley offers stunning mountain scenery, alpine lakes, and a sense of solitude that's hard to find elsewhere in the park.
Tips from William: "Mineral King is a bit of a trek to get to, but it's worth the effort. Use a wide-angle lens to capture the expansive views of the valley, and a telephoto lens to zoom in on the details of the peaks and lakes. The light here is particularly beautiful in the late morning, as the sun rises above the surrounding mountains."
Insights from Hui Cha: "The road to Mineral King is narrow and winding, so take your time and enjoy the journey. Pack a lunch and plan to spend several hours here – it's a place that invites you to slow down and take it all in."
How to Access Mineral King Valley:
- Location: Mineral King is located in the southern part of Sequoia National Park.
- Travel Directions: From the park entrance at Ash Mountain, take the Mineral King Road for about 25 miles. The road is narrow and unpaved in some sections, so drive carefully.
- Trail Details: There are several trails in the Mineral King area, ranging from easy walks to challenging hikes. One of the most accessible is the Eagle Lake Trail, a 6.8-mile round-trip hike with moderate elevation gain.
Alternative Activity: Silver City Mountain Resort
- For a shorter, easier option, visit Silver City Mountain Resort, located near the start of the Mineral King Road. The resort offers a cozy spot for lunch and some beautiful views of the surrounding mountains.
Photographic Techniques:
- Alpine Lakes: The reflections in the alpine lakes are particularly photogenic. Use a polarizing filter to enhance the colors and reduce glare, and try to capture the contrast between the still water and the rugged peaks.
- HDR Photography: Given the high contrast between the bright sky and the darker valley, consider bracketing your shots and using HDR imaging to capture the full range of light.
Exploring the Area:
- Spend some time exploring the trails and enjoying the solitude of Mineral King. It's a place that rewards those who take the time to appreciate its quiet beauty.
Afternoon: Reflecting at Crescent Meadow
2:00 PM - Crescent Meadow
Overview: Conclude your visit with a peaceful walk around Crescent Meadow, often called the "Gem of the Sierra." This lush, green meadow is surrounded by towering sequoias and offers a serene setting for reflection and photography.
Tips from William: "The light in Crescent Meadow can be magical in the afternoon, as the sun filters through the trees and casts dappled shadows on the grass. Use a wide-angle lens to capture the full expanse of the meadow, and a macro lens for close-ups of the wildflowers and other small details."
Insights from Hui Cha: "This is a place to slow down and simply be present. Find a quiet spot to sit and listen to the sounds of the forest. It's a perfect way to end your journey through Sequoia and Kings Canyon."
How to Access Crescent Meadow:
- Location: Crescent Meadow is located in the Giant Forest area, near Moro Rock.
- Travel Directions: From the Giant Forest Museum, take Crescent Meadow Road for about 2 miles to the parking area.
- Trail Details: The Crescent Meadow loop is an easy, 1.5-mile trail that circles the meadow. The trail is flat and well-maintained, making it accessible to all visitors.
Photographic Techniques:
- Close-Up Shots: Focus on the small details – the flowers, the insects, the texture of the tree bark. A macro lens will help you capture these intricate details in stunning clarity.
- Reflections: If the weather is calm, look for reflections in the small streams that run through the meadow. These can add a beautiful element to your landscape shots.
Exploring the Area:
- After walking the Crescent Meadow loop, consider taking the short detour to Tharp's Log, a hollowed-out sequoia that was used as a cabin by early settler Hale Tharp. It's a fascinating piece of history that adds depth to your understanding of the park.
Conclusion: A Journey Through Time and Nature
As our final day in Sequoia and Kings Canyon came to an end, Hui Cha and I found ourselves sitting quietly in Crescent Meadow, watching the last rays of sunlight dance through the trees. This journey had been more than just a chance to capture stunning photographs – it was a journey through time, a walk among giants that had stood for thousands of years, and a reminder of the beauty and resilience of the natural world.
For us, these parks are not just destinations; they are places of deep personal connection, places that invite reflection and renewal. Whether you're a seasoned adventurer or a first-time visitor, we hope this guide helps you discover the wonders of Sequoia and Kings Canyon in a way that is both meaningful and memorable.
Remember to take your time, to look closely, and to let the beauty of these parks inspire you. As you explore the towering sequoias, the deep canyons, and the serene meadows, may you find the same sense of awe and wonder that we have found here, time and time again.
Happy travels, and may your journey through Sequoia and Kings Canyon be as rich and rewarding as ours.
Choosing Lodging for Your Adventure
Selecting the right lodging is key to maximizing your experience in both parks. Here's a breakdown of lodging options that are ideally located to fit into your daily explorations, offering both convenience and comfort:
Lodging Options in Sequoia National Park
1. Wuksachi Lodge (Sequoia National Park)
- Location: In the heart of Sequoia National Park, near the Giant Forest.
- Why It's Ideal: Wuksachi Lodge is the best place to stay if you're looking to explore the Giant Forest, Moro Rock, and Crescent Meadow. Its central location makes it convenient for accessing the main attractions of Sequoia, including the General Sherman Tree.
- Amenities: Rustic yet comfortable rooms, on-site dining, proximity to key trails and viewpoints, and a gift shop.
2. John Muir Lodge (Kings Canyon National Park)
- Location: In Grant Grove Village, close to the General Grant Tree.
- Why It's Ideal: While technically in Kings Canyon, this lodge is perfectly situated for exploring the northern section of Sequoia, particularly the Grant Grove area. It's a great base for visiting both parks in a seamless manner.
- Amenities: Cozy, cabin-like rooms, a restaurant, and proximity to both the General Grant Tree and Kings Canyon scenic drives.
3. Bearpaw High Sierra Camp (Sequoia National Park)
- Location: Deep within Sequoia's wilderness, accessed via a moderate hike.
- Why It's Ideal: For adventurers seeking a more remote and rustic experience, this camp offers incredible access to the High Sierra trails, with guided hikes available. It's ideal if you plan to extend your adventure into the backcountry.
- Amenities: Tent cabins, communal dining, and spectacular mountain views.
Lodging Options in Kings Canyon National Park
1. Cedar Grove Lodge (Kings Canyon National Park)
- Location: In the Cedar Grove area, deep in Kings Canyon.
- Why It's Ideal: Cedar Grove Lodge is the best option for exploring the remote and rugged Cedar Grove area of Kings Canyon, including Zumwalt Meadow, Roaring River Falls, and Mist Falls. Staying here minimizes the need for long drives, allowing you to spend more time in the heart of the canyon.
- Amenities: Comfortable rooms, a snack bar, and close access to trailheads and scenic river views.
2. Grant Grove Cabins (Kings Canyon National Park)
- Location: Near the entrance of Kings Canyon National Park, in Grant Grove Village.
- Why It's Ideal: These historic cabins offer a more rustic experience while providing easy access to both Grant Grove and the road leading to Cedar Grove. It's a great base for those looking to explore the General Grant Tree and other nearby trails.
- Amenities: Rustic cabins with basic amenities, proximity to a restaurant and market, and easy access to major park attractions.
Lodging Options Between Sequoia and Kings Canyon National Parks
1. Montecito Sequoia Lodge (Between the Parks)
- Location: Along the Generals Highway, between Sequoia and Kings Canyon National Parks.
- Why It's Ideal: Montecito Sequoia Lodge is a great choice for travelers who want to split their time between both parks. It's conveniently located along the Generals Highway, making it easy to access both the Giant Forest in Sequoia and the Grant Grove in Kings Canyon.
- Amenities: Family-friendly accommodations, all-inclusive meals, seasonal activities like kayaking and skiing, and beautiful lake and mountain views.
2. Hume Lake Campgrounds (Near Kings Canyon)
- Location: Just outside the national parks, near Hume Lake.
- Why It's Ideal: For those who prefer a camping experience with easy access to both parks, Hume Lake offers a peaceful setting with opportunities for fishing, kayaking, and hiking. It's also well-positioned for accessing Kings Canyon's scenic drives.
- Amenities: Campgrounds with tent and RV sites, access to Hume Lake, nearby hiking trails, and basic facilities.
Lodging Options Outside the Parks
1. Three Rivers, California
- Location: Just outside Sequoia National Park's Ash Mountain Entrance.
- Why It's Ideal: Three Rivers offers a variety of lodging options, from budget motels to charming bed-and-breakfasts. It's a short drive to the park's entrance, making it convenient for day trips into Sequoia and a more budget-friendly option.
- Amenities: Various accommodations, restaurants, grocery stores, and access to the Kaweah River.
2. Wuksachi Village and Lodge (Just Outside the Parks)
- Location: Near the entrance to Sequoia National Park.
- Why It's Ideal: This option allows you to stay close to the park entrance while providing more amenities and services than the in-park lodges. It's a good choice if you want to explore both parks but prefer a more traditional lodging experience.
- Amenities: Comfortable rooms, on-site dining, easy access to park entrances, and proximity to local attractions.
Tips for Choosing Lodging:
- Book Early: Lodging within the parks fills up quickly, often months in advance, especially during peak seasons. Early booking is essential to secure your desired accommodations.
- Consider Proximity: Staying inside or near the parks reduces travel time, allowing you to spend more time exploring and less time driving.
- Balance Comfort and Access: Choose accommodations that offer a balance of comfort and convenience, depending on how much time you plan to spend in the parks versus relaxing.
By choosing the right lodging options based on your itinerary, you'll be well-positioned to enjoy the full experience of Sequoia and Kings Canyon National Parks.
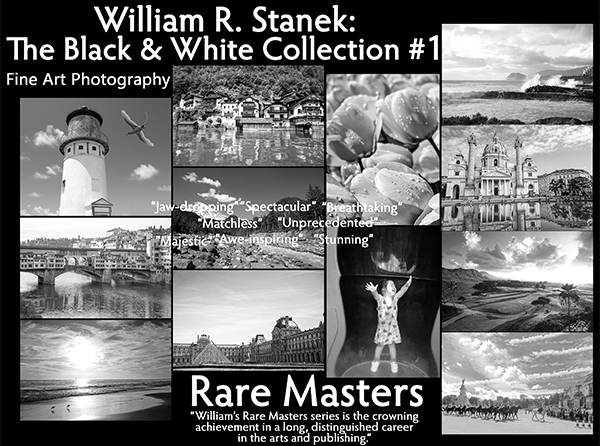
Step into a world of timeless beauty with our premium, oversized hardcover book - crafted for discerning collectors and anyone who values the power of art. Perfect for your coffee table, it's more than just a book; it's a conversation starter, a window into over 30 years of William's visionary photography.
Your Support Matters
Purchasing artwork from William Stanek's collection not only brings beauty into your life but also helps us continue to share. Thank you for supporting our creative journey!

Support The Lights of Paris by Robert Stanek, William Stanek's pen name! Through vivid historical detail and deeply moving character stories, Robert takes readers on an unforgettable journey through one of history’s most transformative times.

